How to add a map key and annotate your locator map
This is part of a five-part series on how to create locator maps:
1 – Introduction: How to create a locator map
2 – Move around the map & set the map size
3 – Add markers
4 – Design the map
5 – Annotate & give your map a key
Four steps lead to your final locator map: 1: Add markers, 2: Design map, 3: Annotate and 4: Publish. In this article, we will focus on step 3 and 4. In these steps, you can add a title, description, byline and source to your map, add a map key, change the layout, and finally publish your map.
In step 3: Annotate & Layout, you see two tabs – one for Annotate, one for Layout:
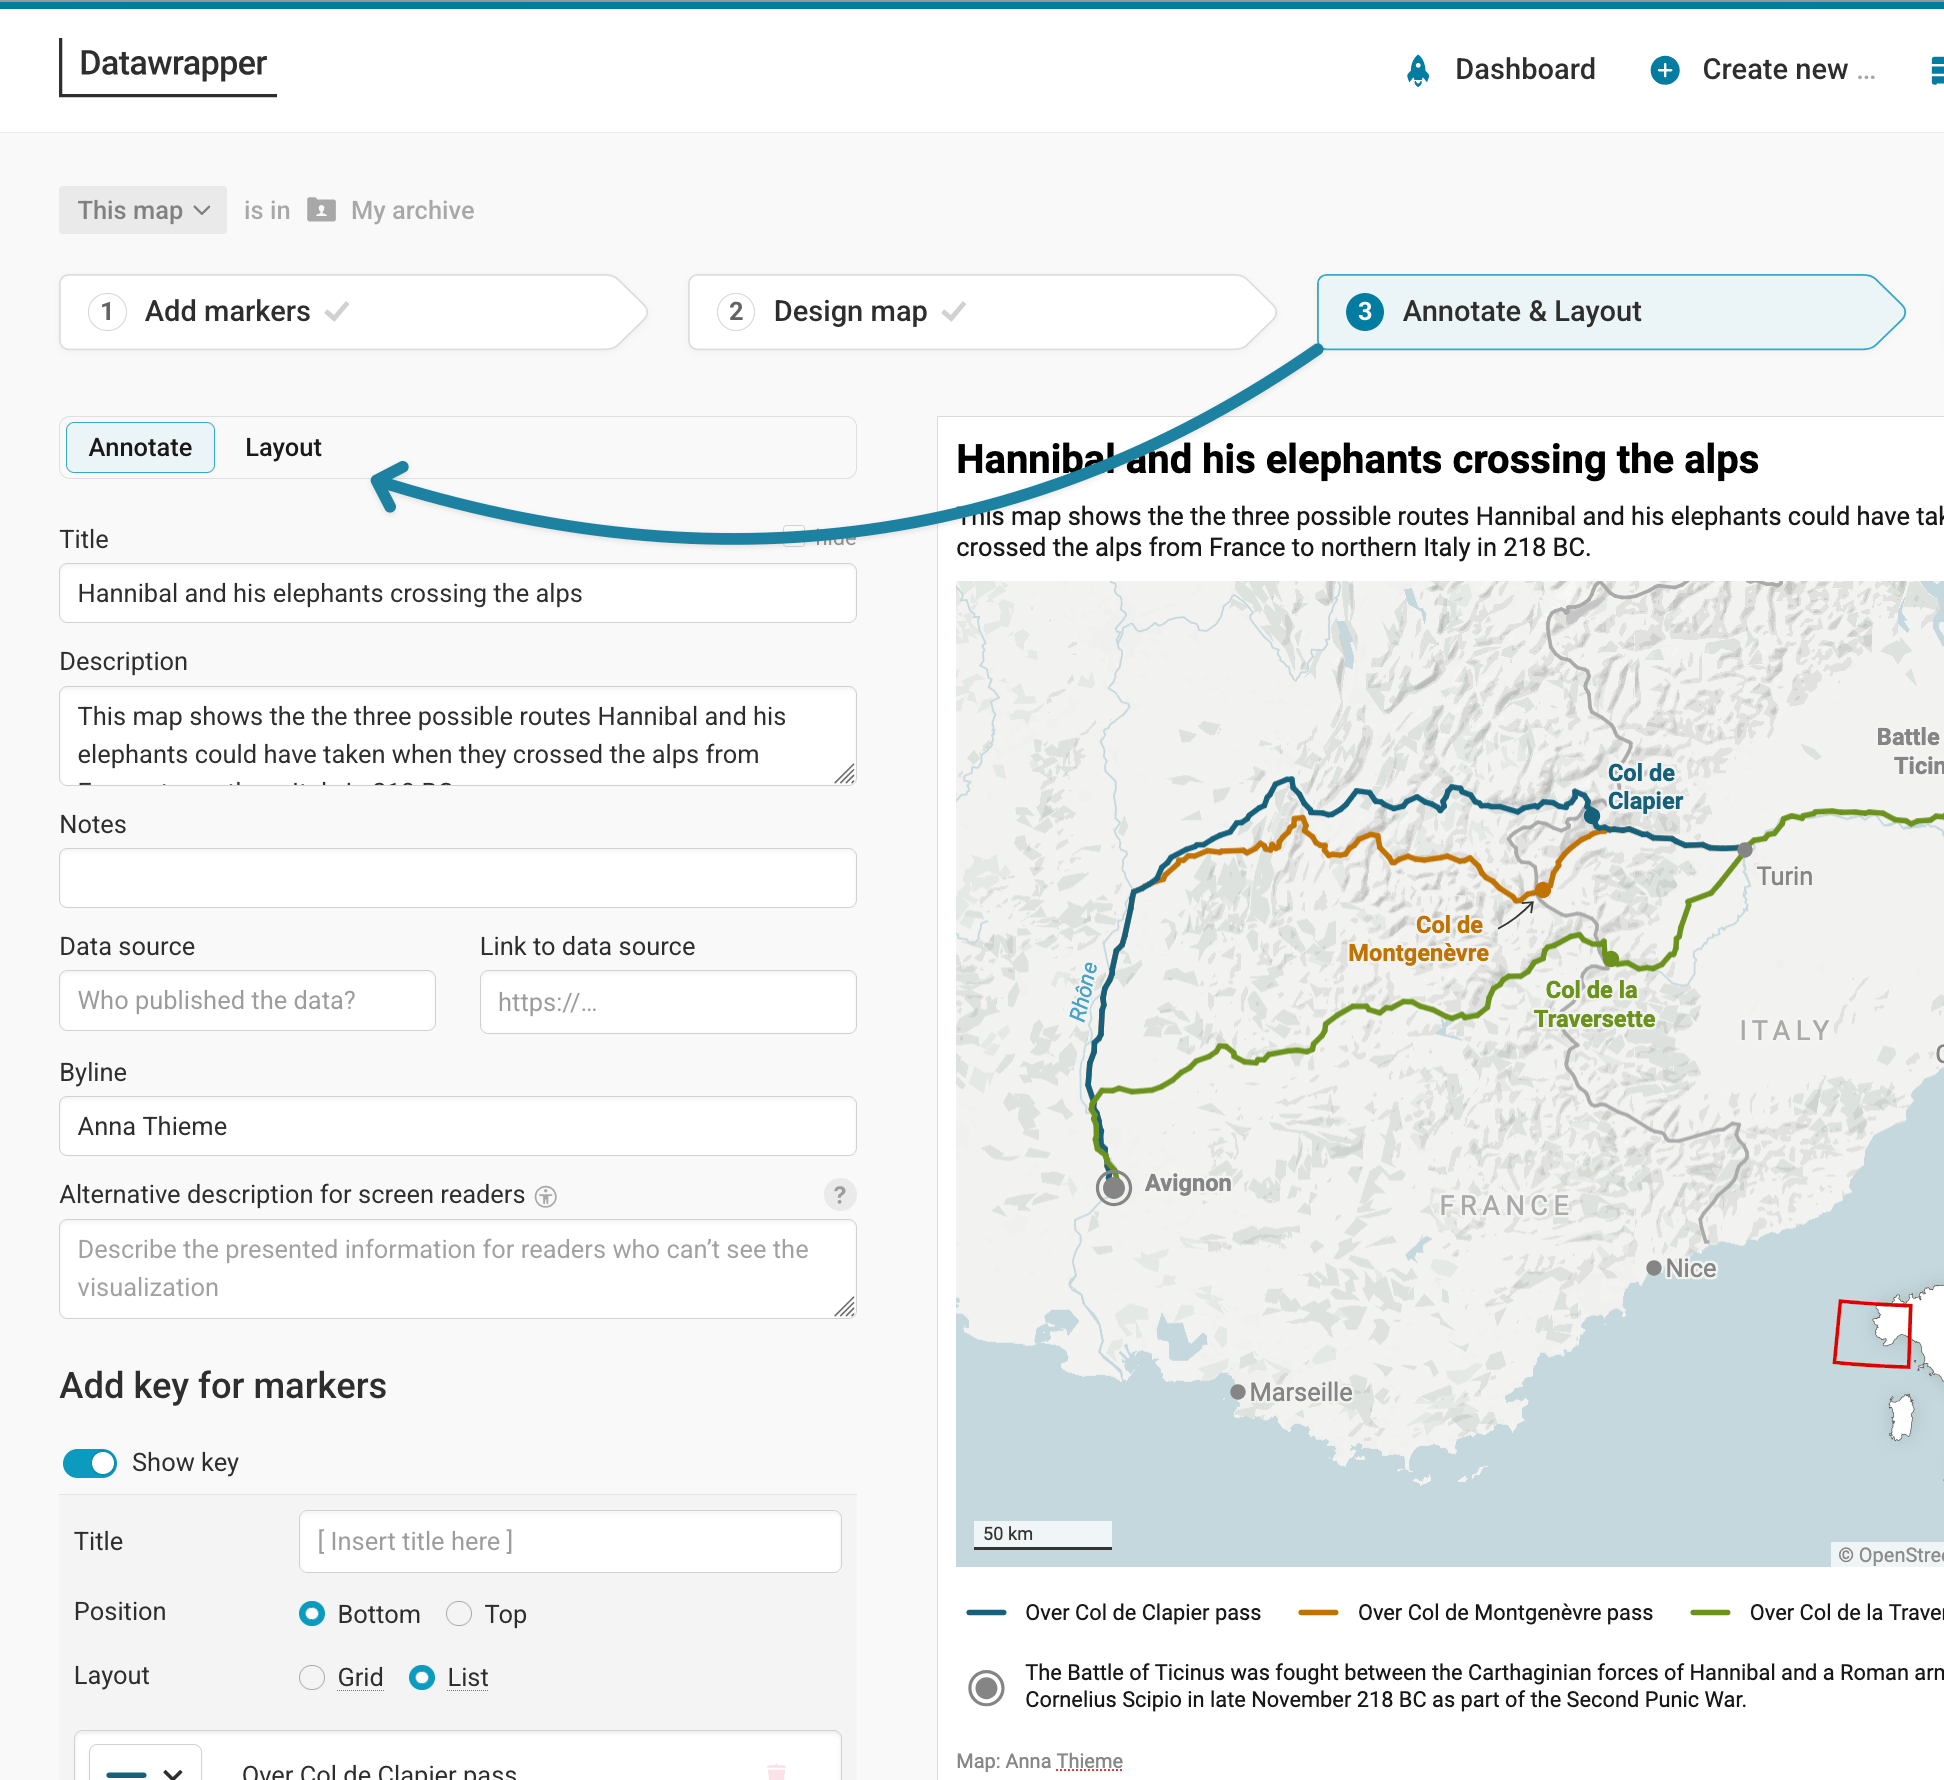
Let's look at the options in the Annotate tab first:
Give your map a title and description
In the Annotate tab, you're first asked to give your visualization a title, description, notes, source, byline, and an alternative description for screen readers. You can find a detailed explanation of all these Annotate options here.
Add a key to explain your markers
To add information about certain markers, you can add tooltips to them – but your audience might not know that they're there. A map key below or above your map is a great alternative. It's always visible and easy to spot.
To add a map key, click on the little toggle left of the words "Show key". A few options will appear:
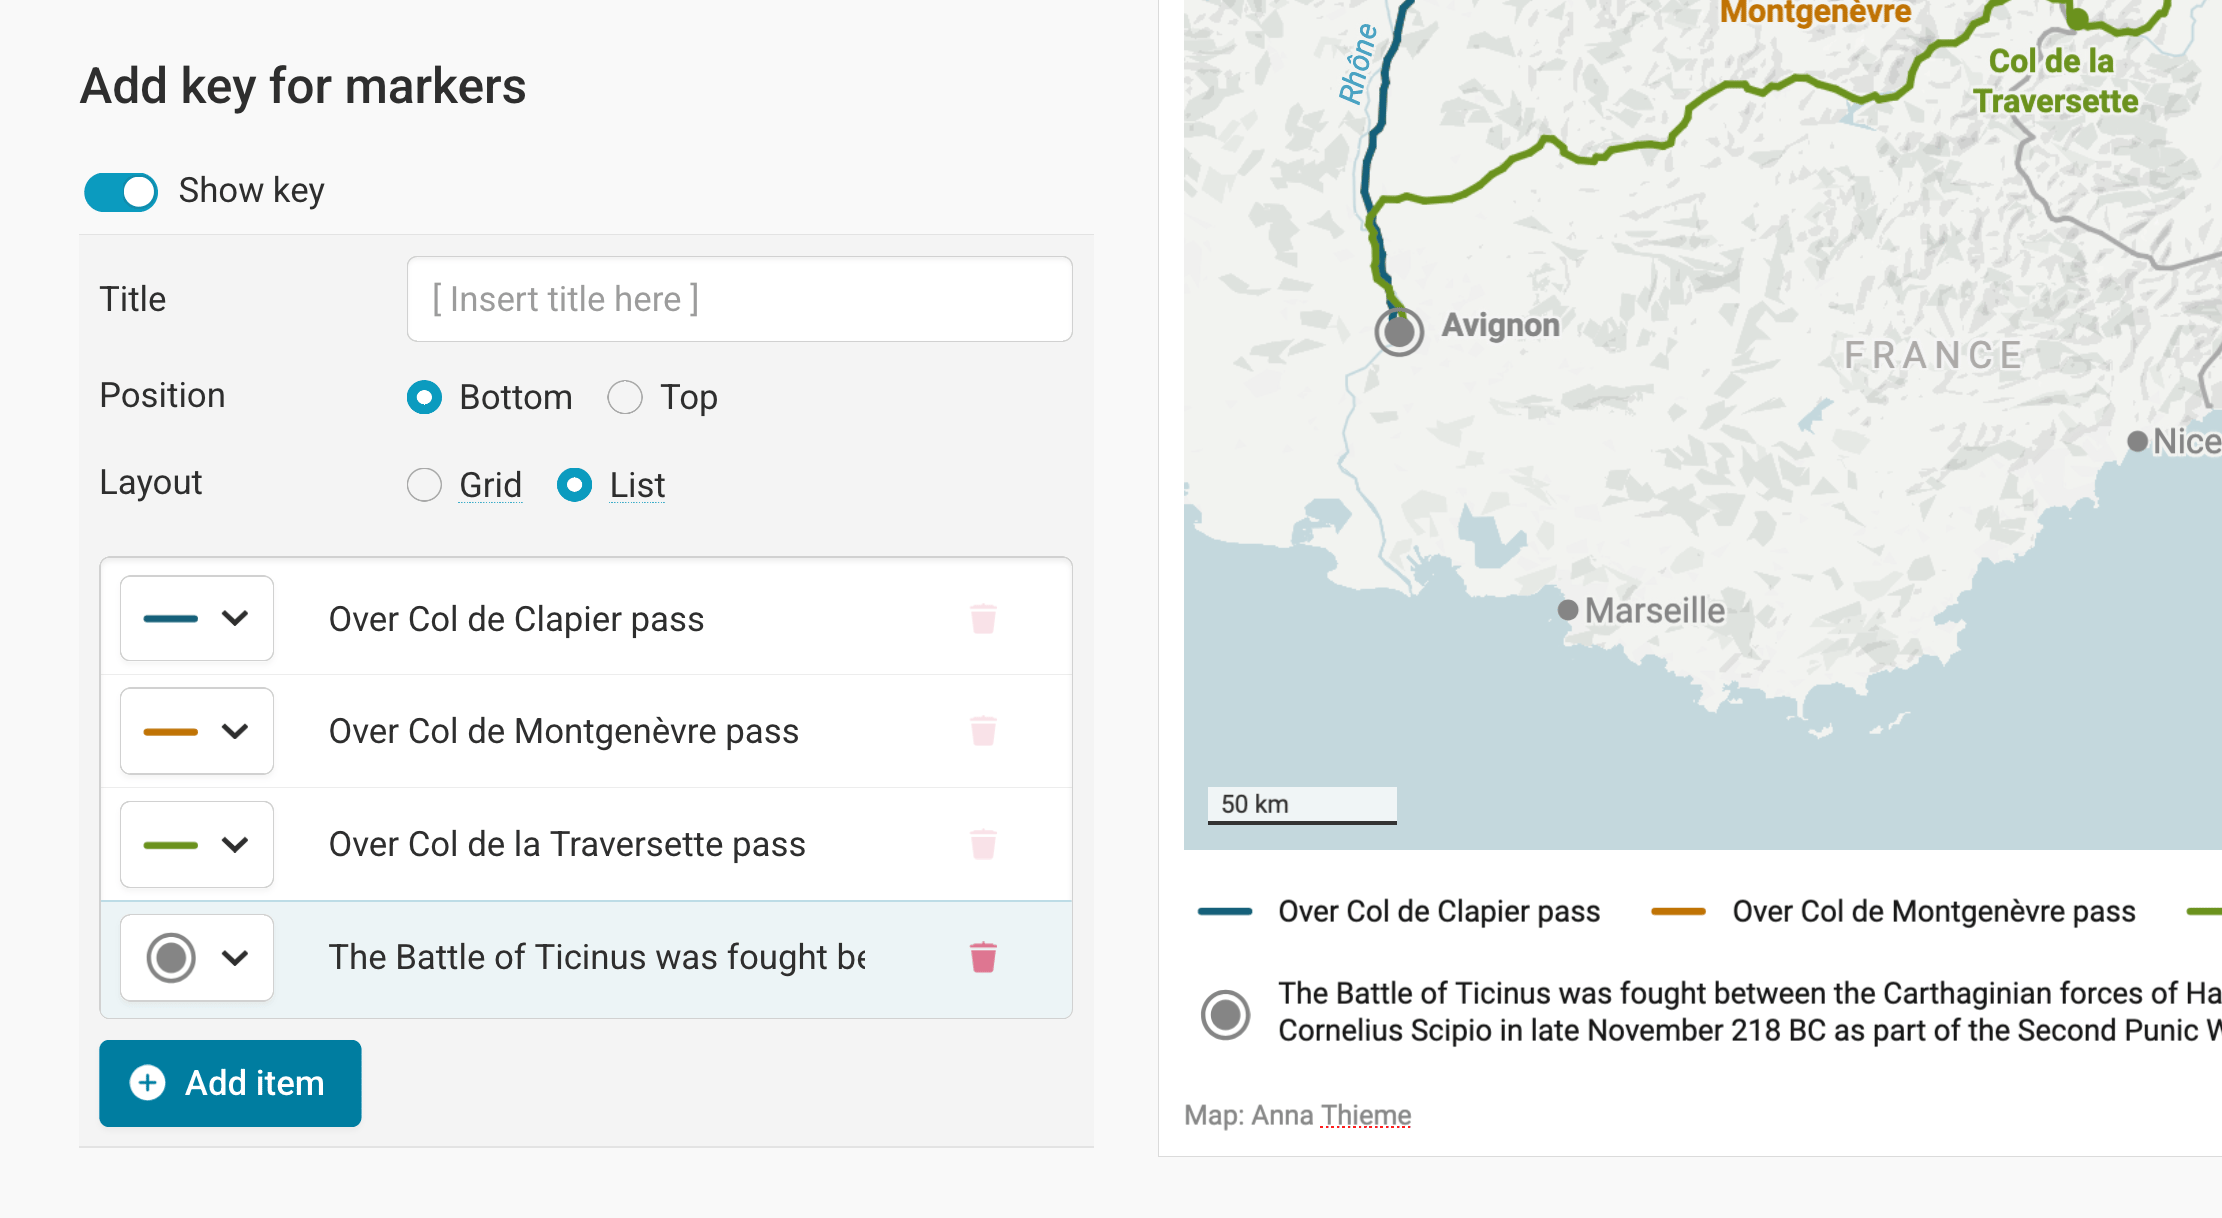
Let's go through them:
- Title: You can give your marker key a title, but you don't need to. Often, a key is self-explanatory.
- Position: You can decide if your marker key should be above or below your map.
- Layout: Here you can choose if your key should be displayed as a grid or as a list. Play around to see what works better. A grid layout usually works best for longer explanations, while the list layout works better for shorter explanations.
Make sure to check the appearance of your map key in the mobile version, too – it will look differently!
To add a marker to the map key, click on Add item. If you do, you can choose one of the marker symbols you use in your map. If you created multiple markers with the same symbol, you will only see this symbol once in the list.
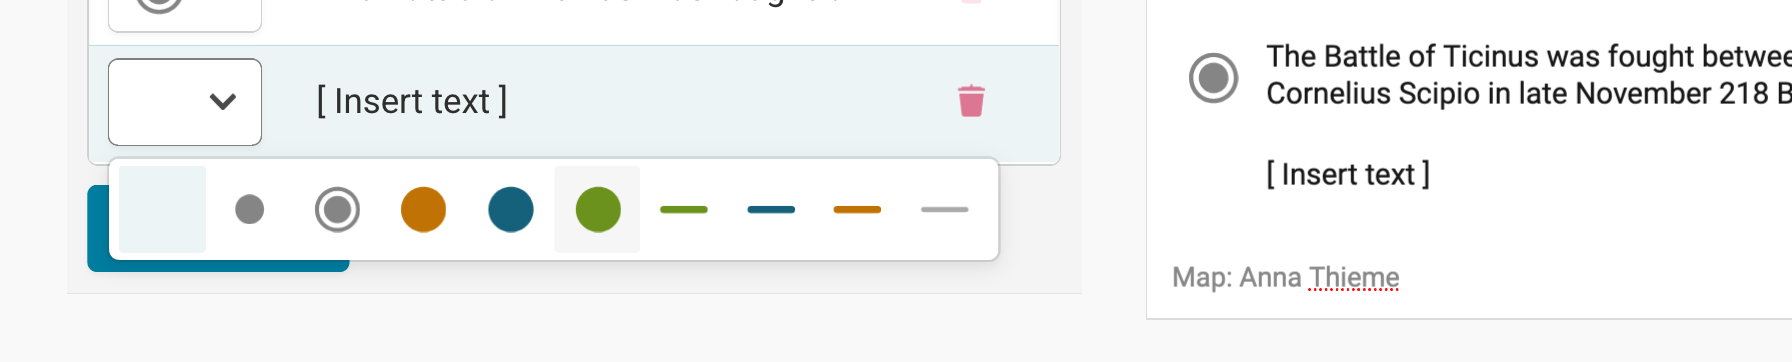
Add as many items with the "+Add Item" button as you have symbols that you want to explain. (You don't need to explain all markers if it doesn't make sense for your map.)
You can then add text to your label by clicking on [Insert text].
To change the order of markers in your key, hover over a key item to see a little gray handle on the right side. Click on it and drag it to the position you want to see your item at:
To delete a key item, click on the little red trash icon next to the text.
Layout
In the Layout tab, you can select an output locale, change the design theme and footer options, and enable social sharing. Find a detailed explanation of all the Layout options here.
Publish
Congratulations you just finished editing your locator map! In the last step, you can publish your work and decide how to share it with the world. The best way to use a Datawrapper chart is by embedding it directly on your website. To do that, click the big blue button that says "Publish Chart". Then, copy & paste the embed code snippet into your website or CMS.
You can also download your chart as a PNG (available for free and paying users) or as a PDF or SVG (available ony for paying users). Click here for more information on the different pricing plans of Datawrapper.