How to change, correct, and delete data in step 2
In step 2: Check & Describe, Datawrapper lets you correct and adjust your data. This article explains how.
Changing the content of data cells & headers
We recommend that you upload clean data (find out here how your data should look to work best in Datawrapper) so that you don't need to change much once it's uploaded to Datawrapper. But once you see the chart in step 3, you might want to change the data slightly in step 2. Note that you can always go back and forth between the steps without losing anything.
To change cells (including the column headers), simply double-click in a cell and start typing. Press Enter or click in another cell or outside the table to finish the edit. If your column header has very long words, think of ways to shorten them.
You can see that changes are indicated with a small orange triangle at the top left of the cell. You can revert all these changes by clicking "Revert changes" below the tables. Your table will then show the data you uploaded originally.

Changing the column type
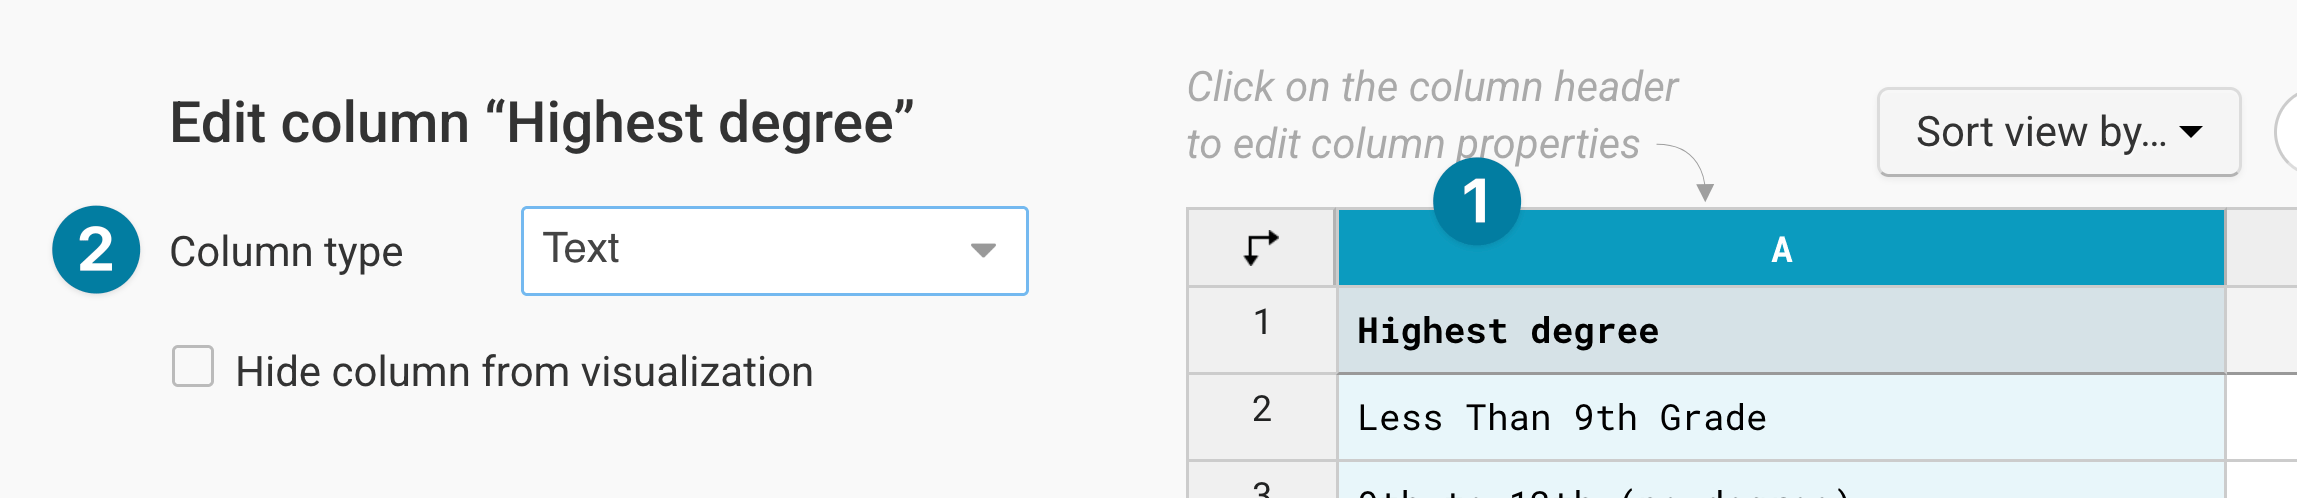
Datawrapper will automatically try to detect the type of data in your column when importing the data. Text is always aligned left, dates are aligned to the center, numbers are aligned right. Learn here what data column types exist and how to detect them.
Sometimes, Datawrapper is wrong. If the data type is not correct, this might affect the chart (e.g. you get a tooltip saying "insufficient data"). In this case, you can assign the intended type – Text, Number, or Date – by clicking on a column header ❶ and then selecting another Column type ❷.
Hiding/Deleting a column from your visualization
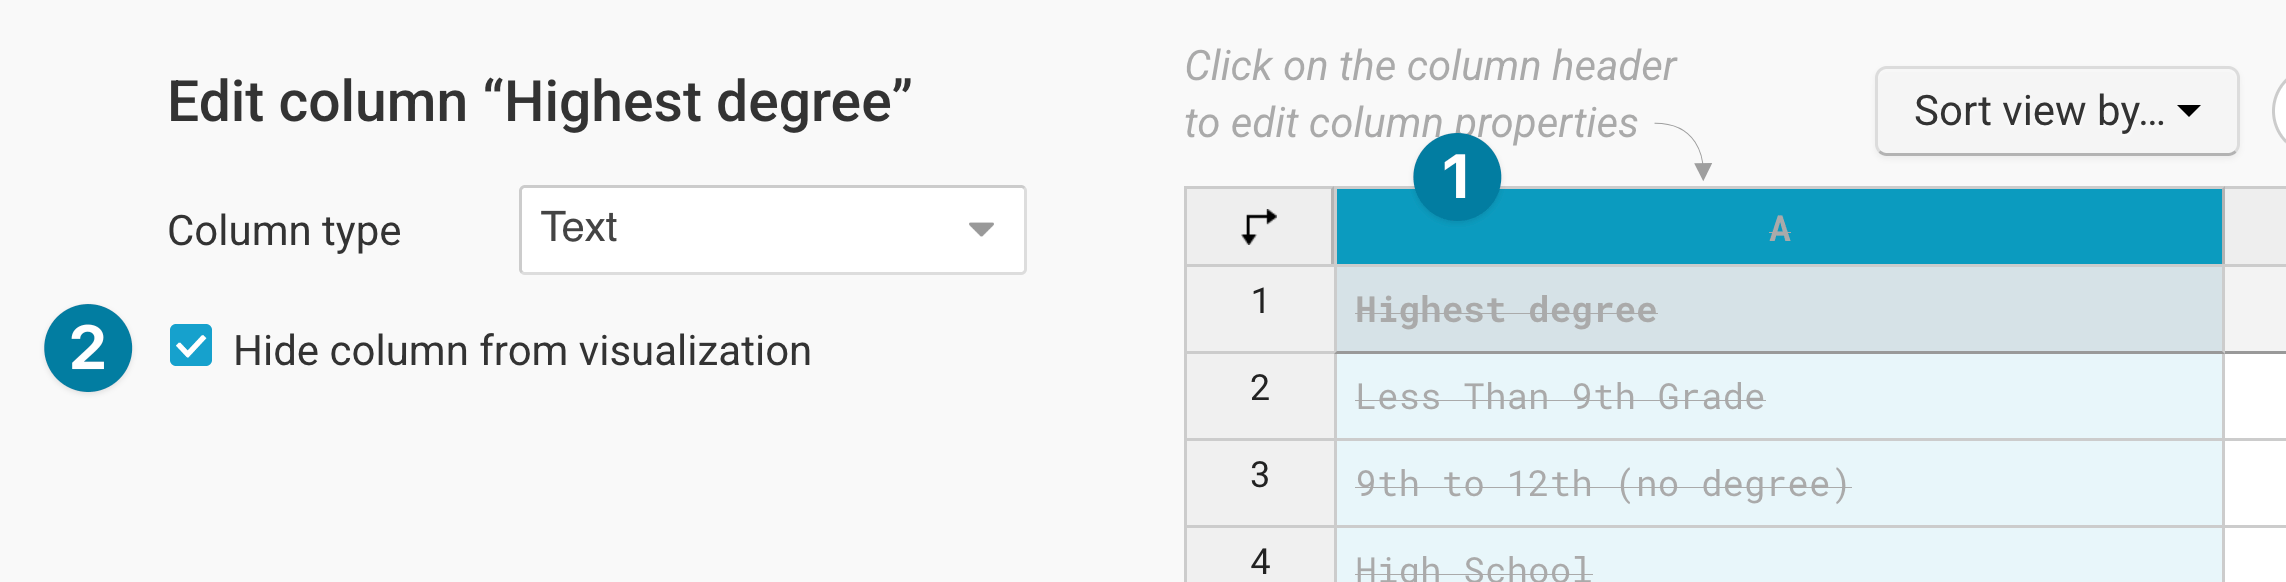
If you don't want to see a certain column visualized in your chart, you can click on a column header ❶ and then select Hide column from visualization ❷. If you want to show this column again, you need to click again on the column header and deselect the checkbox.
Note that it is always better to upload just the numbers that are really needed. The option above is only a quick fix.
Rounding
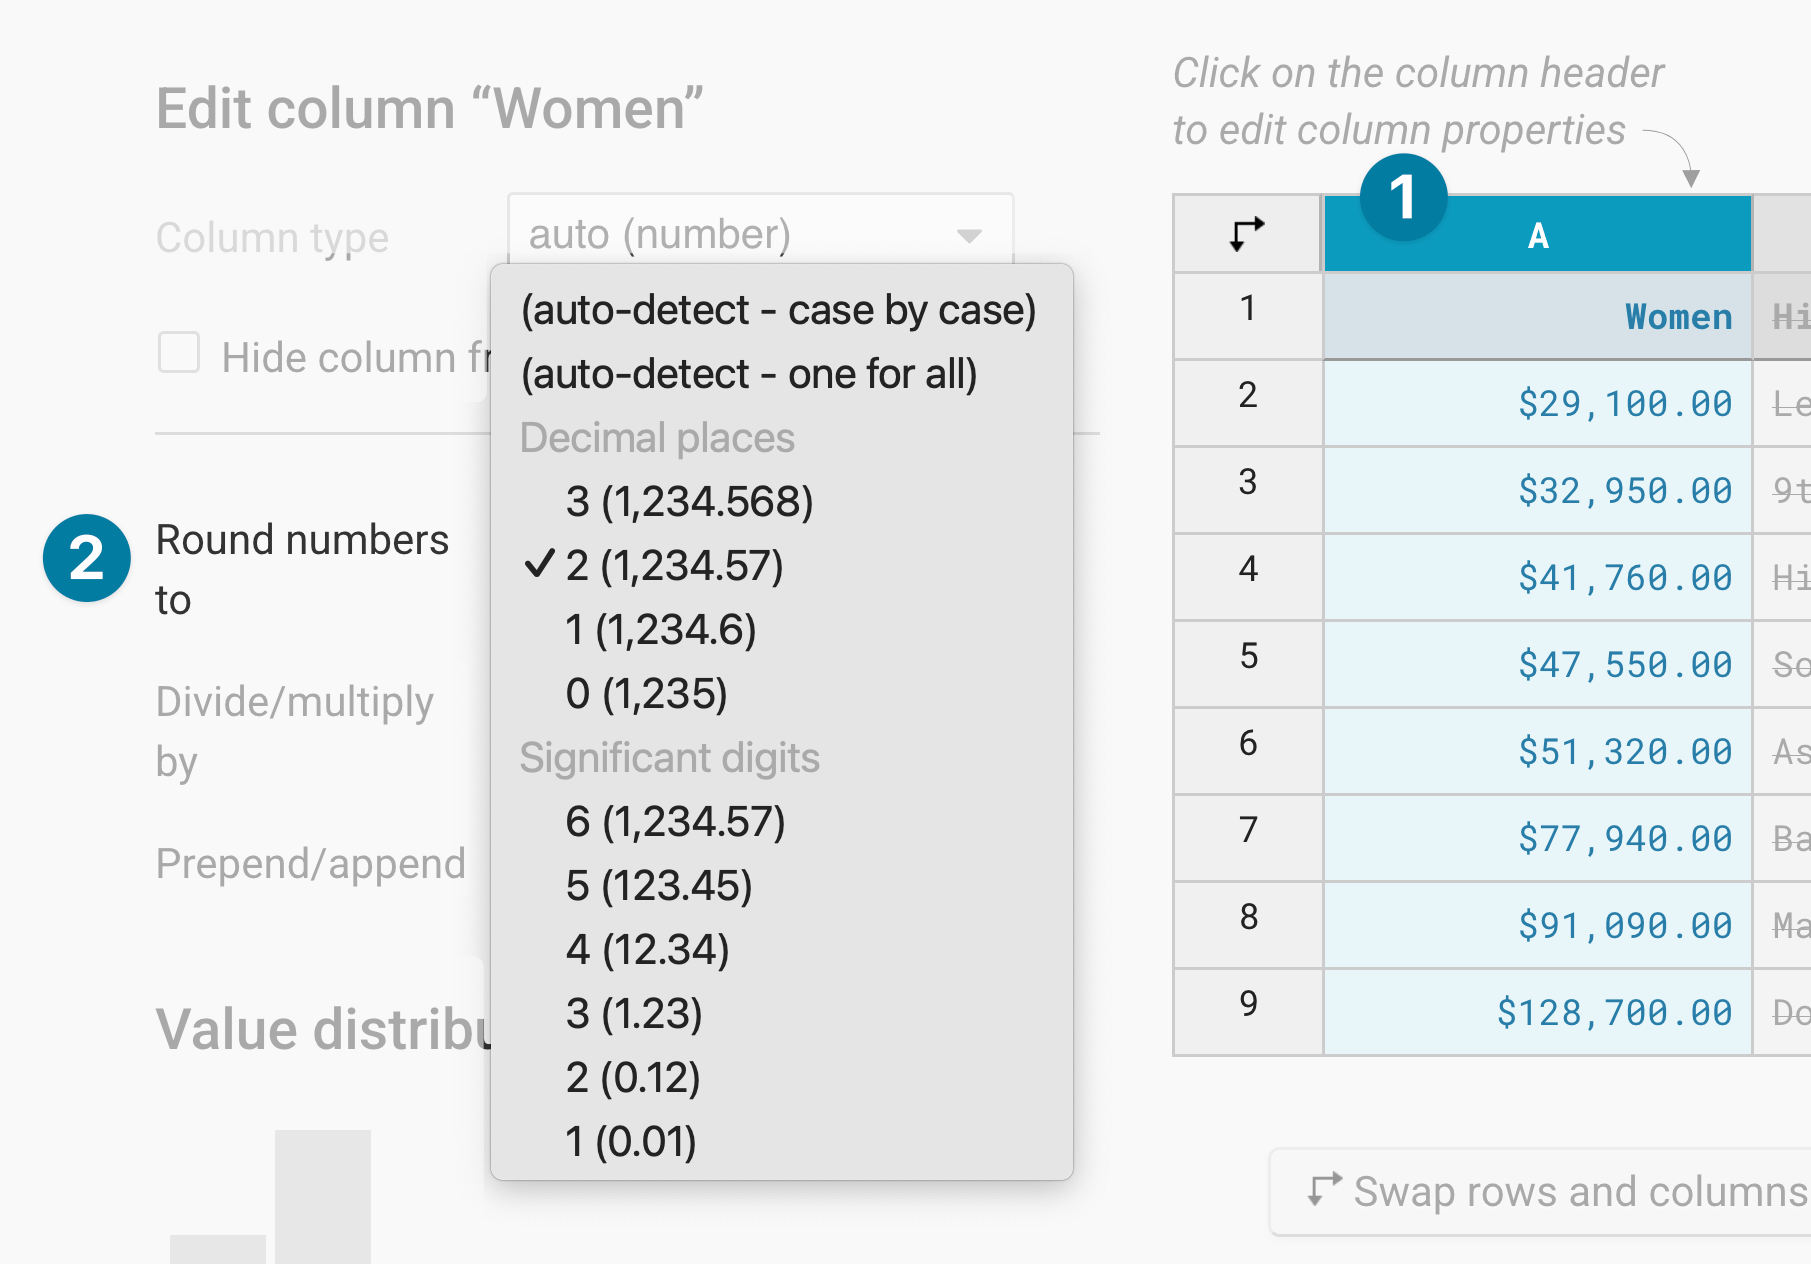
Let's assume you have the values 50.05, 20.020, 0.8 and 30.00. You can round these numbers in step 2 by clicking on a column header and then selecting any of the options below ❷:
- (auto-detect – case by case): This option goes through all values and decides case by case how many decimal places make sense for your numbers. In our case, the numbers would get rounded to 50.05, 20.02, 0.8 and 30.
- (auto-detect – one for all): This option is the default. It decides for all numbers how many decimal places make sense. In our case, the values would be 50.05, 20.02, 0.8 and 30.00
- Decimal places: Here you can decide on decimal places yourself. E.g. if we use 1, our values would be 50.1, 20.0, 0.8 and 30.0
- Significant digits: With this option, you can choose how many digits in your number you want to display (with the exception of long numbers like 82,293). For example, if we chose 2 digits, our values are 50, 20, 0.80 and 30. If we chose 5 digits, our values are 50.050, 20.020, 0.80000 and 30.000. Note how this is different from decimal places. You can learn more about the concept of significant digits in this video from Khan Academy.
Dividing/multiplying by
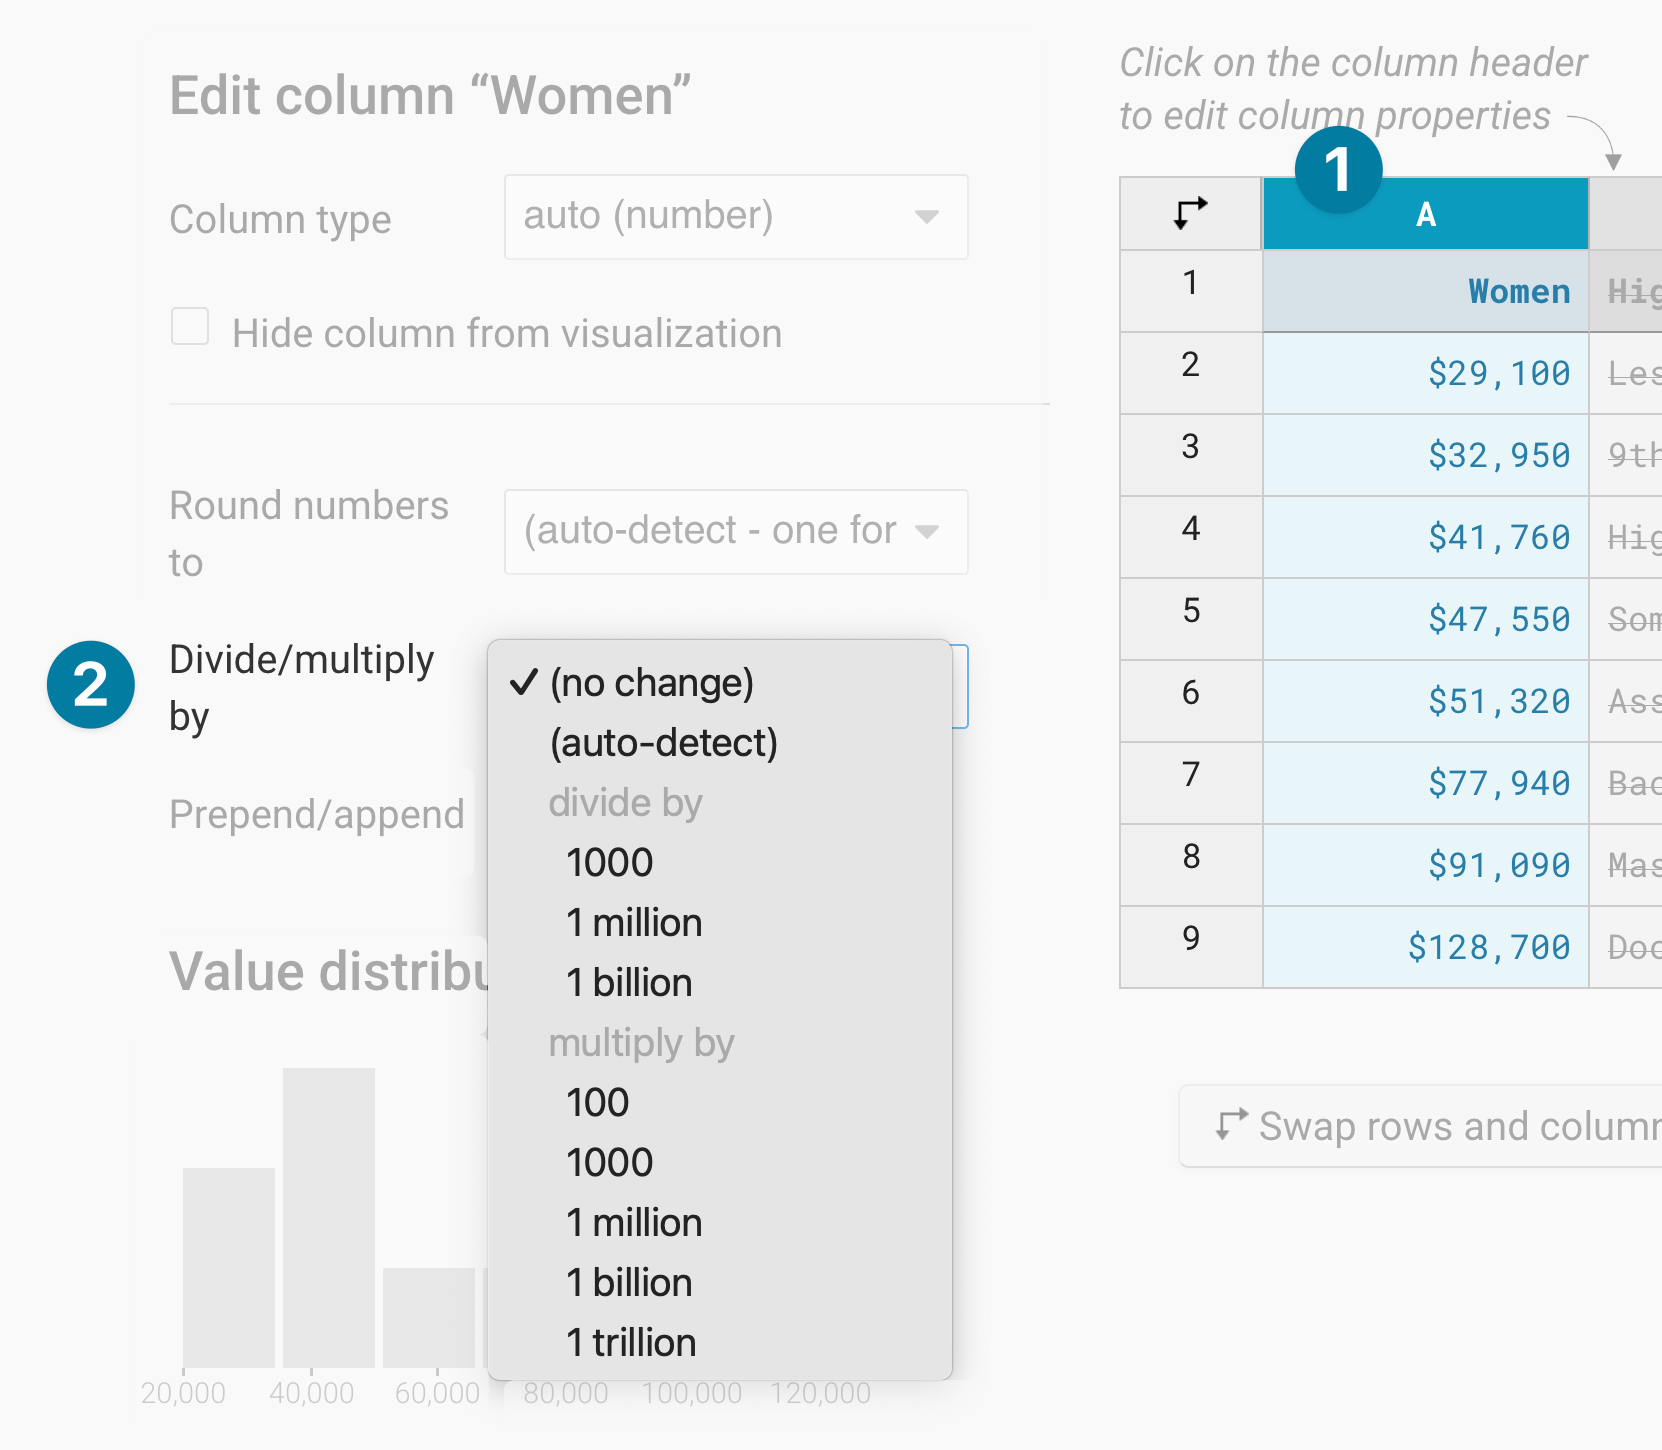
Multiplying is useful if your original data comes "in 1,000s" or "in millions." In almost all cases, we recommend multiplying by e.g. 1000 or 1 million and use a number format that makes those high numbers readable, like 123.4k.
Prepending/Appending units
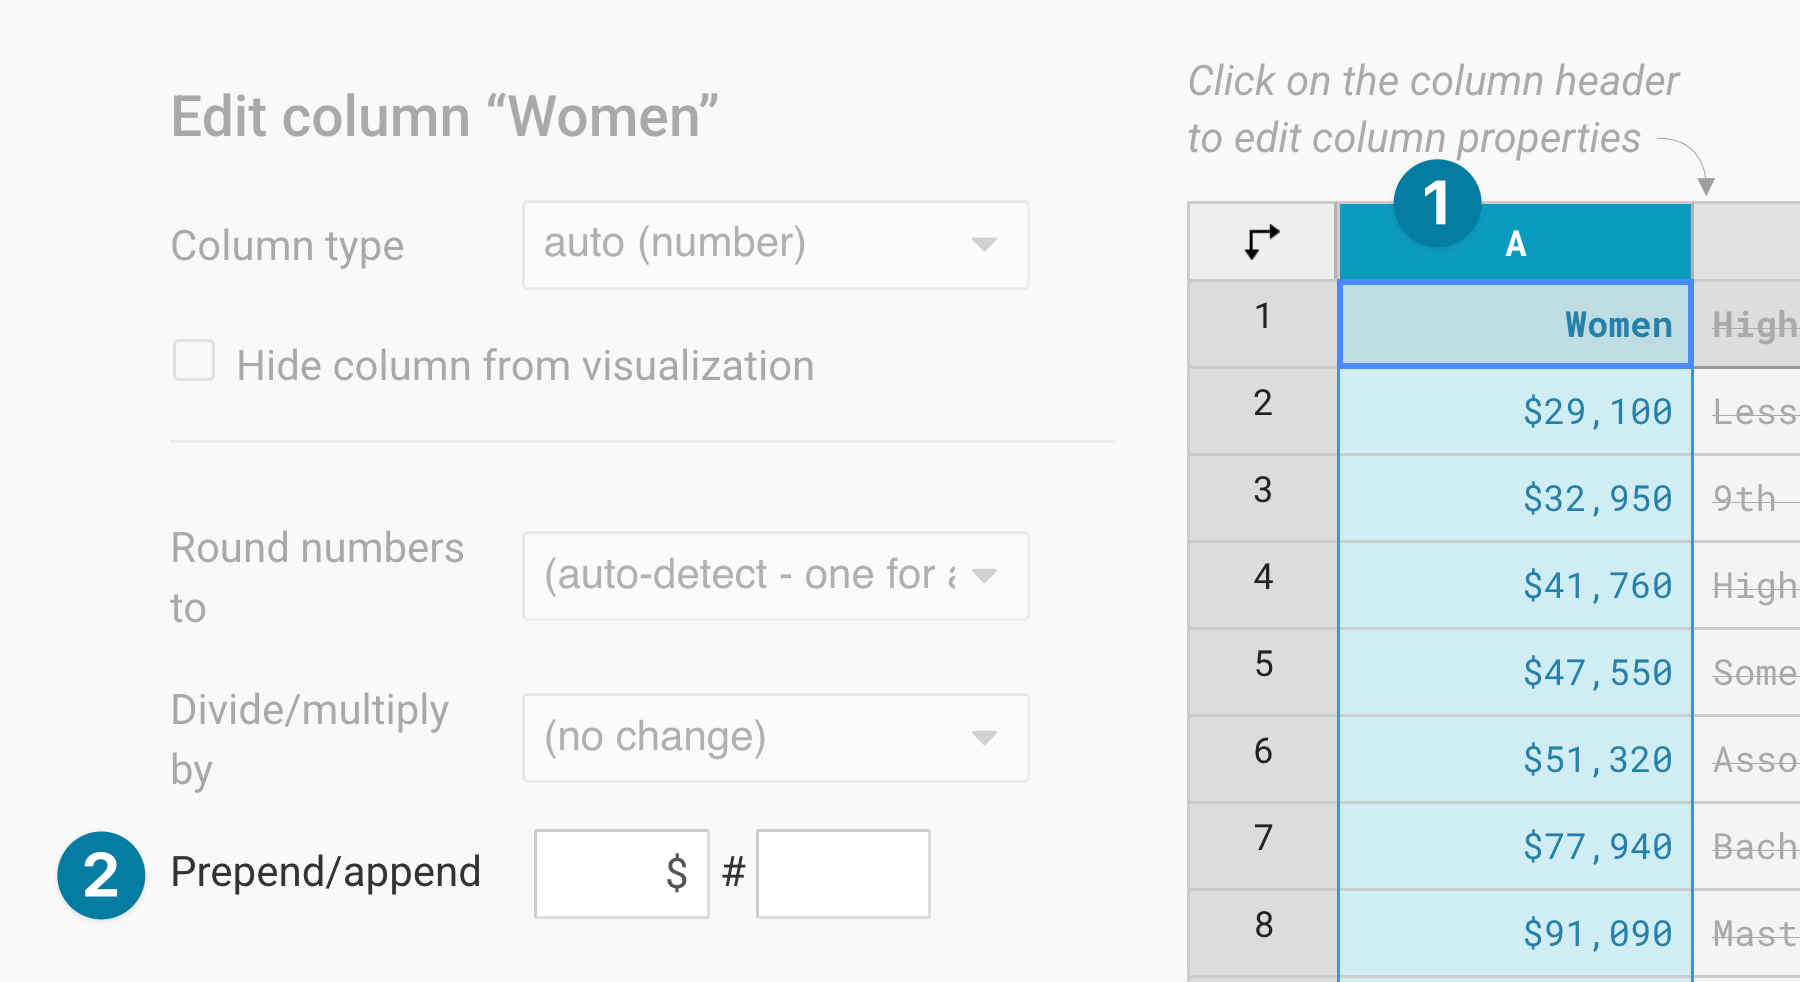
This feature enables you to add e.g. a dollar, euro, or % sign (or any other if needed) to describe what the numbers are. You can also add words or phrases, like " candies". The benefit of prepending/appending something in step 2 instead of in step 1 is that your numbers will still get interpreted as numbers, not text.
Deleting cells
You can delete data cells by pressing Backspace once you're in the edit mode in a cell. You can also delete multiple cells. Select the cells by dragging from one cell to others. If there is a mistake in the data, you can correct it without having to go back to spreadsheet software and upload the data again.
Deleting rows
You can also delete (and change) data in Step 1: Upload Data. You cannot revert this – if you change your mind, you need to upload the data again. However, that's often the best way to delete (or add) data rows: