How to set up SSO
Single Sign-On is available for users on the Enterprise plan. Find more information about our pricing options here.
Single-Sign-On, also known as SSO, is an authentication scheme that lets people sign in to a website using your organization's existing login system. Datawrapper currently supports SAML2 and OpenID Connect-based SSO, allowing everyone in your organization to access Datawrapper with your company credentials and ensuring seamless and secure authentication for you and your team.
Contents
- Where to find your SSO settings
- Set up SSO with OpenID Connect
- Set up SSO with SAML2
- Sign in with SSO
Where to find your SSO settings
You can set up SSO in your workspace settings. You can get there directly at app.datawrapper.de/settings/sso, or by clicking your workspace name in the top right of the app, then Settings & Account > Single Sign-On:

Click on Enable Single Sign-On, then choose your SSO protocol: OpenID Connect or SAML2. Here's how to set them up:
Set up SSO with OpenID Connect
To use SSO with OpenID Connect (OIDC), you'll first have to set up a new app integration in your Identity Provider (IdP) of choice and then navigate to the app's OIDC settings. Here are guides on how to do so for some common IdPs:
Once you are ready to enter the OIDC settings information for your integration, follow these steps:
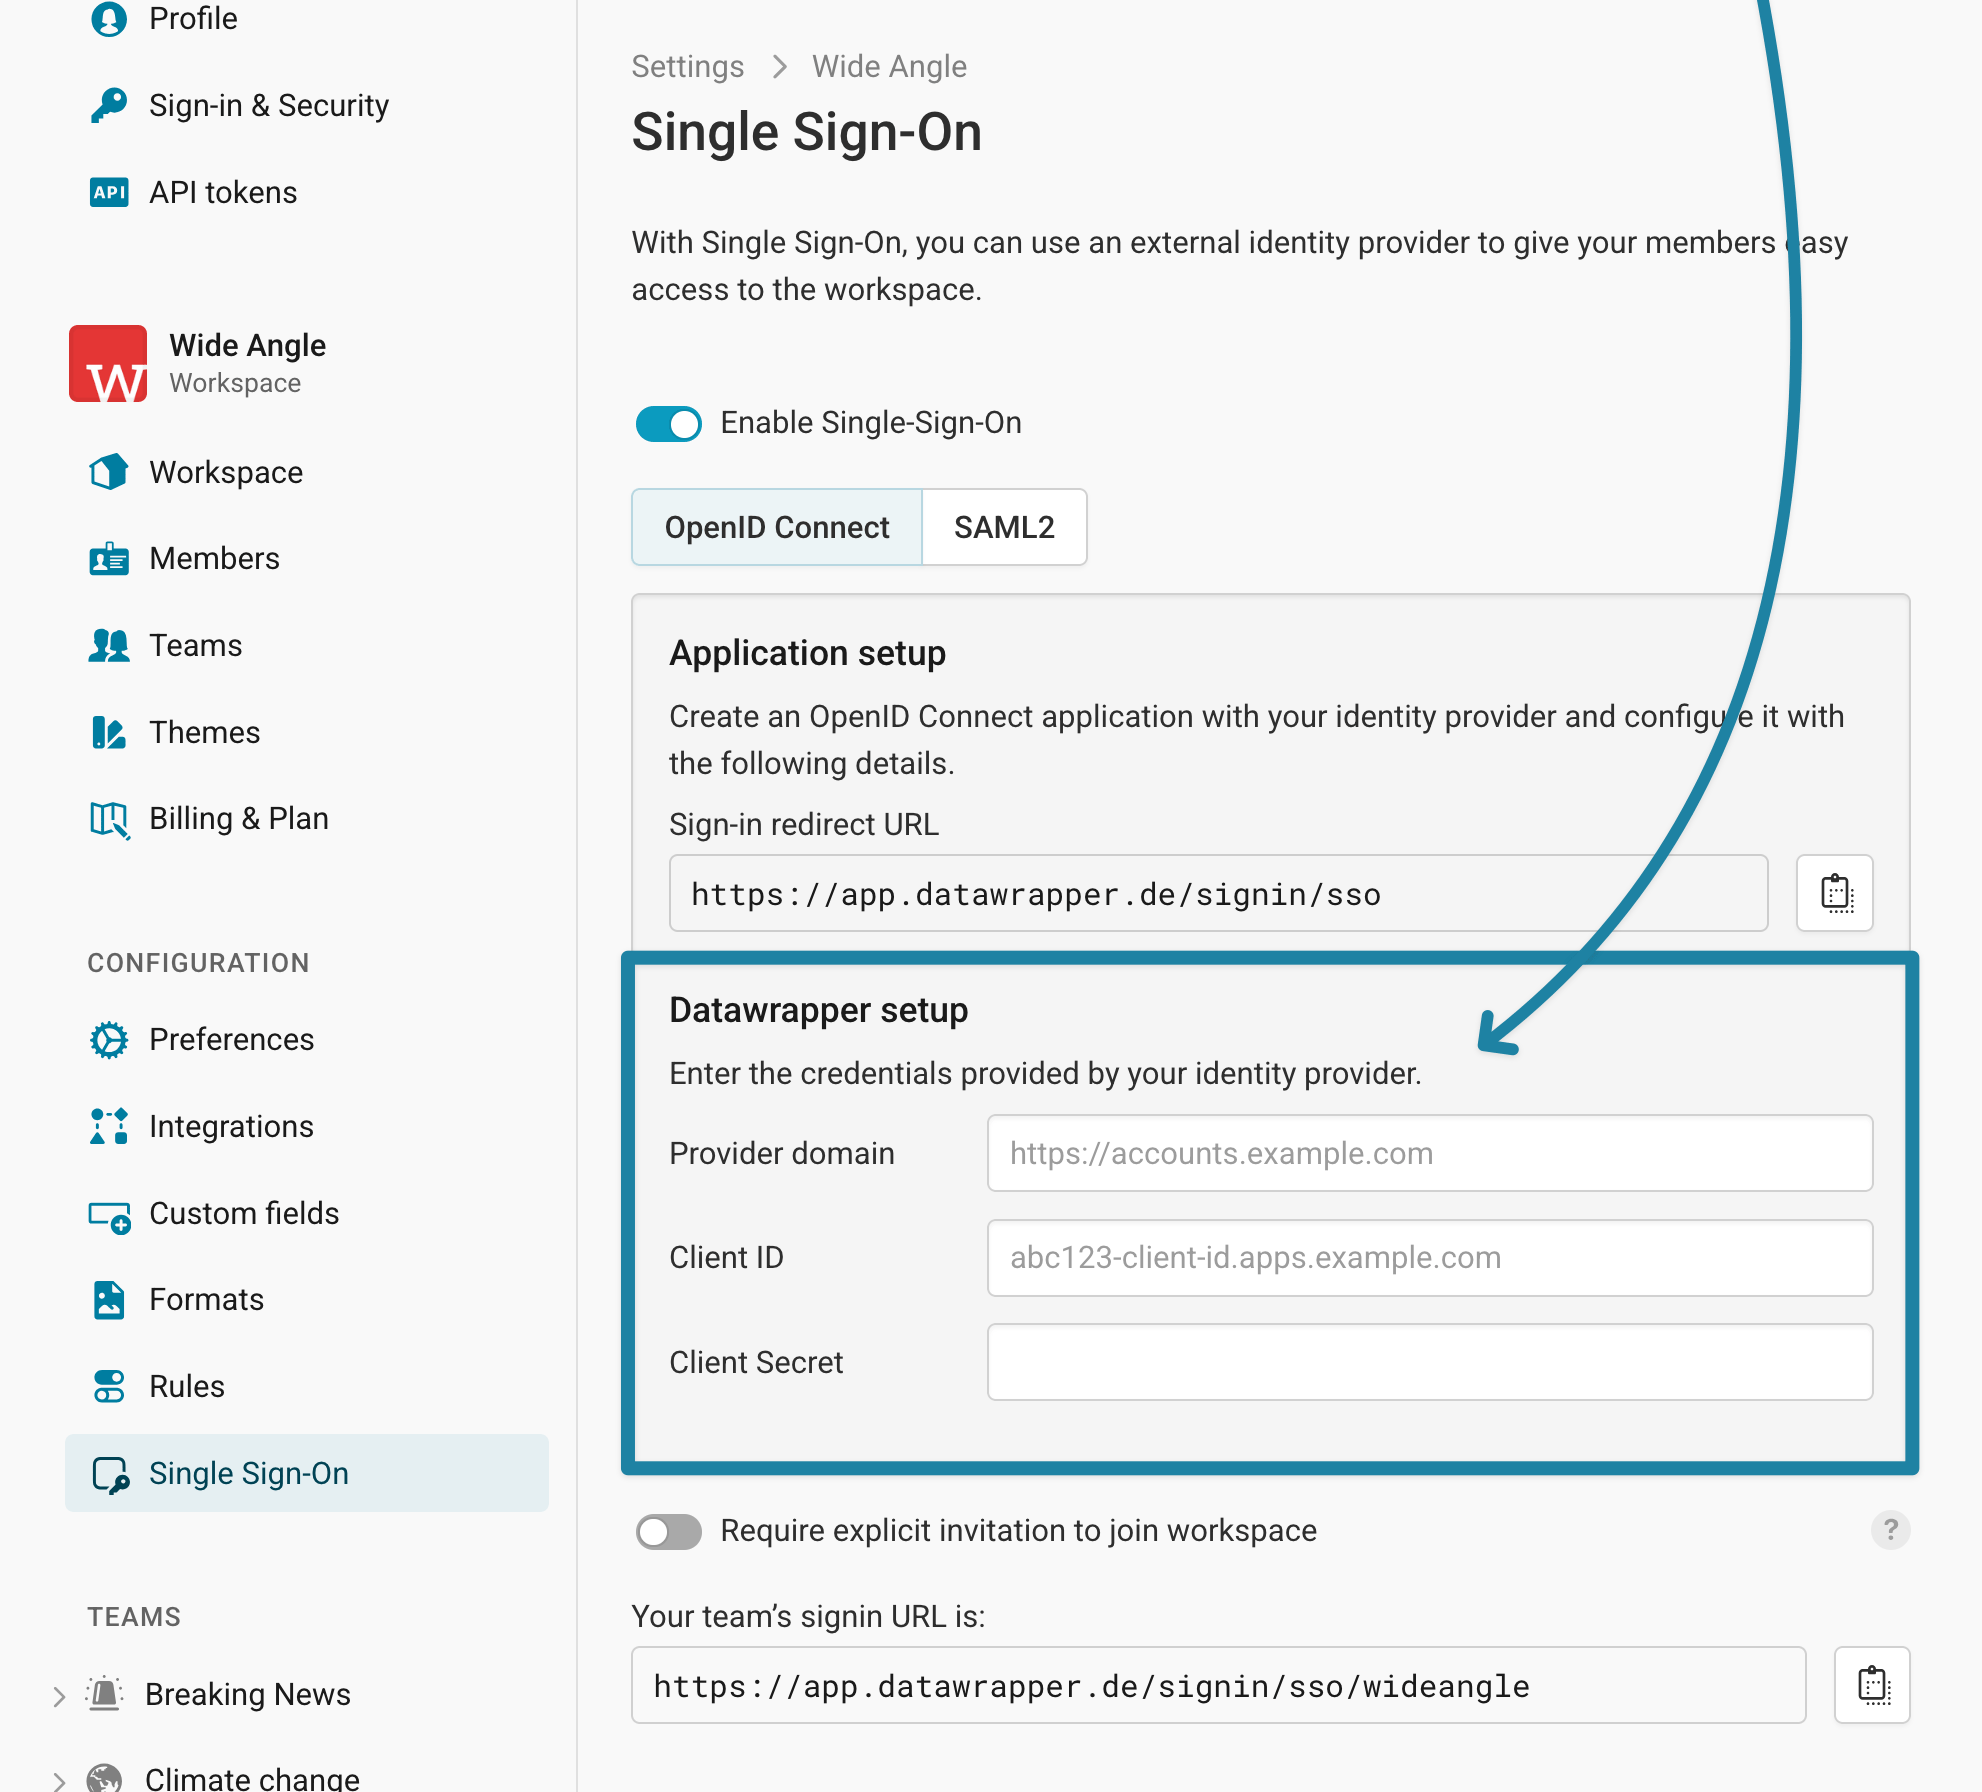
In your identity provider's OIDC settings, specify the following values for the Sign-in redirect URL (aka. Redirect URI):
https://app.datawrapper.de/signin/ssoIn your identity provider's settings, retrieve the provider domain (might also be called domain name), the client ID (might also be called application ID), and the client secret.
Copy these values into the Provider domain, Client ID, and Client Secret in Datawrapper:
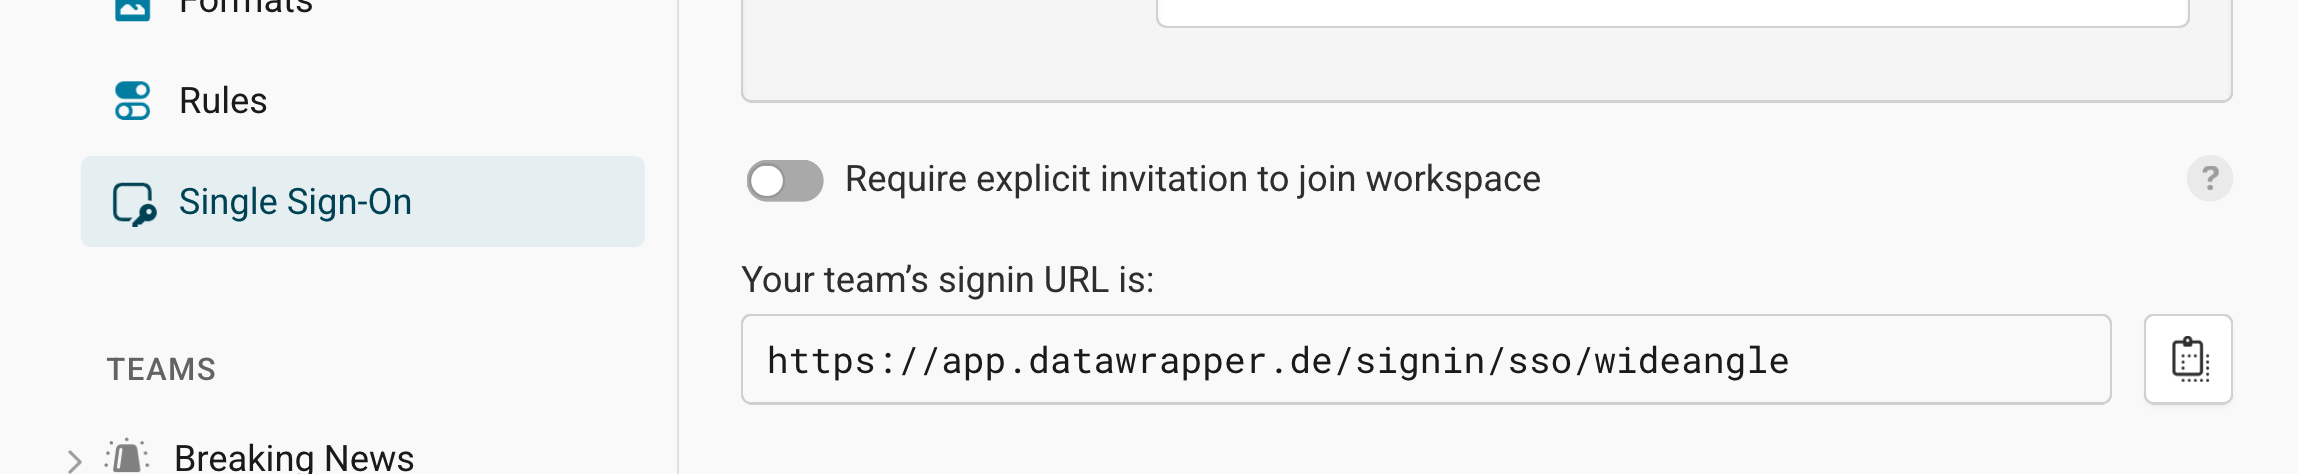
Once everything is filled in, the team signin URL at the bottom of the page is ready to be used for signing into Datawrapper with your identity provider:
Set up SSO with SAML2
To use SSO with Security Assertion Markup Language (SAML), you'll first have to set up a new app integration in your Identity Provider (IdP) of choice and then navigate to the app's SAML settings. Here are guides on how to do so for some common IdPs:
Once you are ready to enter the SAML settings information for your integration, follow these steps:
In your IdP SAML settings, specify the following Entity ID (also called Audience URI):
https://app.datawrapper.de/spFor the Callback URL (also called SSO URL, Assertion Consumer Service, or ACS URL), copy and paste the following:
https://app.datawrapper.de/signin/ssoThe expected application username and Name ID format is the user's email address.
In your settings, retrieve the IdP SSO URL and Identity Provider Issuer values, as well as the Certificate file.
- In Okta, the certificate can be found by clicking on the View Setup Instructions button in the application's Sign On tab.
- In Entra ID, navigate to the SAML Certificates section and select Download for Certificate (Raw).
Copy the first two values into the SSO URL and Entity ID fields in Datawrapper (the Identify Provider Issuer goes into the Entity ID field). Also access the certificate as raw text by opening the file in a text editor and copy the text into the Certificate field:

You can also decide to not request a specific authentication context. If you do, the SAML assertion gets performed without requesting a specific authentication context.
Once everything is filled in, the team signin URL at the bottom of the page is ready to be used for signing into Datawrapper with your identity provider:
Sign in with SSO

Once SSO is configured for your Datawrapper workspace, you and your team can sign in a few places:
on app.datawrapper.de (see screenshot above),
via your designated Datawrapper sign-in URL, or
through your identity provider’s login portal.
Frequently Asked Questions
Can I require workspace members to sign in with SSO?
Yes. To do so, go to your workspace settings. Scroll down to Workspace > Sign in method, then click on Change and select SSO:

When you change the sign in method for all workspace members this way, they will be prompted in their account settings to activate SSO.
You can review the sign in methods used by your workspace members on the Members page.
Can I limit who in my organization can sign in with SSO?
Yes. By default, anyone with the SSO sign-in URL and a valid Identity Provider account will be able to join your workspace. But you can require that future workspace members need an invitation before being able to sign in to Datawrapper. To do so, go to your Single Sign-On settings, then turn on Require explicit invitation to join workspace.

Once enabled, users need to be manually invited to the workspace even when signing in through SSO.