How to create an arrow plot
- Free
- Pro
- Business
- Enterprise
Arrow plots show how data points (e.g. life expectancy, election results) of different categories (e.g. countries, parties) have changed between two dates (e.g. decades, years, days). Arrow plots show exactly two dates. The special thing about arrow plots is the connecting arrow between these two points, pointing from the earlier date to the later date.
If you want to show multiple time points for your data points, consider a line chart. If your emphasis is on the gap between the dots rather than the time that has passed between them, then a range plot is the better choice. If you want to show multiple dots, consider a dot plot.
This guide will show you how to create and customize the following arrow plot about the share of electric cars in new car sales:

Preparing your data
Formatting your data
If you want to try to create this chart type, here's what you'll need:
- One header row containing labels.
- The first column containing main categories. Each one will appear as a line.
- Two columns containing numeric values, one for each date. One of them will become the start of your arrows, the other one the end.
- An optional text column if you want to group your lines, like the continents in our data.
That's what the data looks like for the chart you can see above:
| Country | 2013 | 2023 | Continent |
| Norway | 5.8 | 93 | Europe |
| Iceland | 1.4 | 71 | Europe |
| Sweden | 0.53 | 60 | Europe |
| Germany | 0.23 | 24 | Europe |
| Spain | 0.12 | 12 | Europe |
| Italy | 0.08 | 9.2 | Europe |
| Belgium | 0.12 | 41 | Europe |
| Netherlands | 5.5 | 35 | Europe |
| France | 0.53 | 25 | Europe |
| United Kingdom | 0.16 | 24 | Europe |
| China | 0.095 | 38 | Asia |
| Japan | 0.54 | 3.6 | Asia |
| India | 0.016 | 2 | Asia |
| Canada | 0.22 | 13 | Americas |
| United States | 0.71 | 9.5 | Americas |
| Brazil | 0.0024 | 3 | Americas |
In this case, we have 16 different categories, i.e. countries. On each country's line, the values of 2013 and 2023 will be shown. If the value from 2013 is lower than the value from 2023, the arrow points to the right. If it's higher, the arrow points to the left.
Uploading your data
Once you have prepared your data, create a new chart in Datawrapper. You can do so by going to our homepage and clicking on Start creating. In step 1: Upload, you can copy & paste your dataset, upload it as a .csv or Excel file, or connect to a Google Sheet. It will look like this:
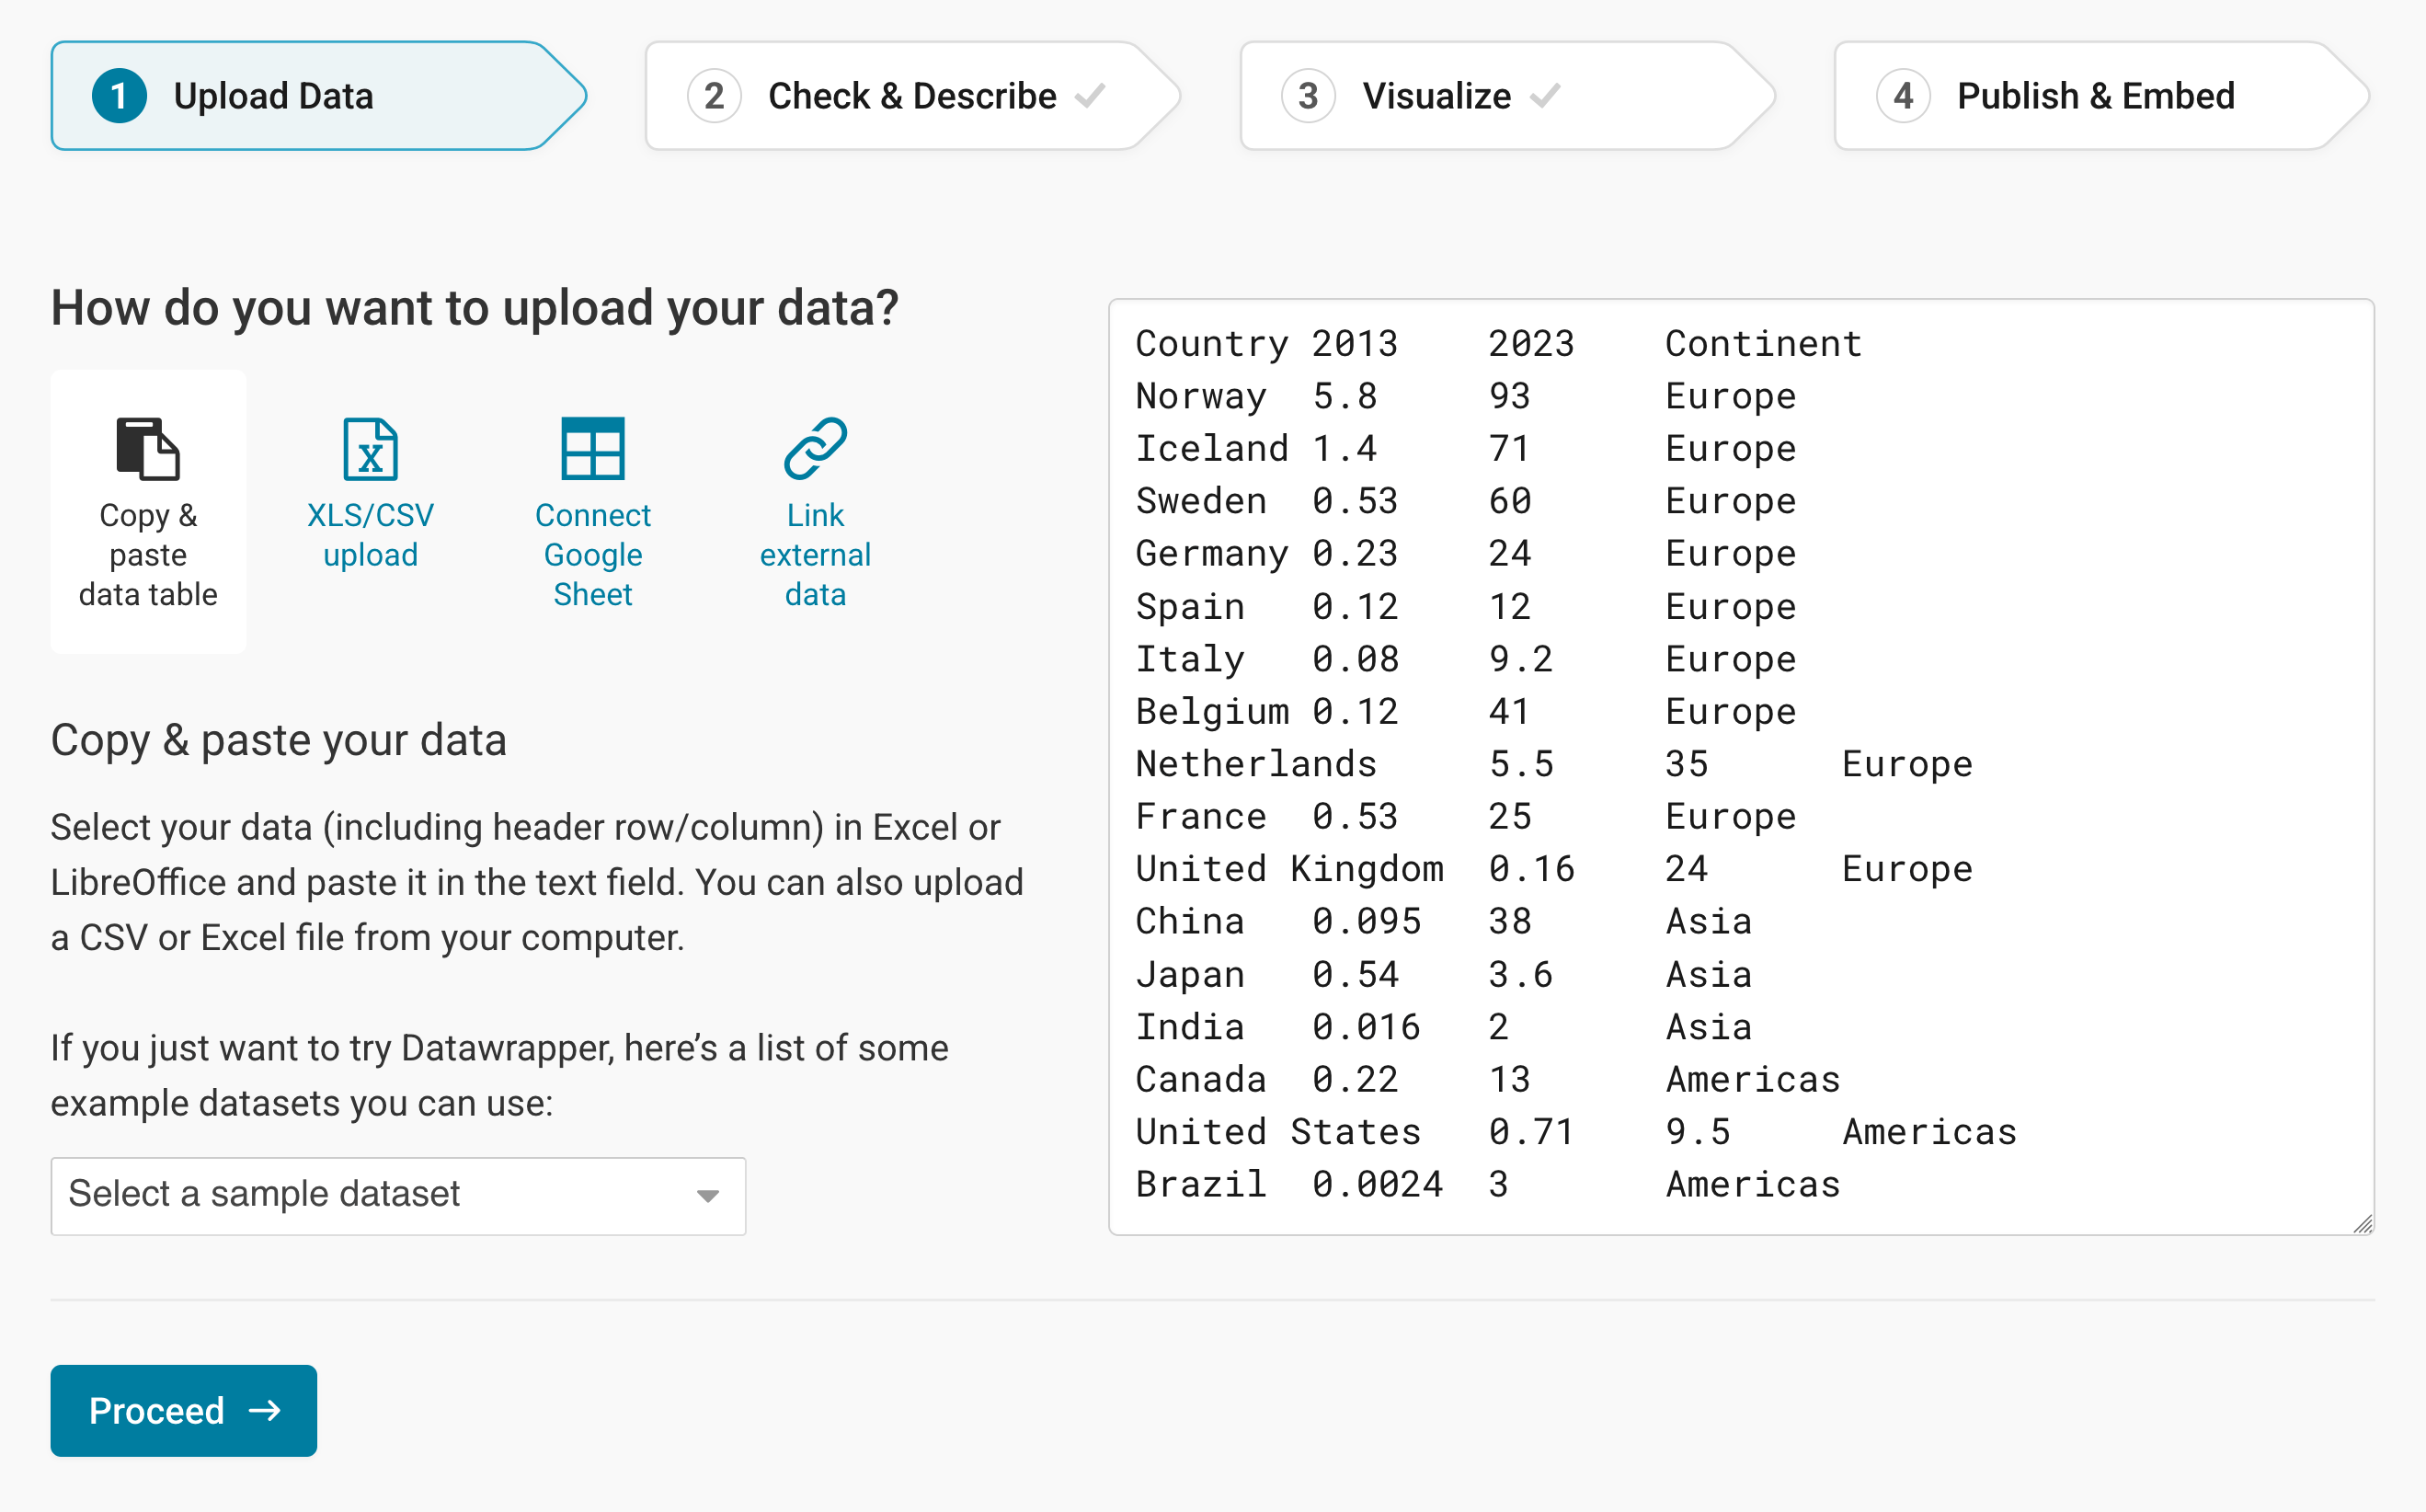
Click on Proceed to get to step 2: Check & Describe.
Checking data and units
In step 2: Check & Describe, your data will automatically be arranged in columns and rows. You can see that Datawrapper correctly recognized your numbers as numbers (and not as text or dates) because they are colored in blue and are right-aligned. To learn more about Datawrapper's automatic recognition of data formats, visit this article.
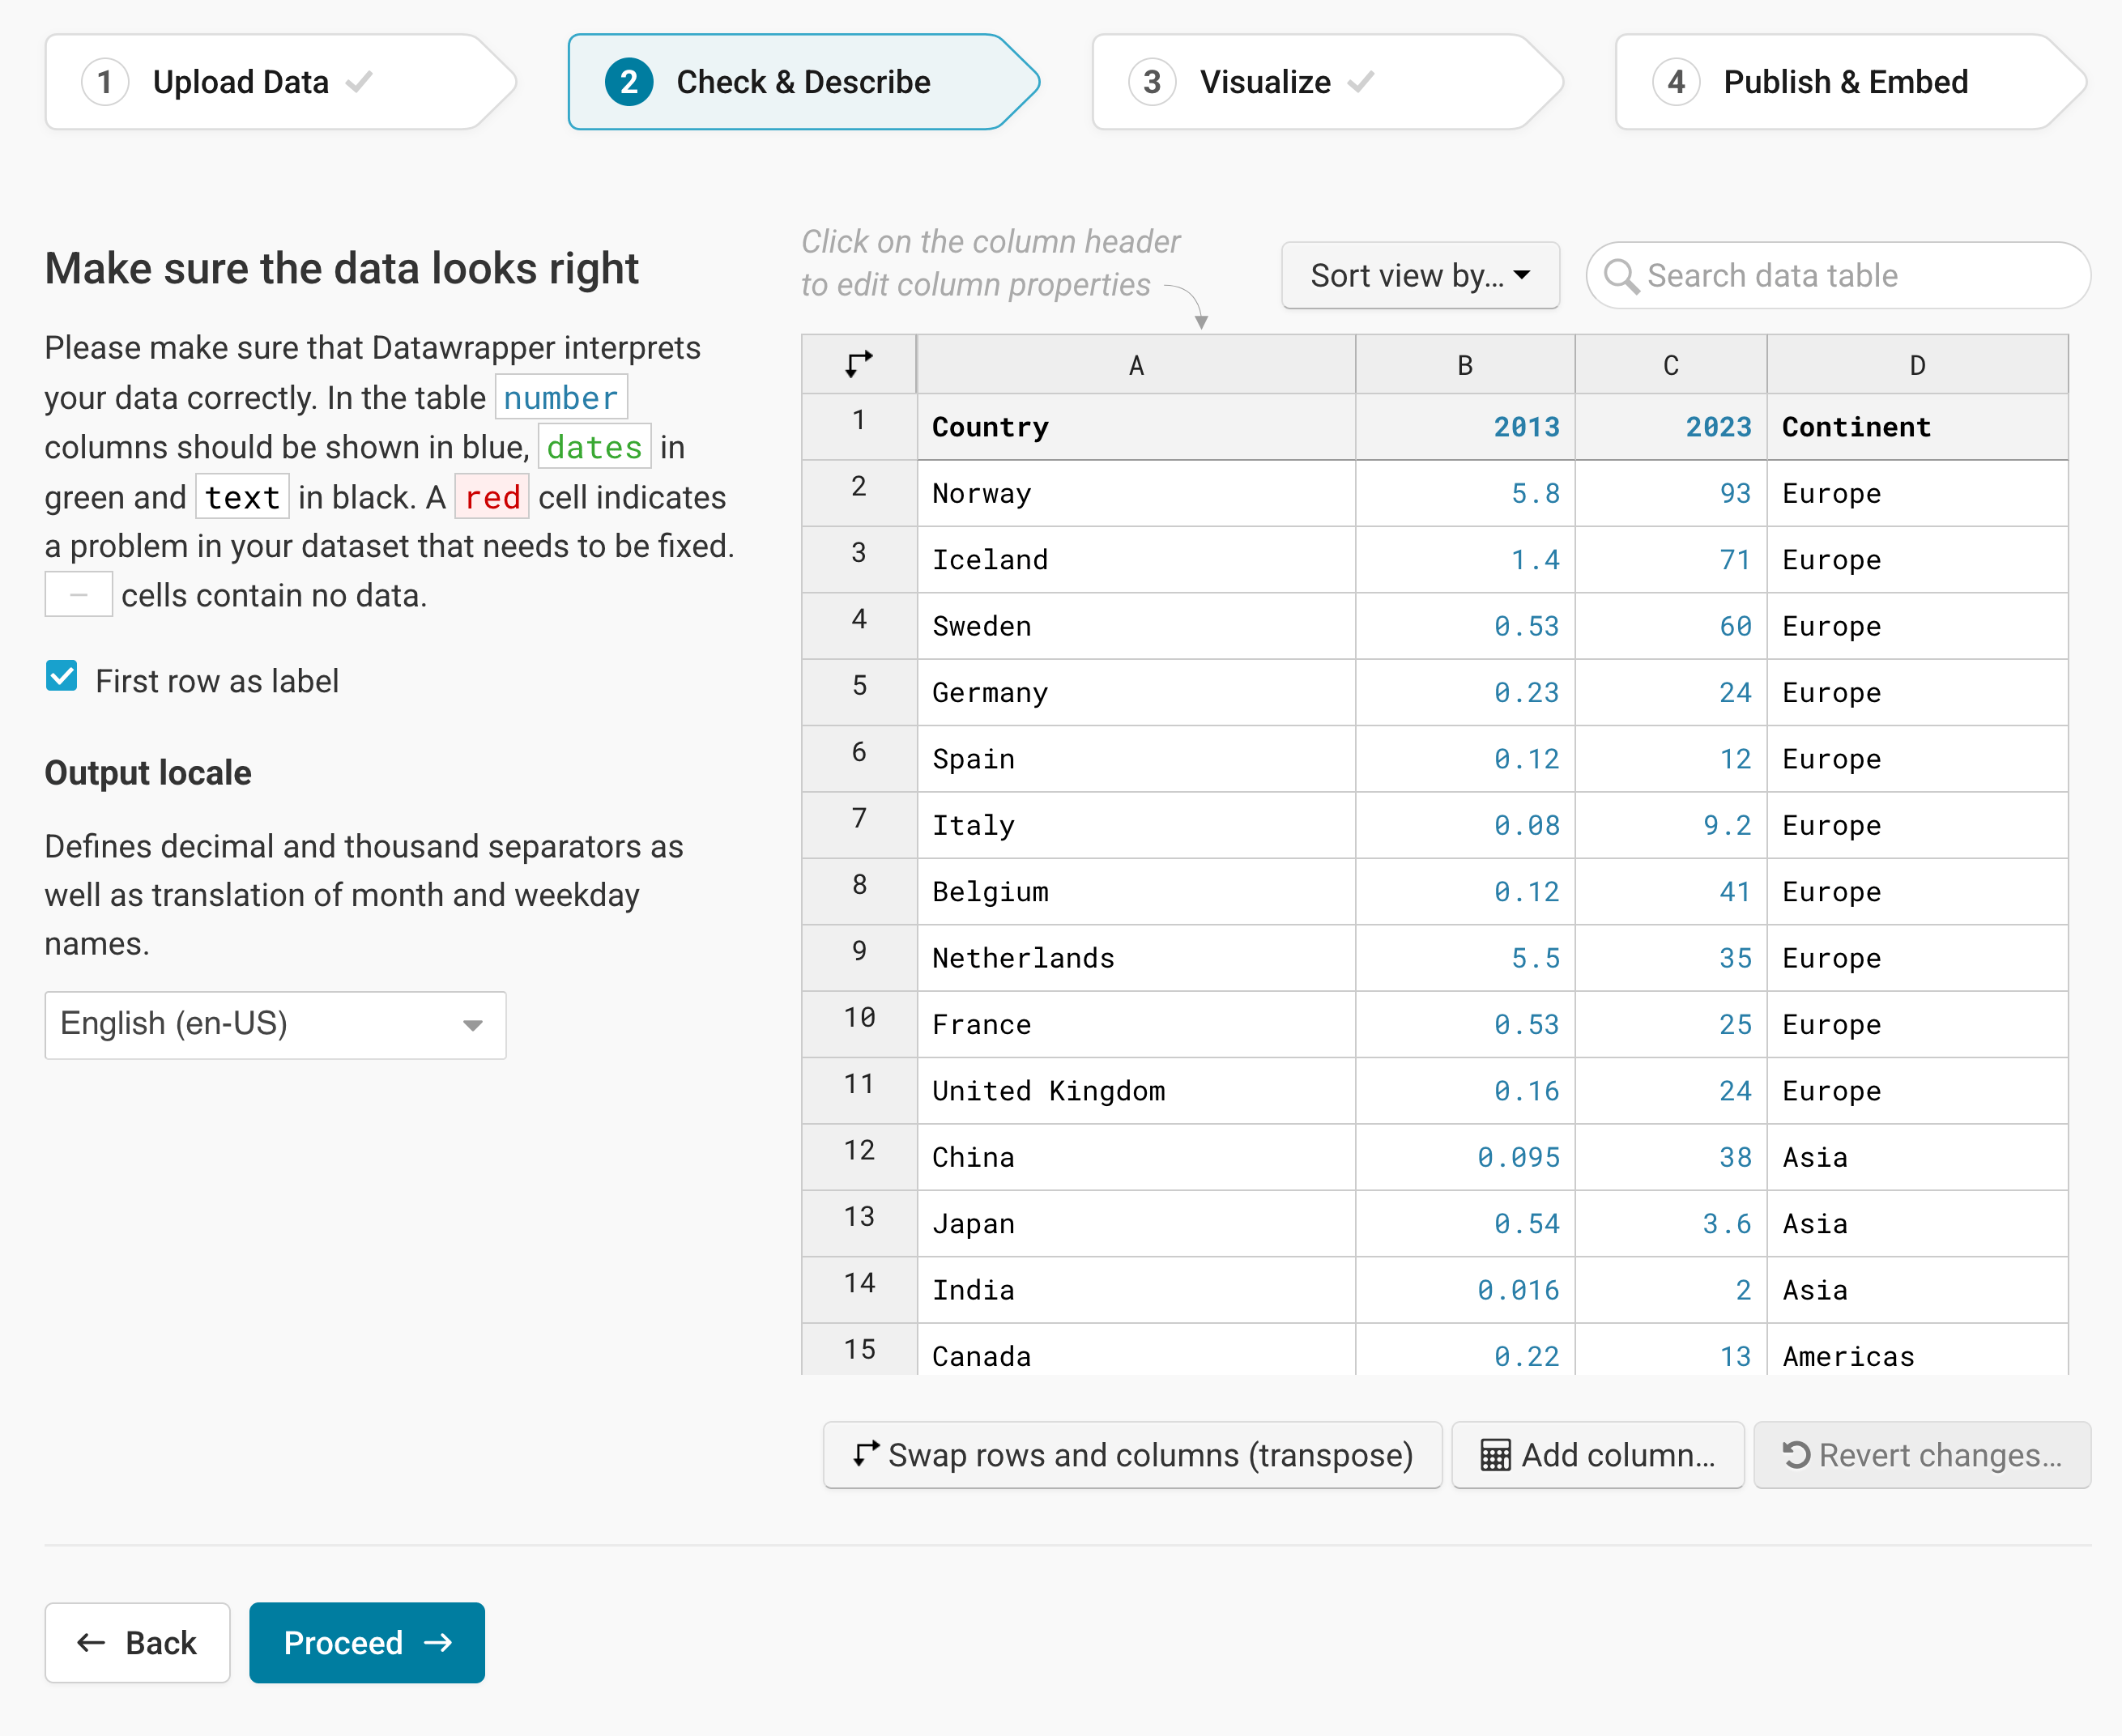
Make sure that the box First row as label is ticked so that Datawrapper correctly assigns the values to the labels.
To add a unit (like km/h, kg, inch, $, etc.) to your numbers, click on a column header and then add the unit of your choice to the Prepend/append options on the left. You can learn more about adding units to numbers here.
Click on Proceed and Datawrapper will take you to the next step.
Choosing an arrow plot
Once you're in step 3: Visualize, choose Arrow Plot and Datawrapper will create a first version of your chart.
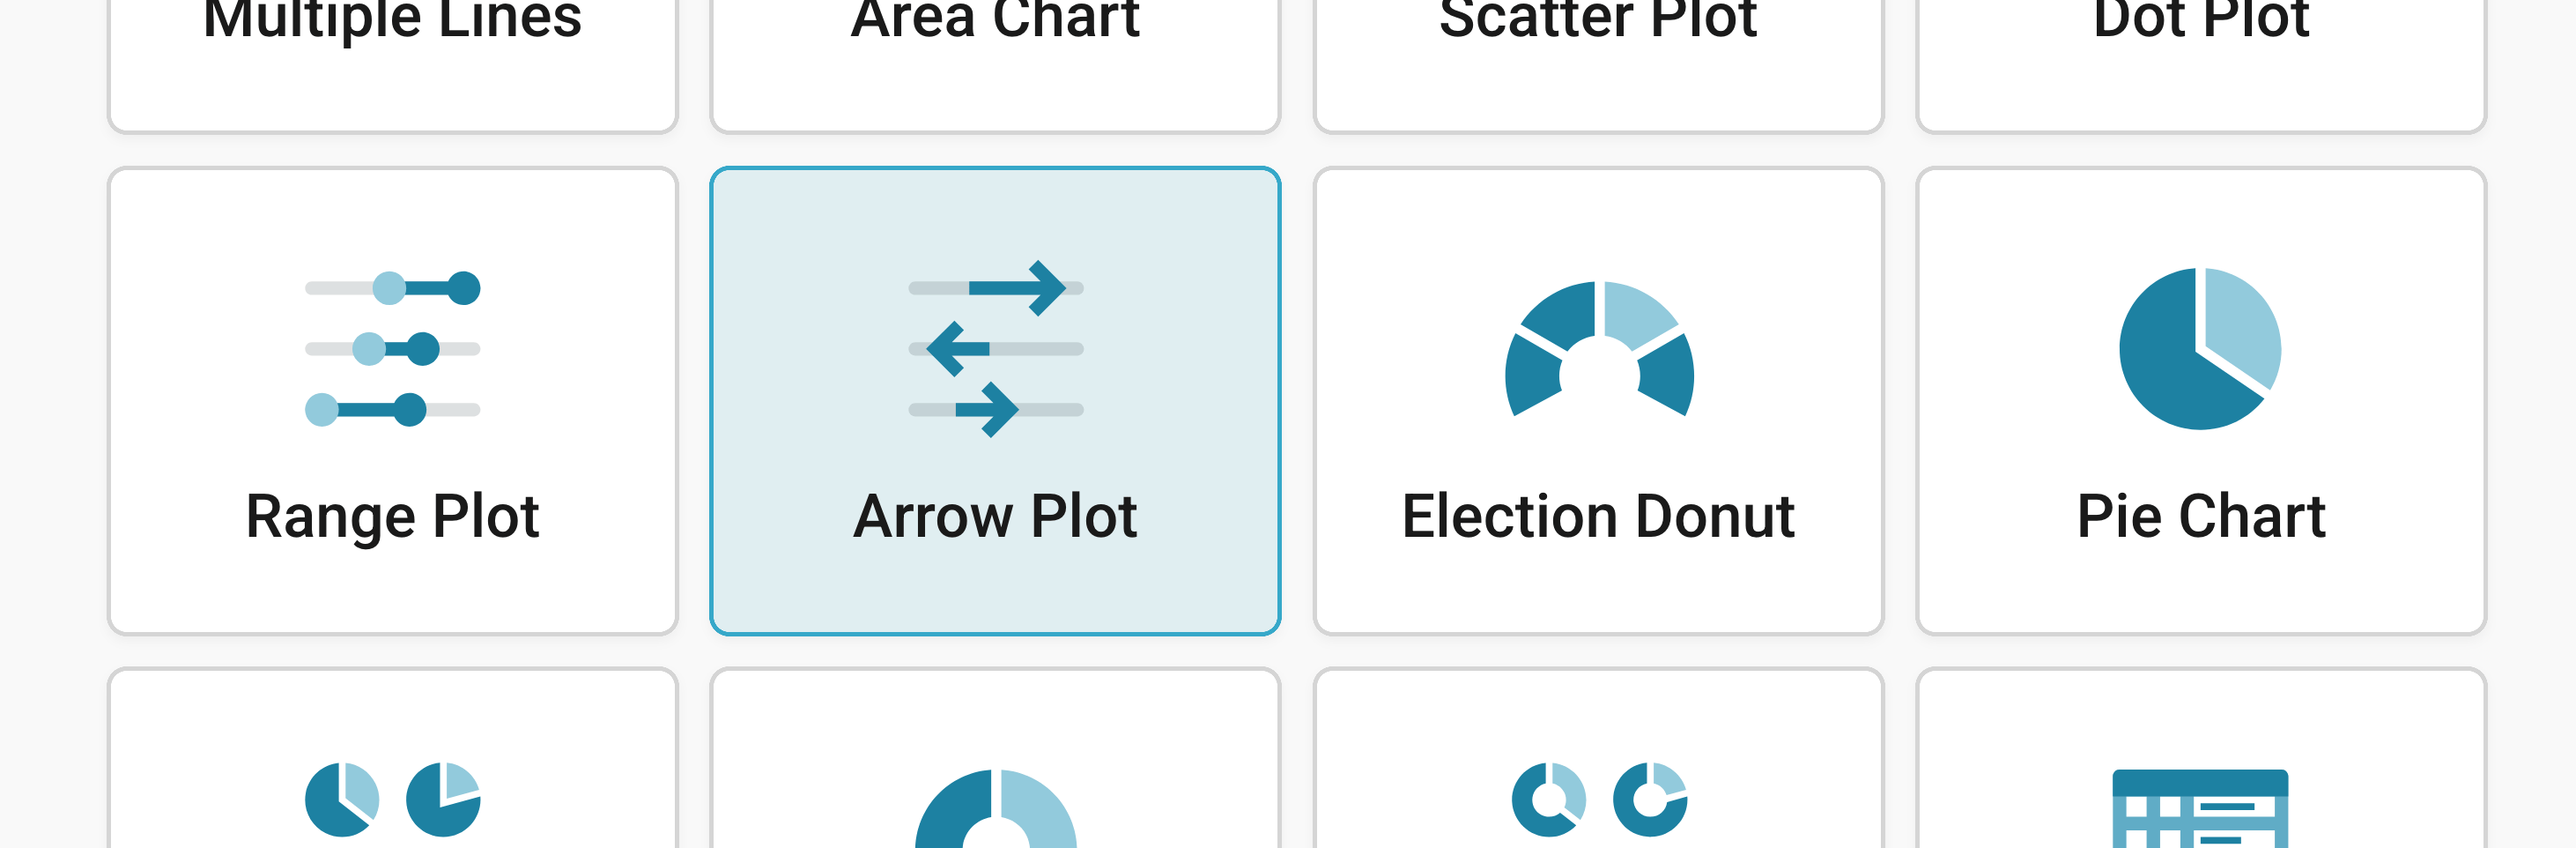
Besides Chart type, you'll notice three more tabs in this step: Refine, Annotate, and Layout.
Resizing
In any tab of step 3: Visualize, you can click, hold, and drag the arrow in the lower right corner to scale the chart window or manually determine the dimension of the chart by entering values in the boxes below the chart (Size).
We recommend checking what the chart looks like on different screen sizes multiple times while designing it, by clicking on the little icons (mobile, tablet, and computer) below the chart.
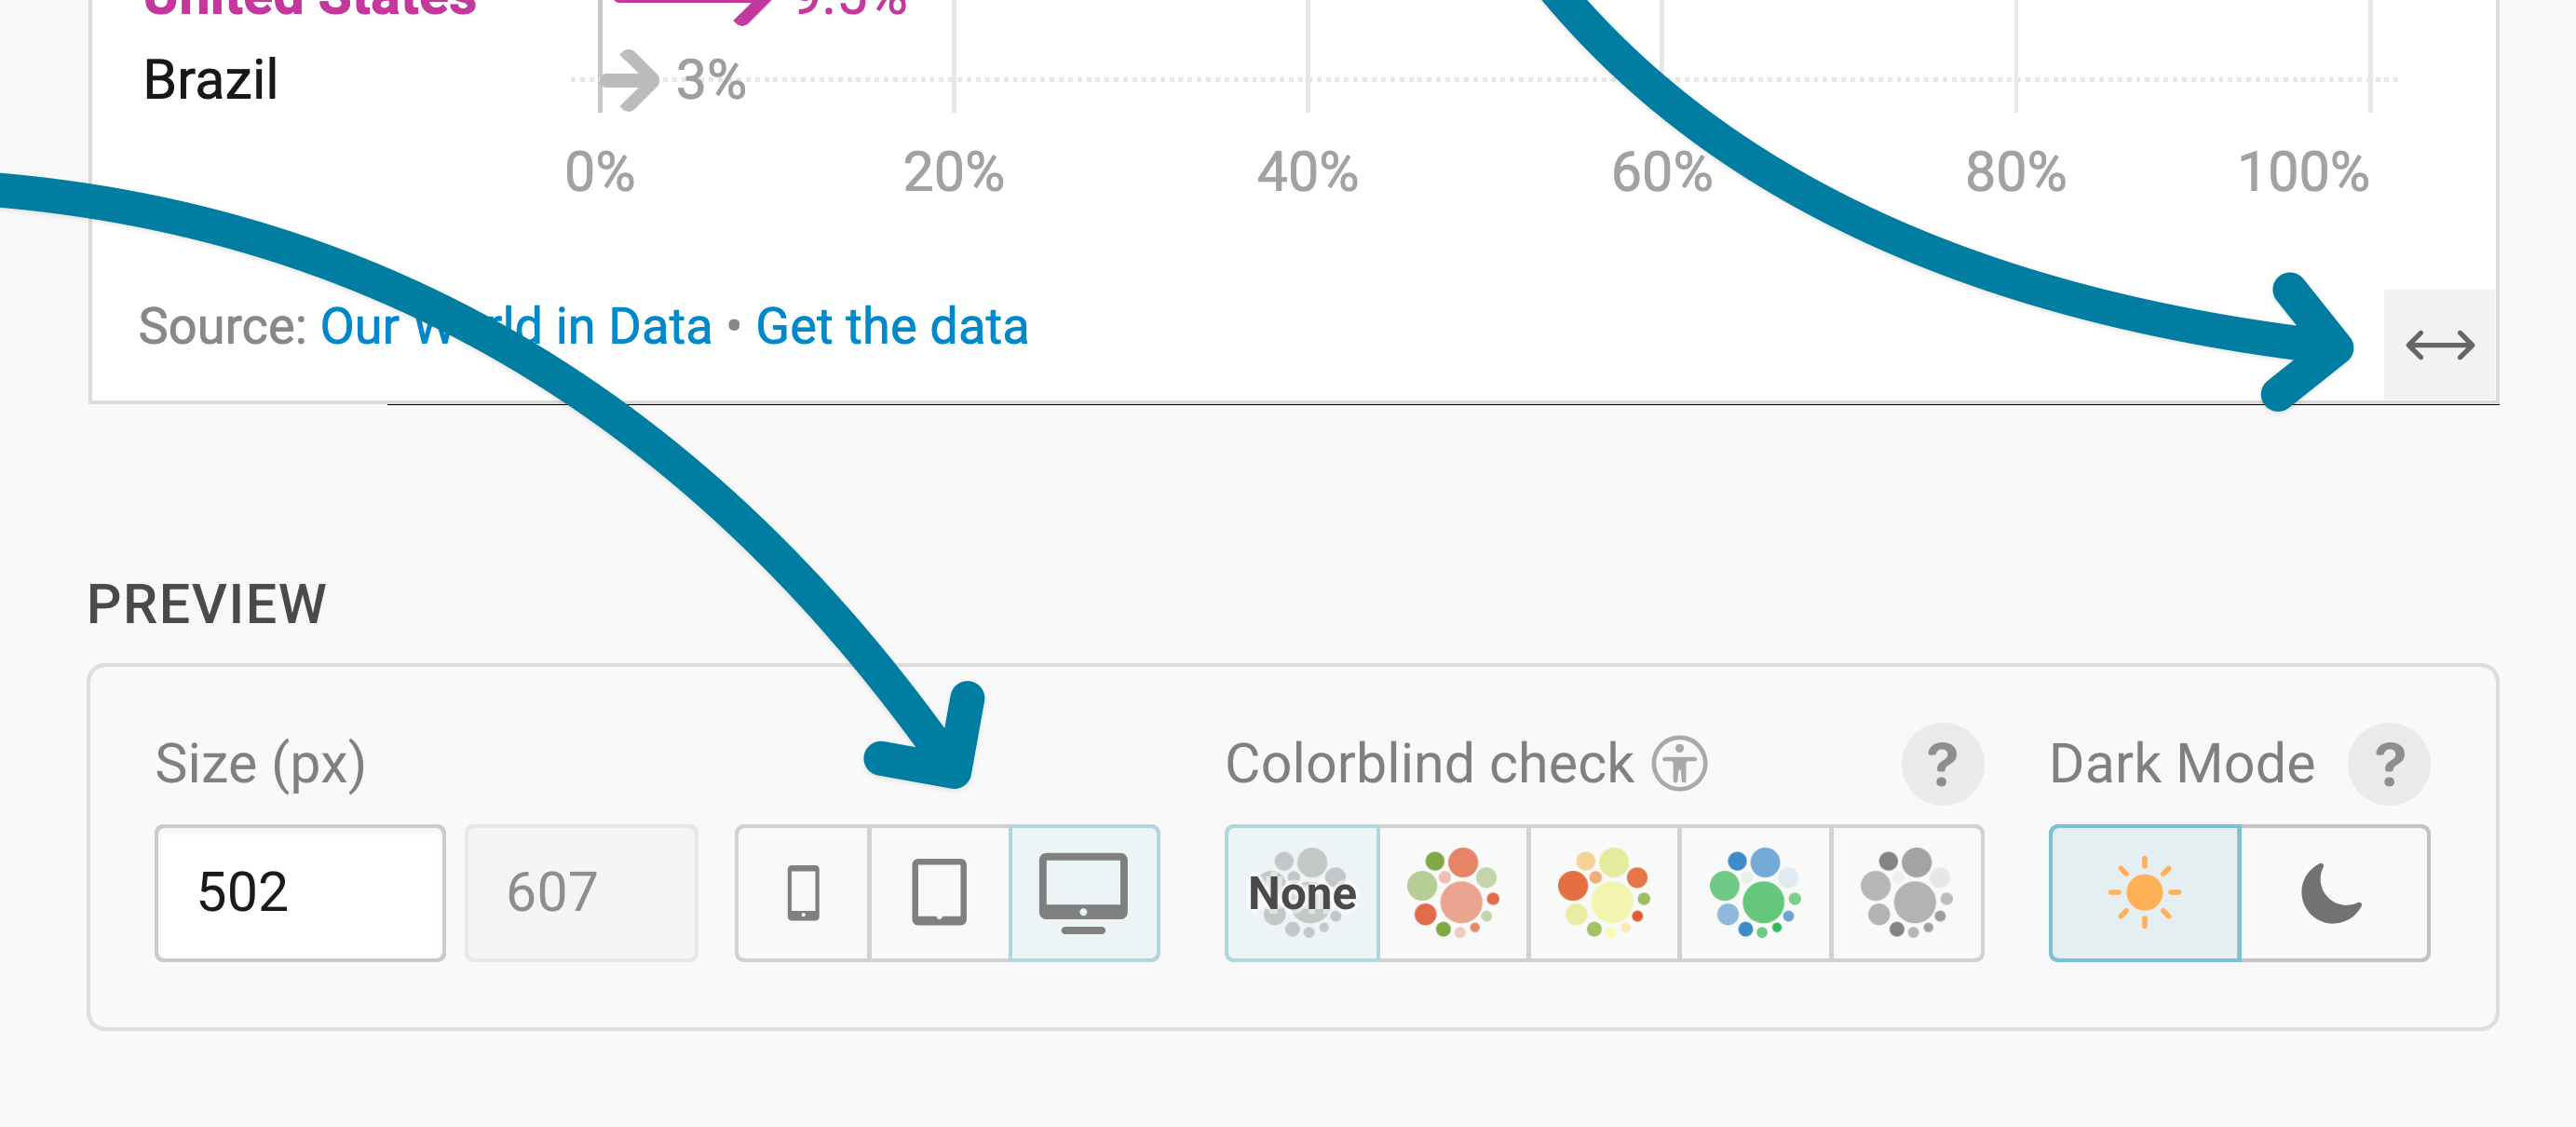
Learn more about changing the width and height of your chart in this article.
Refining your chart
Let's continue with the Refine tab. Here, we see five panels: Arrows, Labels, Horizontal axis, Appearance, and Sorting & Grouping.
Choosing the arrows
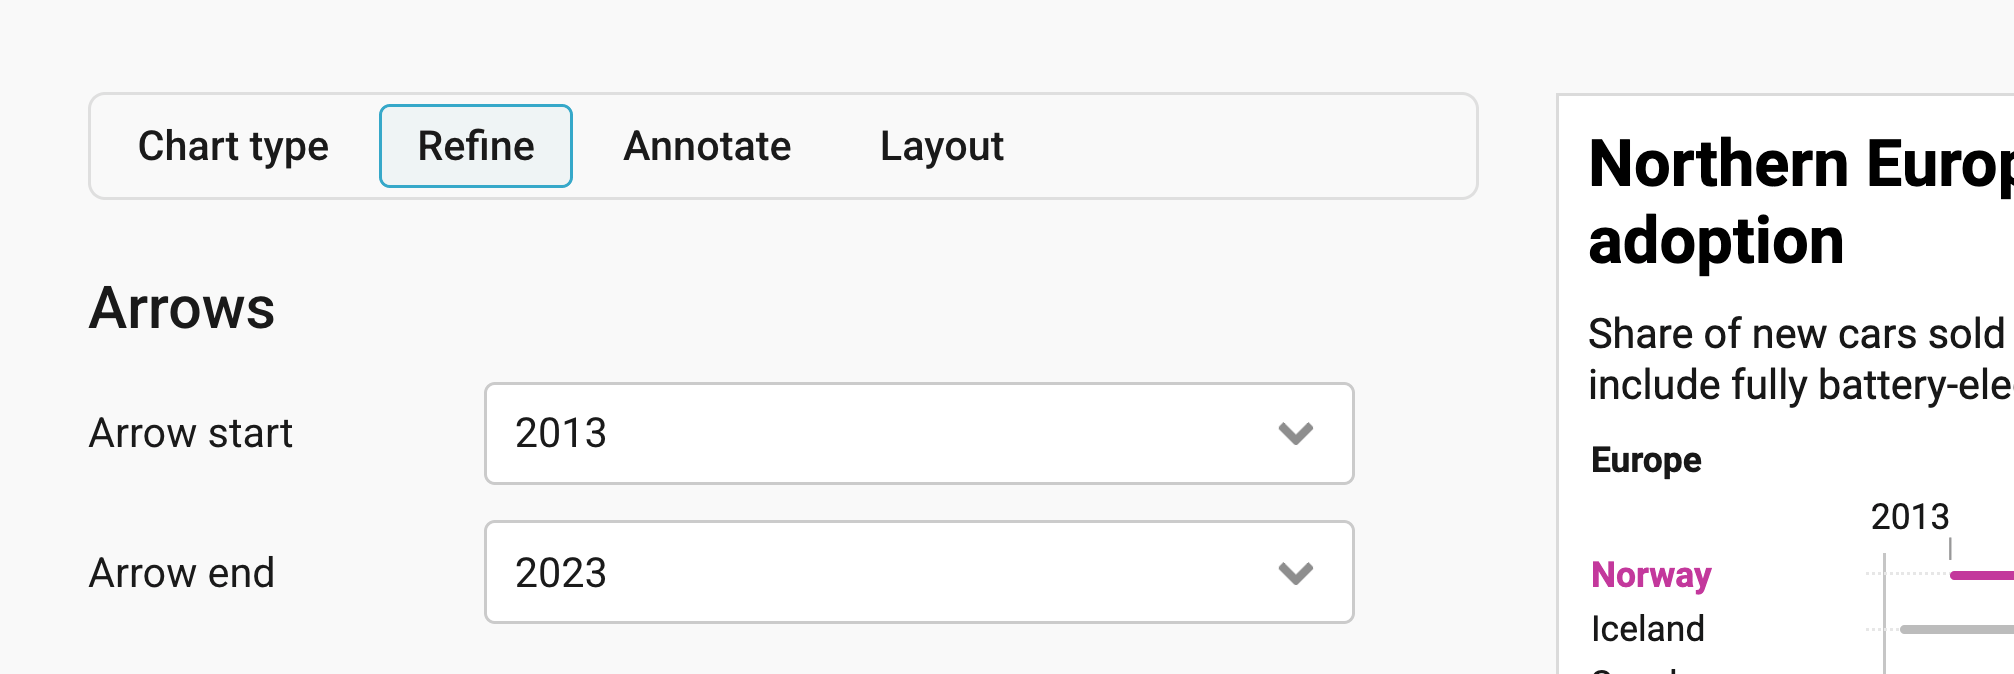
The Arrows panel lets you decide which two columns your arrows connect.
- Arrow start: lets you choose the column for the start of each arrow, usually your earlier date. Datawrapper picks the first column with numbers (the default).
- Arrow end: lets you choose the column for the end of each arrow, usually your later date. In our chart, the arrows go from "2013" to "2023". Make sure to pick the earlier date as the start, since the arrows always point from the start to the end.
Formatting labels
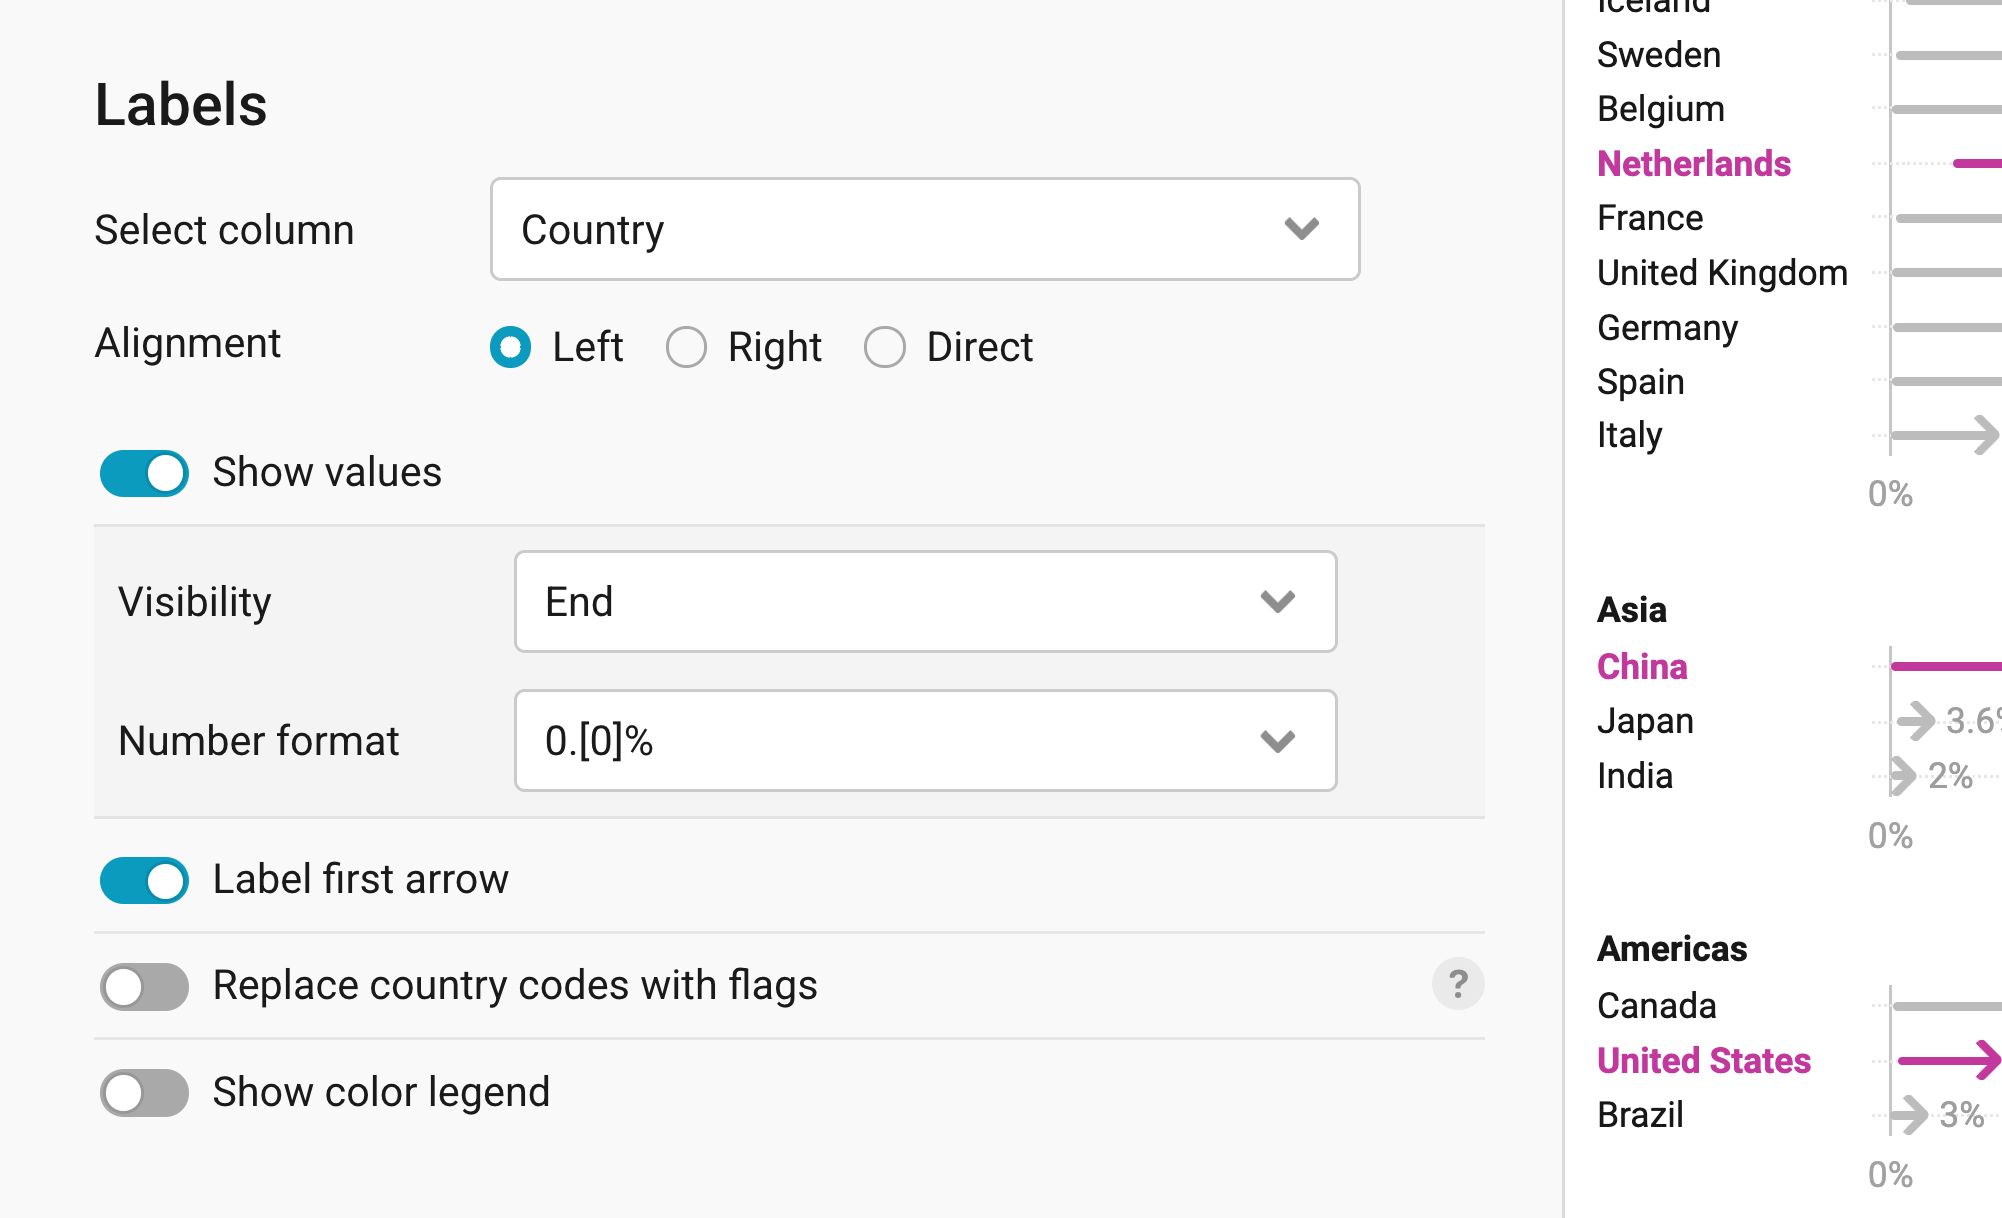
The Labels panel lets you decide where your row labels appear and which values your readers see.
- Select column: lets you choose the column with the names of your lines, like "Country" in our data.
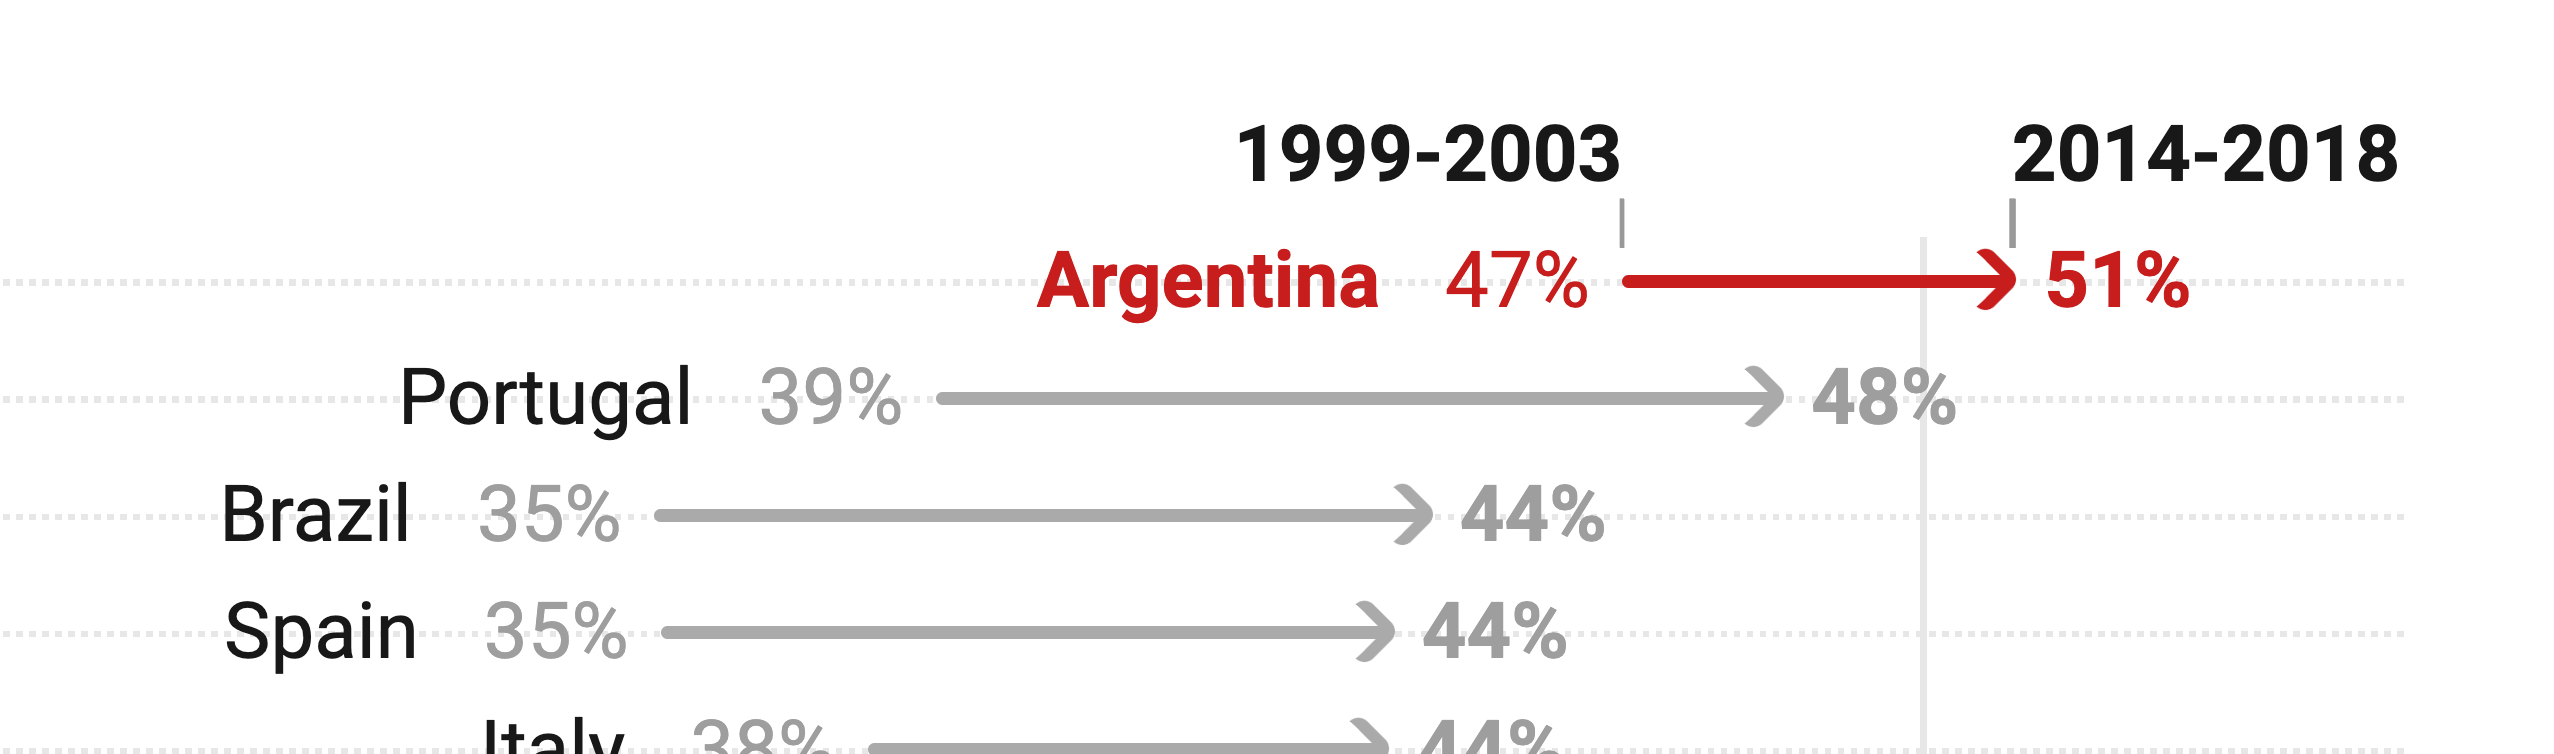
- Alignment: shows the labels on the Left (the default), on the Right, or Direct, right next to each arrow. Here's an example for an arrow chart with direct alignment:
- Show values: shows numbers next to your arrows.
- Under Visibility, you decide which ones: the value at the Start (the default) or at the End of each arrow, like in our chart, or Both. If you care more about the change, pick Difference or Percentage change instead.
- Under Number format, you can decide how they look. We chose 0.[0]%, which adds a percent sign and only shows a decimal place where there is one, like in "9.2%" and "93%".cLearn more about all available number formats here.
- Label first arrow: shows the names of your two columns, like "2013" and "2023", above the start and the end of the first arrow. That way, readers know right away which end shows which date.
- Replace country codes with flags: shows flags when you have country codes in your labels. Learn more here.
- Show color legend: This option appears once you customize your colors. It adds a legend above your chart that explains what each color stands for. If you turn this one, you get the option to Stack labels, so that they're on top of each instead of next to each other.
Changing the axis range
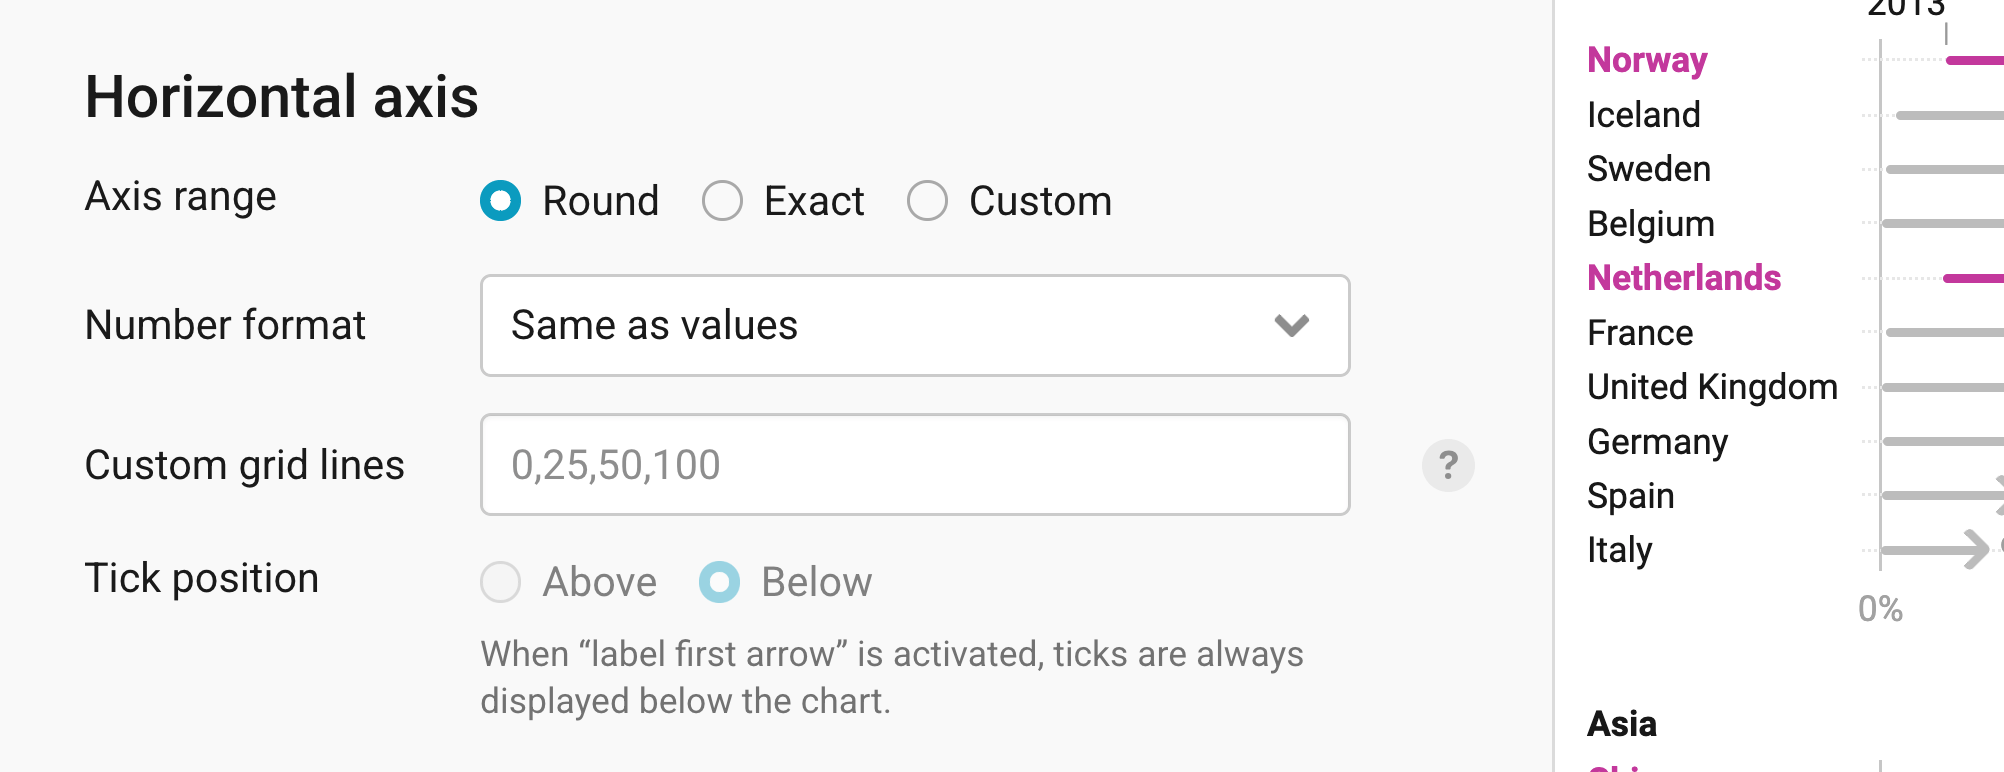
The Horizontal axis panel lets you change the range and look of the axis below your chart.
- Axis range: Round (the default) extends the axis to the next grid line, Exact ends it at your smallest and largest value, and Custom lets you type in your own range.
- Number format: decides how the numbers on the axis look. By default, they look the same as your values. Learn more about all available number formats here.
- Custom grid lines: sets where your grid lines go. By default, Datawrapper decides where they go, but you can type in some values yourself, separated by commas, like "0, 25, 50, 100".
- Tick position: shows the axis labels Above or Below (the default) the chart. If you turn on Label first arrow, ticks are always shown above the arrows.
Changing colors and appearance
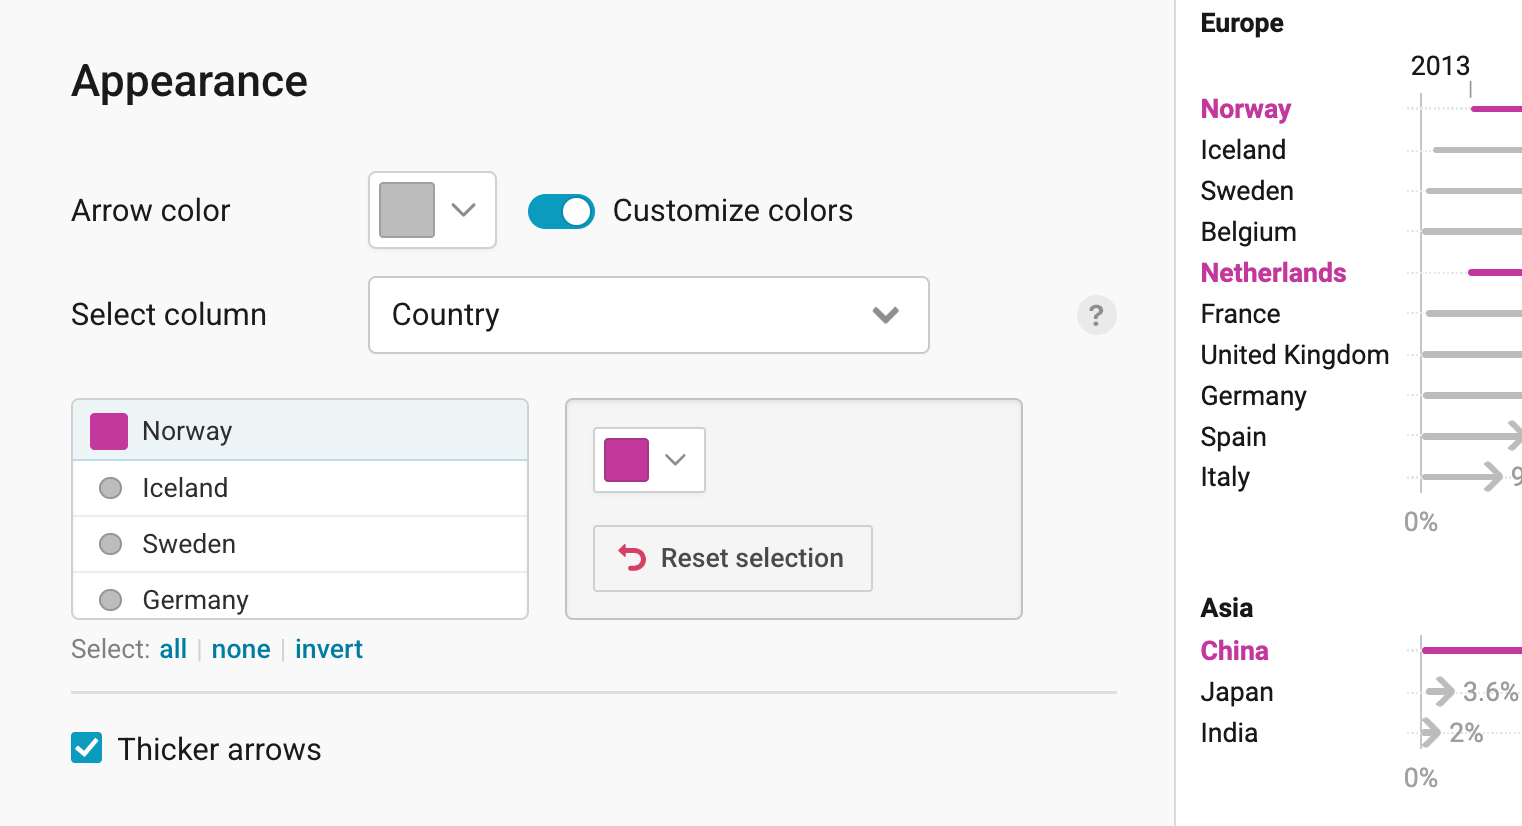
The Appearance panel lets you choose the colors and the thickness of your arrows.
- Arrow color: sets one color for all arrows.
- Customize colors: gives single arrows their own colors. If you uploaded multiple text columns, you'll see the option to Select column. Choose the column with the names you want to color by, like "Country". Then click on one or several names in the list and pick a new color. All, none, and invert below the list help you select many names at once, and Reset all changes undoes all your colors. In our chart, all arrows are gray, except for the four countries we want to talk about, which we show in pink.
- Thicker arrows: makes your arrows thicker and easier to see. That can be a good idea if many of your arrows are short, or if your chart should stand out in an article.
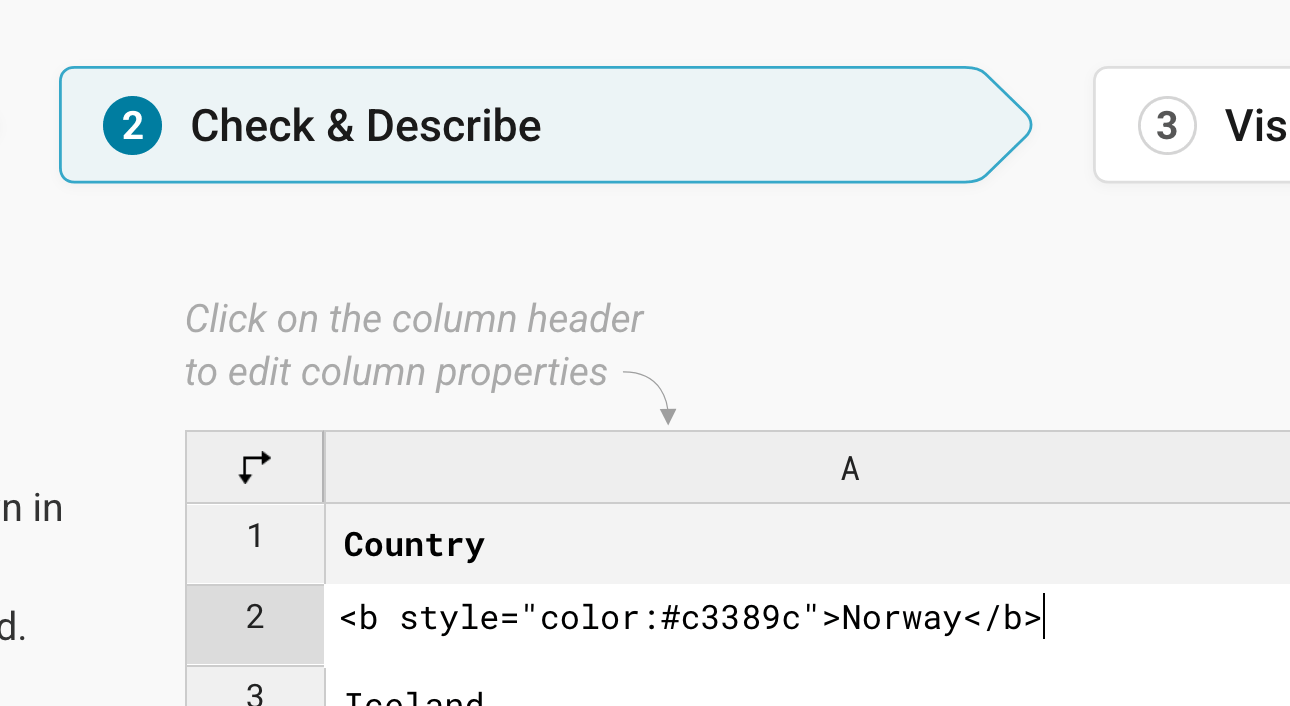
For our chart, we also changed the color of the label (e.g., "Norway"). This can't be done in the Visualize step, but has to be done in step 2: Check & Describe, with HTML. If you click on one of the cells, you can add styling. For our chart, we added <b style="color:#c3389c">Norway</b>
Sorting and grouping rows
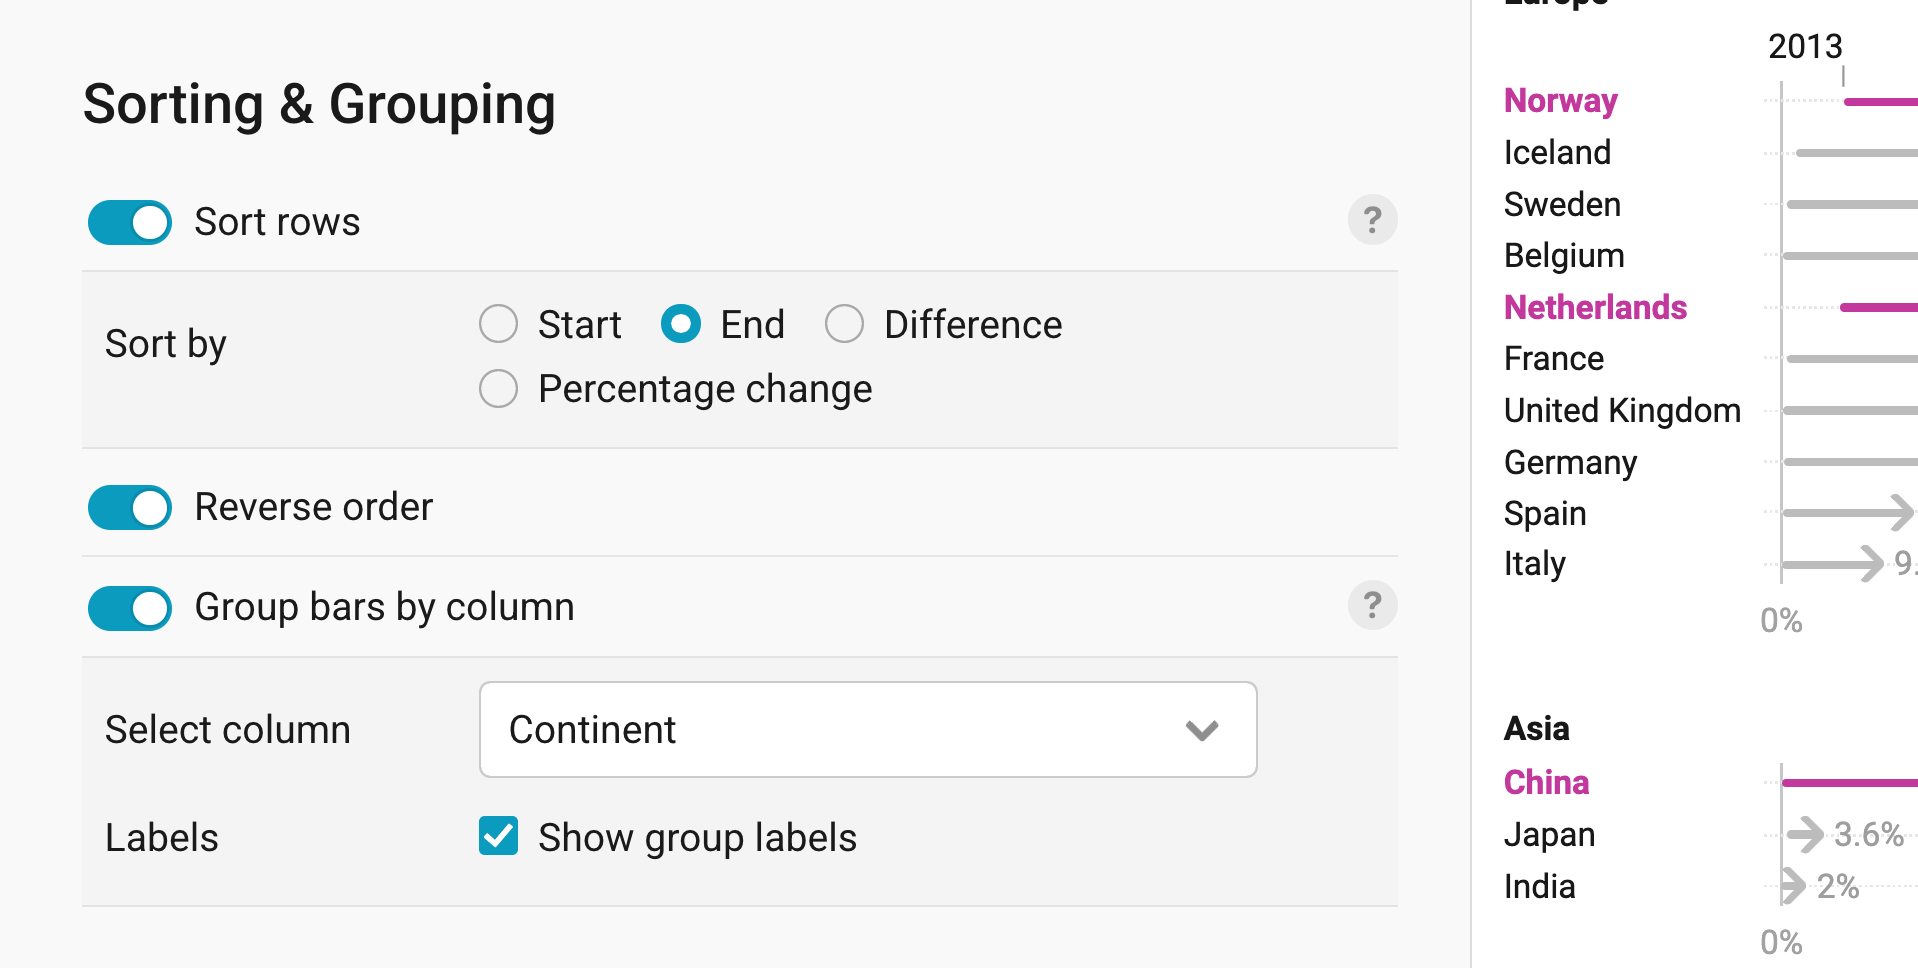
The Sorting & Grouping panel lets you decide in which order your lines appear and whether they're grouped.
- Sort rows: sorts your lines instead of showing them in the order of your dataset (the default). Under Sort by, you can sort them by their Start or End values, by the Difference between them, or by the Percentage change. In our chart, we sort by End.
- Reverse order: flips the order of your lines. Together with sorting by End, that puts the countries with the highest share in 2023 at the top.
- Group bars by column: puts your lines into groups. For that, you need an extra text column in your data, like "Continent" in ours. Choose it under Select column, and turn on Show group labels to show the name of each group above it. Learn more about grouping here.
Annotating your chart
Adding a title and source
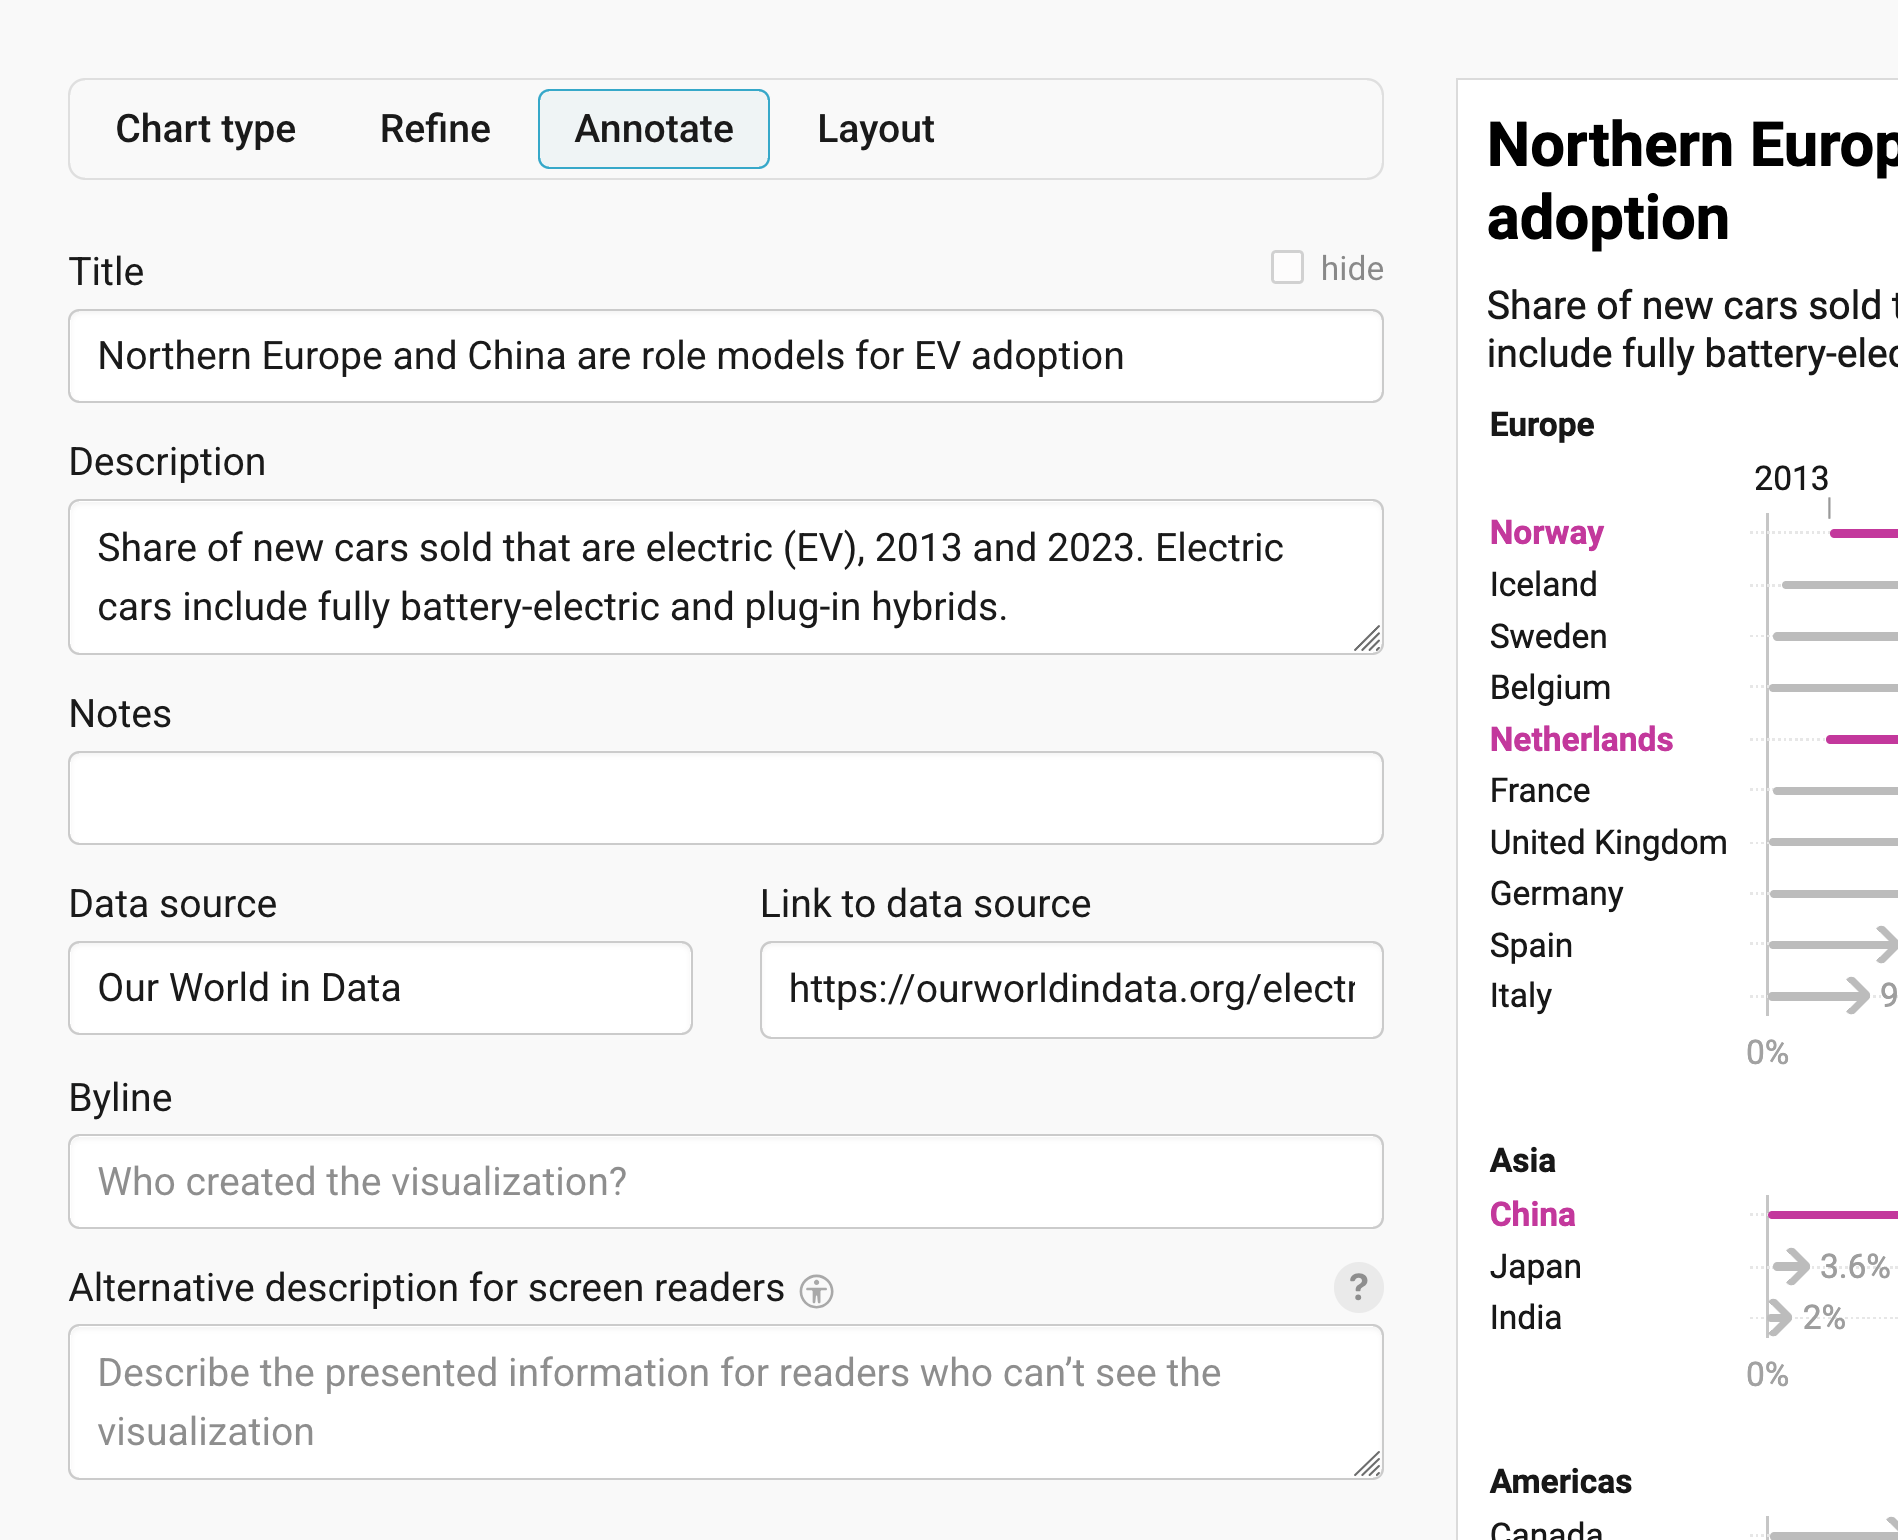
In the Annotate tab, you're first asked to give your visualization a title, description, notes, source, byline, and an alternative description for screen readers. You can find a detailed explanation of all these Annotate options here.
Highlighting arrow ends

In the 2nd panel in the Annotate tab, you can emphasize one or both arrow ends. To do so, select the one(s) you want to highlight.
Adding text annotations
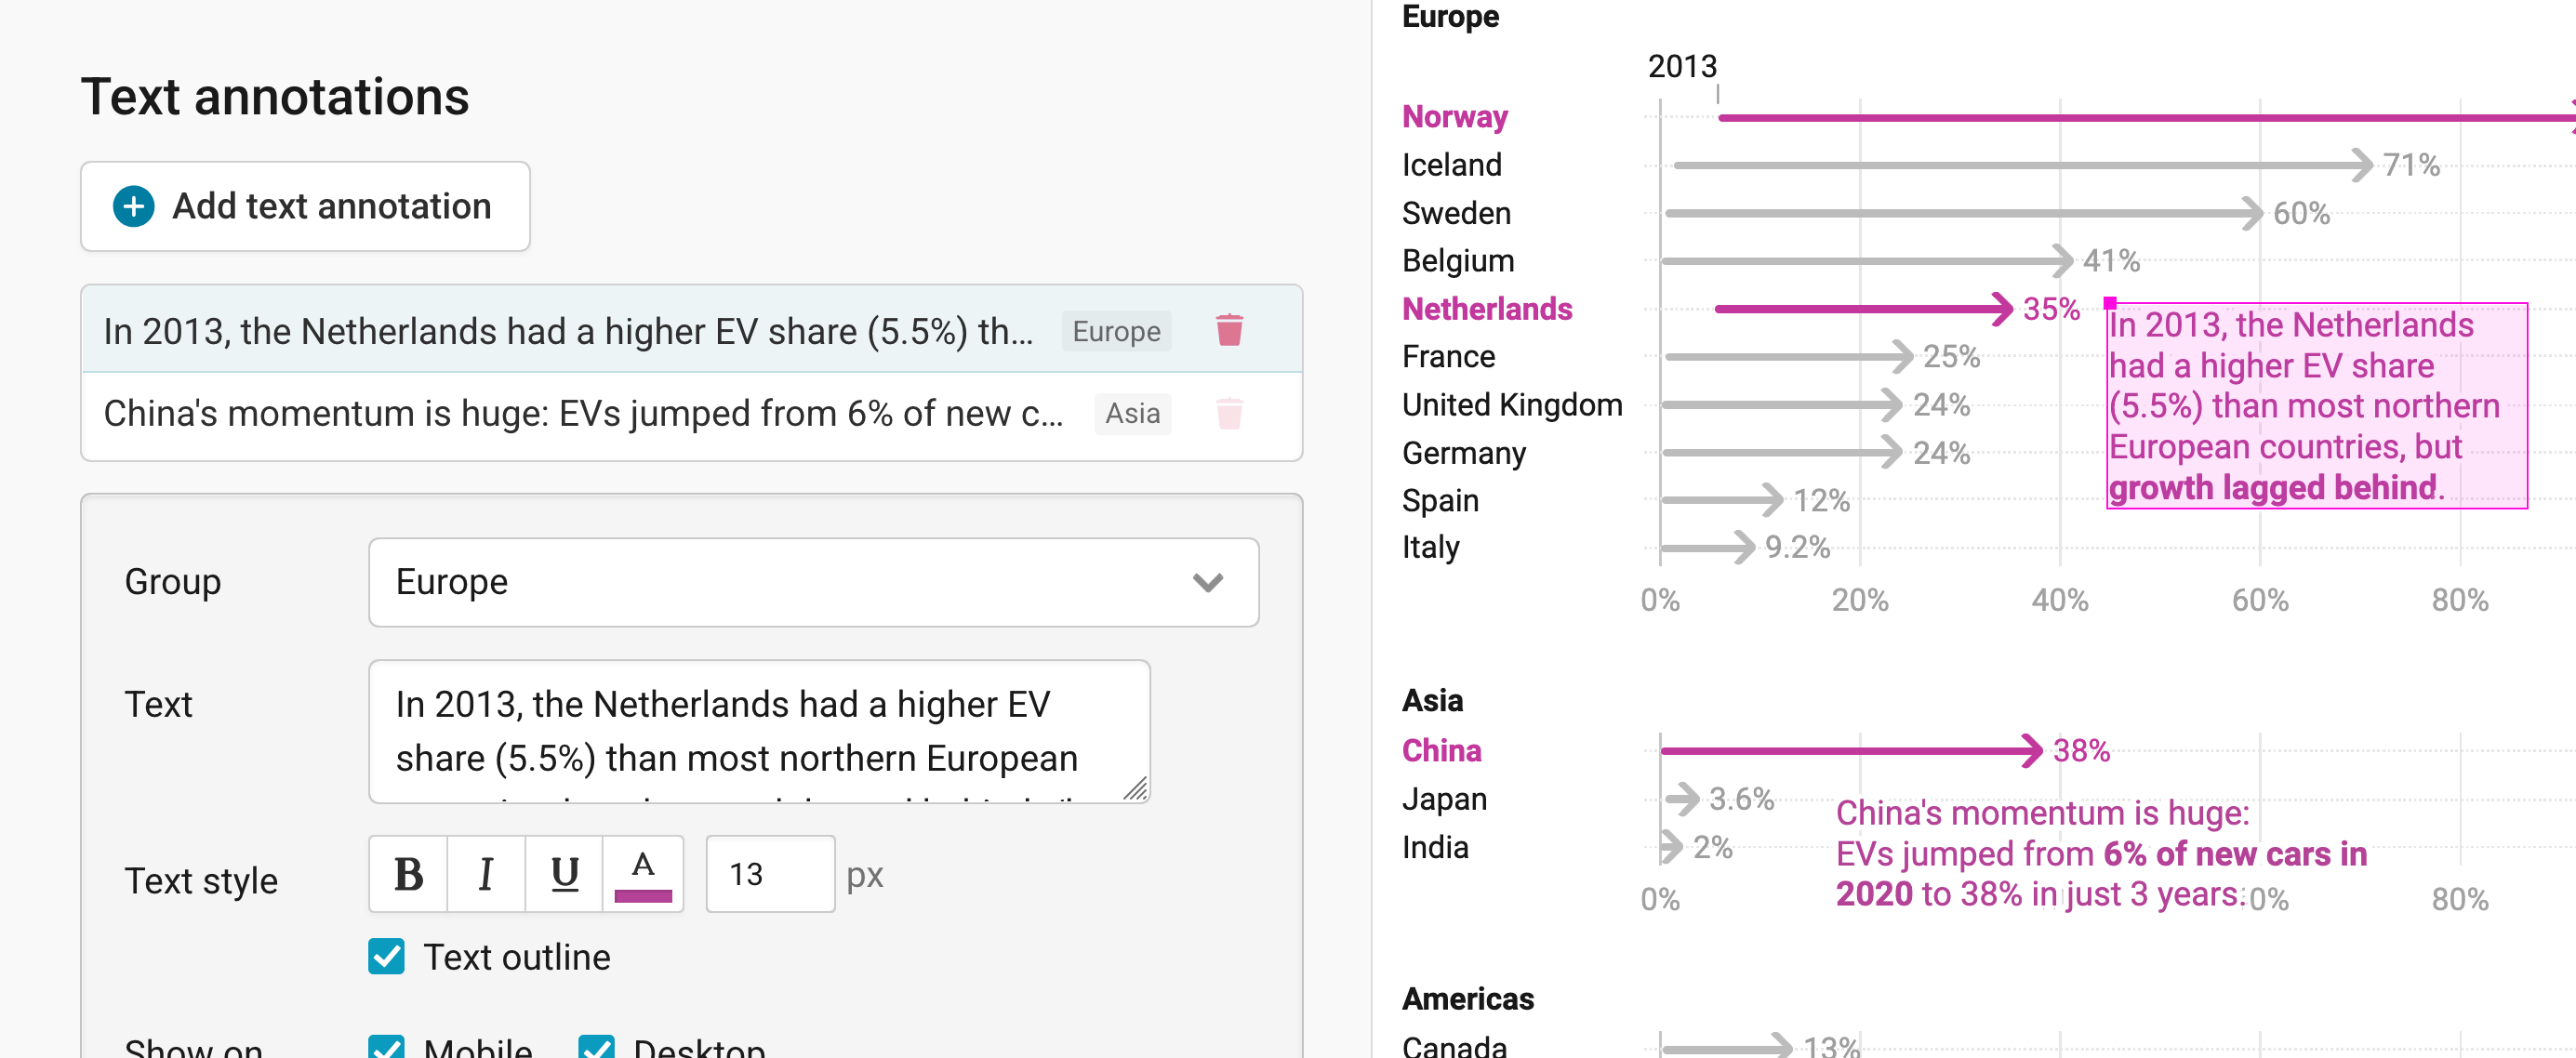
You can add annotations to your arrow plot by clicking on Add text annotation. You can then style and move the text, add an arrow and circle to it, and adjust how it will appear on mobile. Here's an in-depth explanation of all the options.
Highlighting ranges
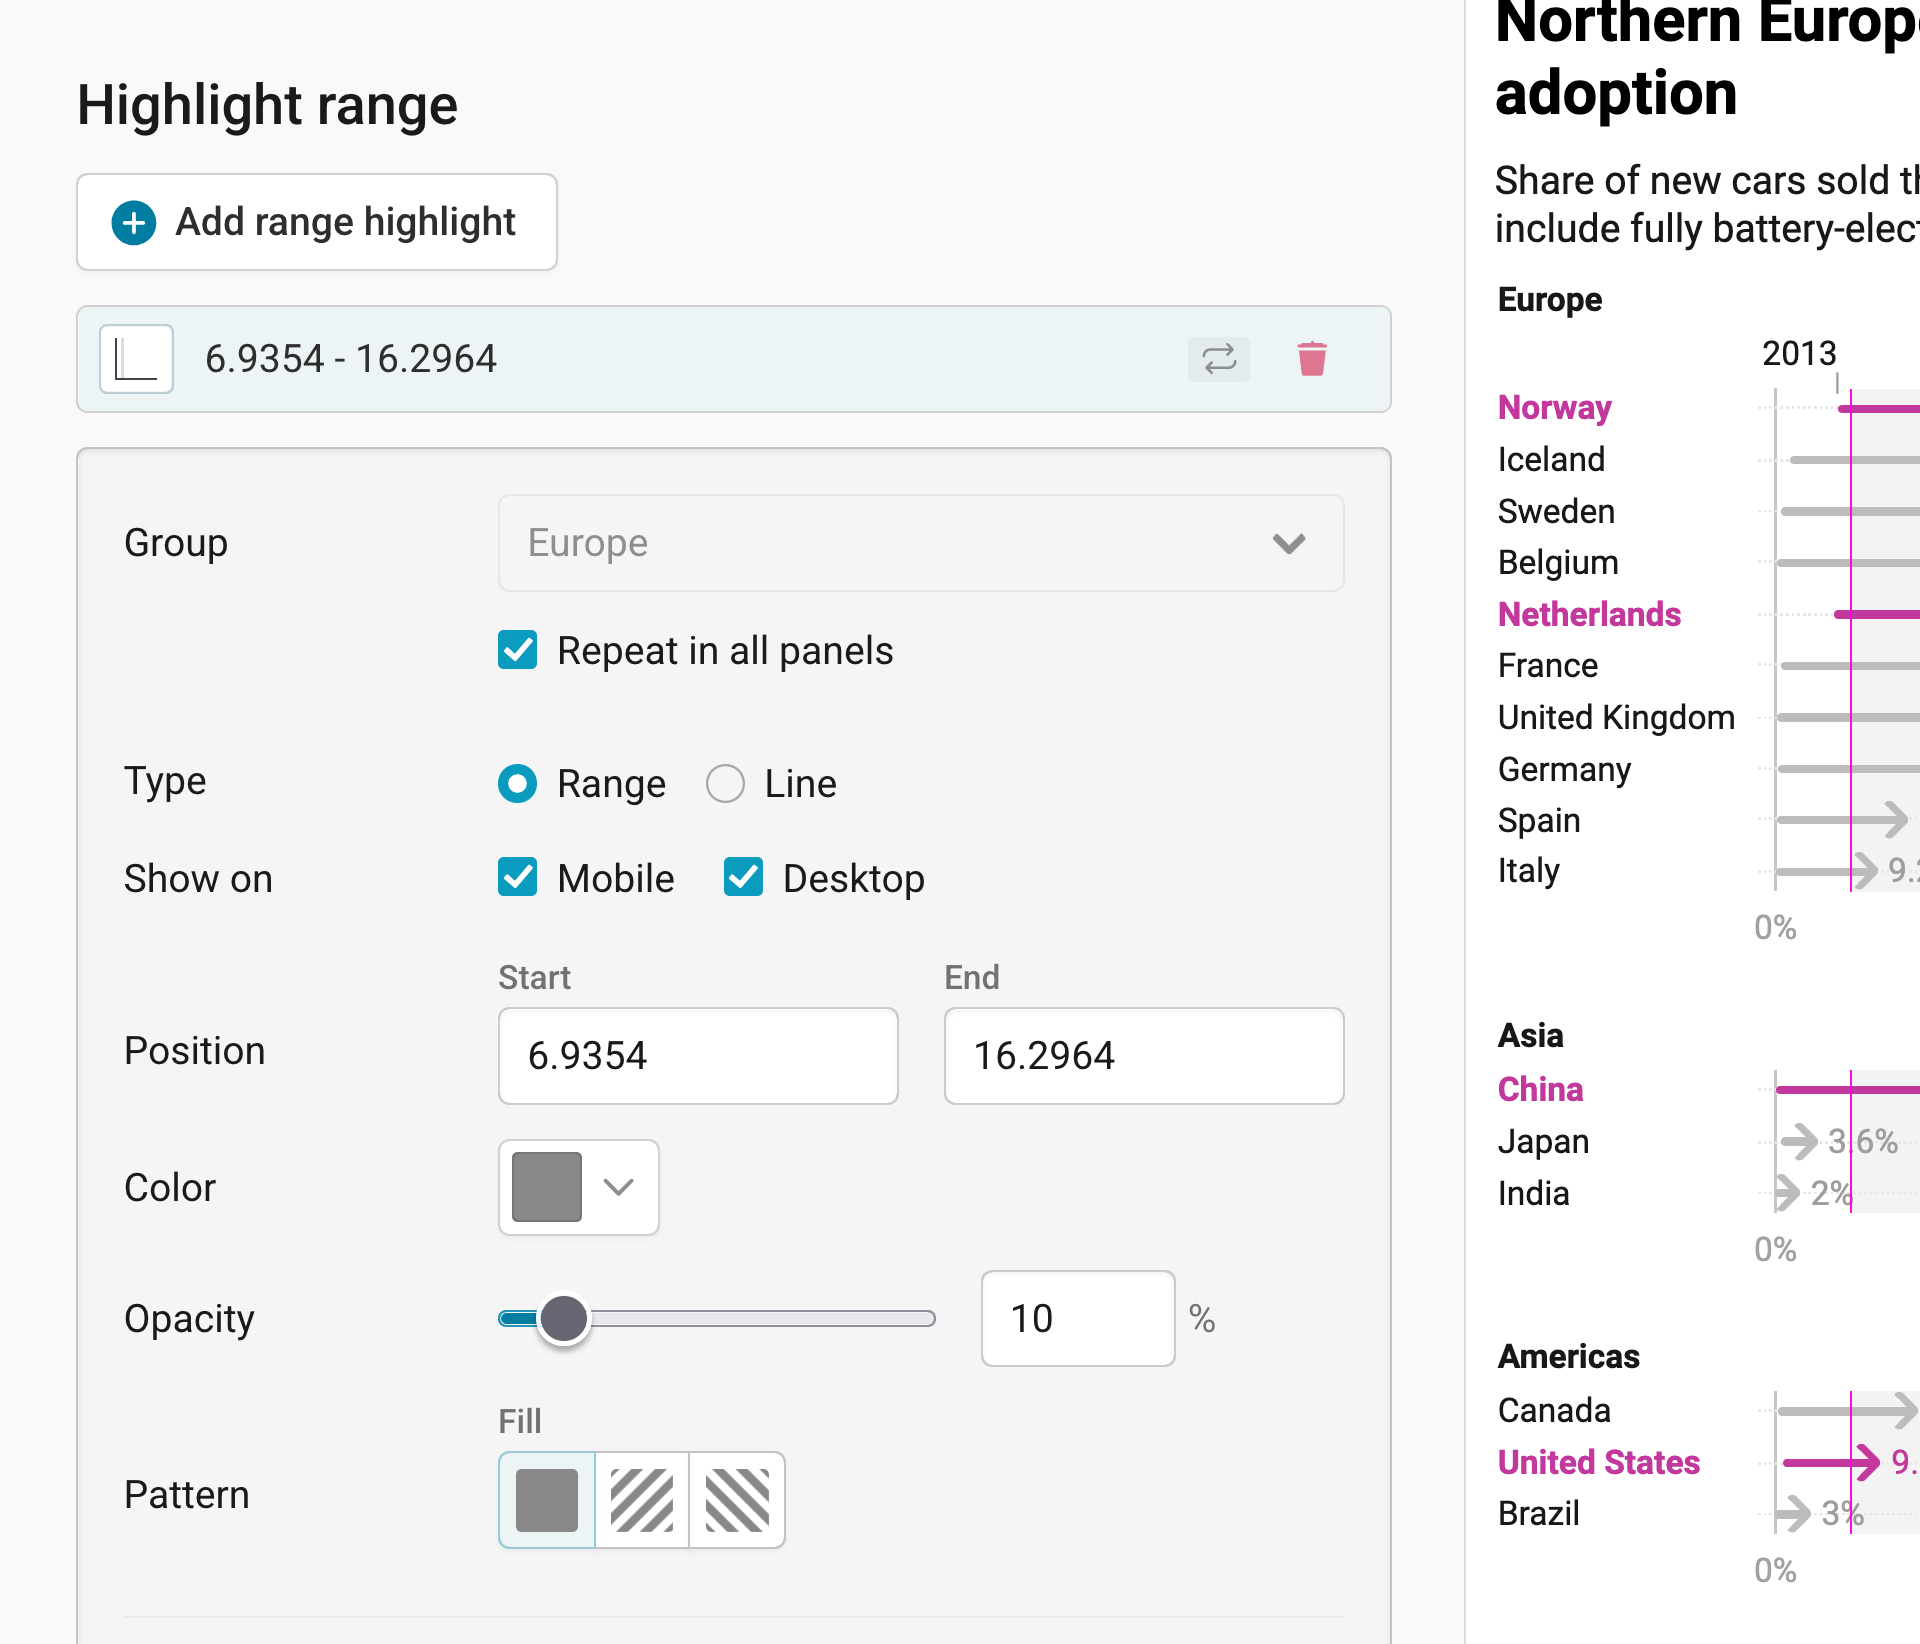
You can add a range or line highlight by clicking on Add range highlight and then dragging on the chart where you want the highlight to be. You can then change its position, color, opacity, and line width and style, or delete it again. Here's an in-depth explanation of all the options.
Publishing your chart
In the Layout tab, you can select an output locale, change the design theme and footer options, and enable social sharing. Find a detailed explanation of all the Layout options here.
In step 4: Publish & Embed, you can first publish your chart and then decide how it gets to your readers. We recommend pasting the embed code into your website or CMS, but you can also share the chart's URL. Learn more about both options here. To use your chart somewhere else, download it as a PNG (on any plan) or as an SVG or PDF (on paid plans). See what each plan includes on our pricing page.
And that's it! You've successfully created and customized an arrow plot.