How to create a multiple lines chart
- Free
- Pro
- Business
- Enterprise
Line charts are often the best choice to show how your data developed over time. Multiple lines charts – also called small multiple line charts, trellis plot, facets, grid charts, or panel charts – do the same, but separate each line in their own panel. That means your lines don’t overlap anymore like in a normal line chart. Multiple lines charts are great to show lots of lines and keep a tidy appearance.
👉 To learn more about Datawrapper multiple lines, read our feature announcement from February 2024.
This guide will show you how to create and customize the following chart:

Preparing your data
Formatting your data
To visualize data, you first need the data. The data for the chart on U.K. house prices comes from the U.K. government, and we prepared it in this Google Sheet for you to copy. The data looks like this:
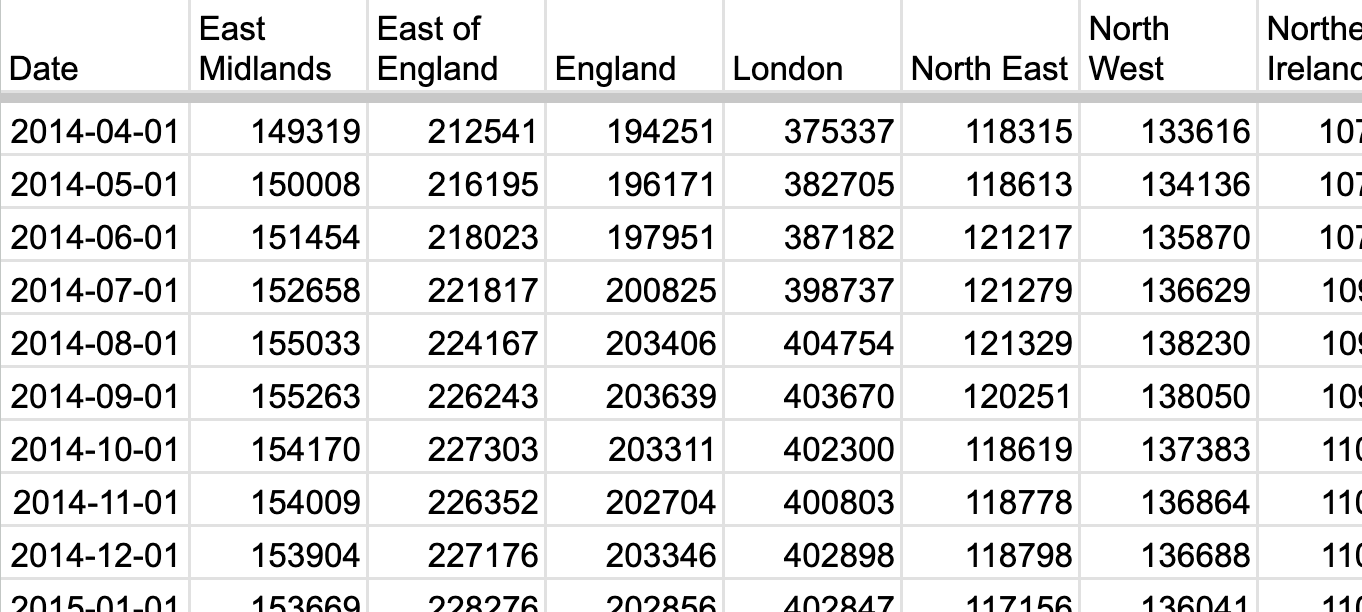
To make sure that Datawrapper accepts the data, your data should have the following:
- A header row with labels. These will show up as titles above each chart panel (e.g. "East Midlands", "London").
- A first column with dates or times. They will define the horizontal axis. Learn which date formats Datawrapper recognizes.
- Columns with values. They will define each line and the length of the vertical axis.
Uploading your data
Once you have prepared your data, create a new chart in Datawrapper. You can do so by going to our homepage and clicking on Start creating. In step 1: Upload, you can copy & paste your dataset, upload it as a .csv or Excel file, or connect to a Google Sheet. For now, you can just copy & paste the data:
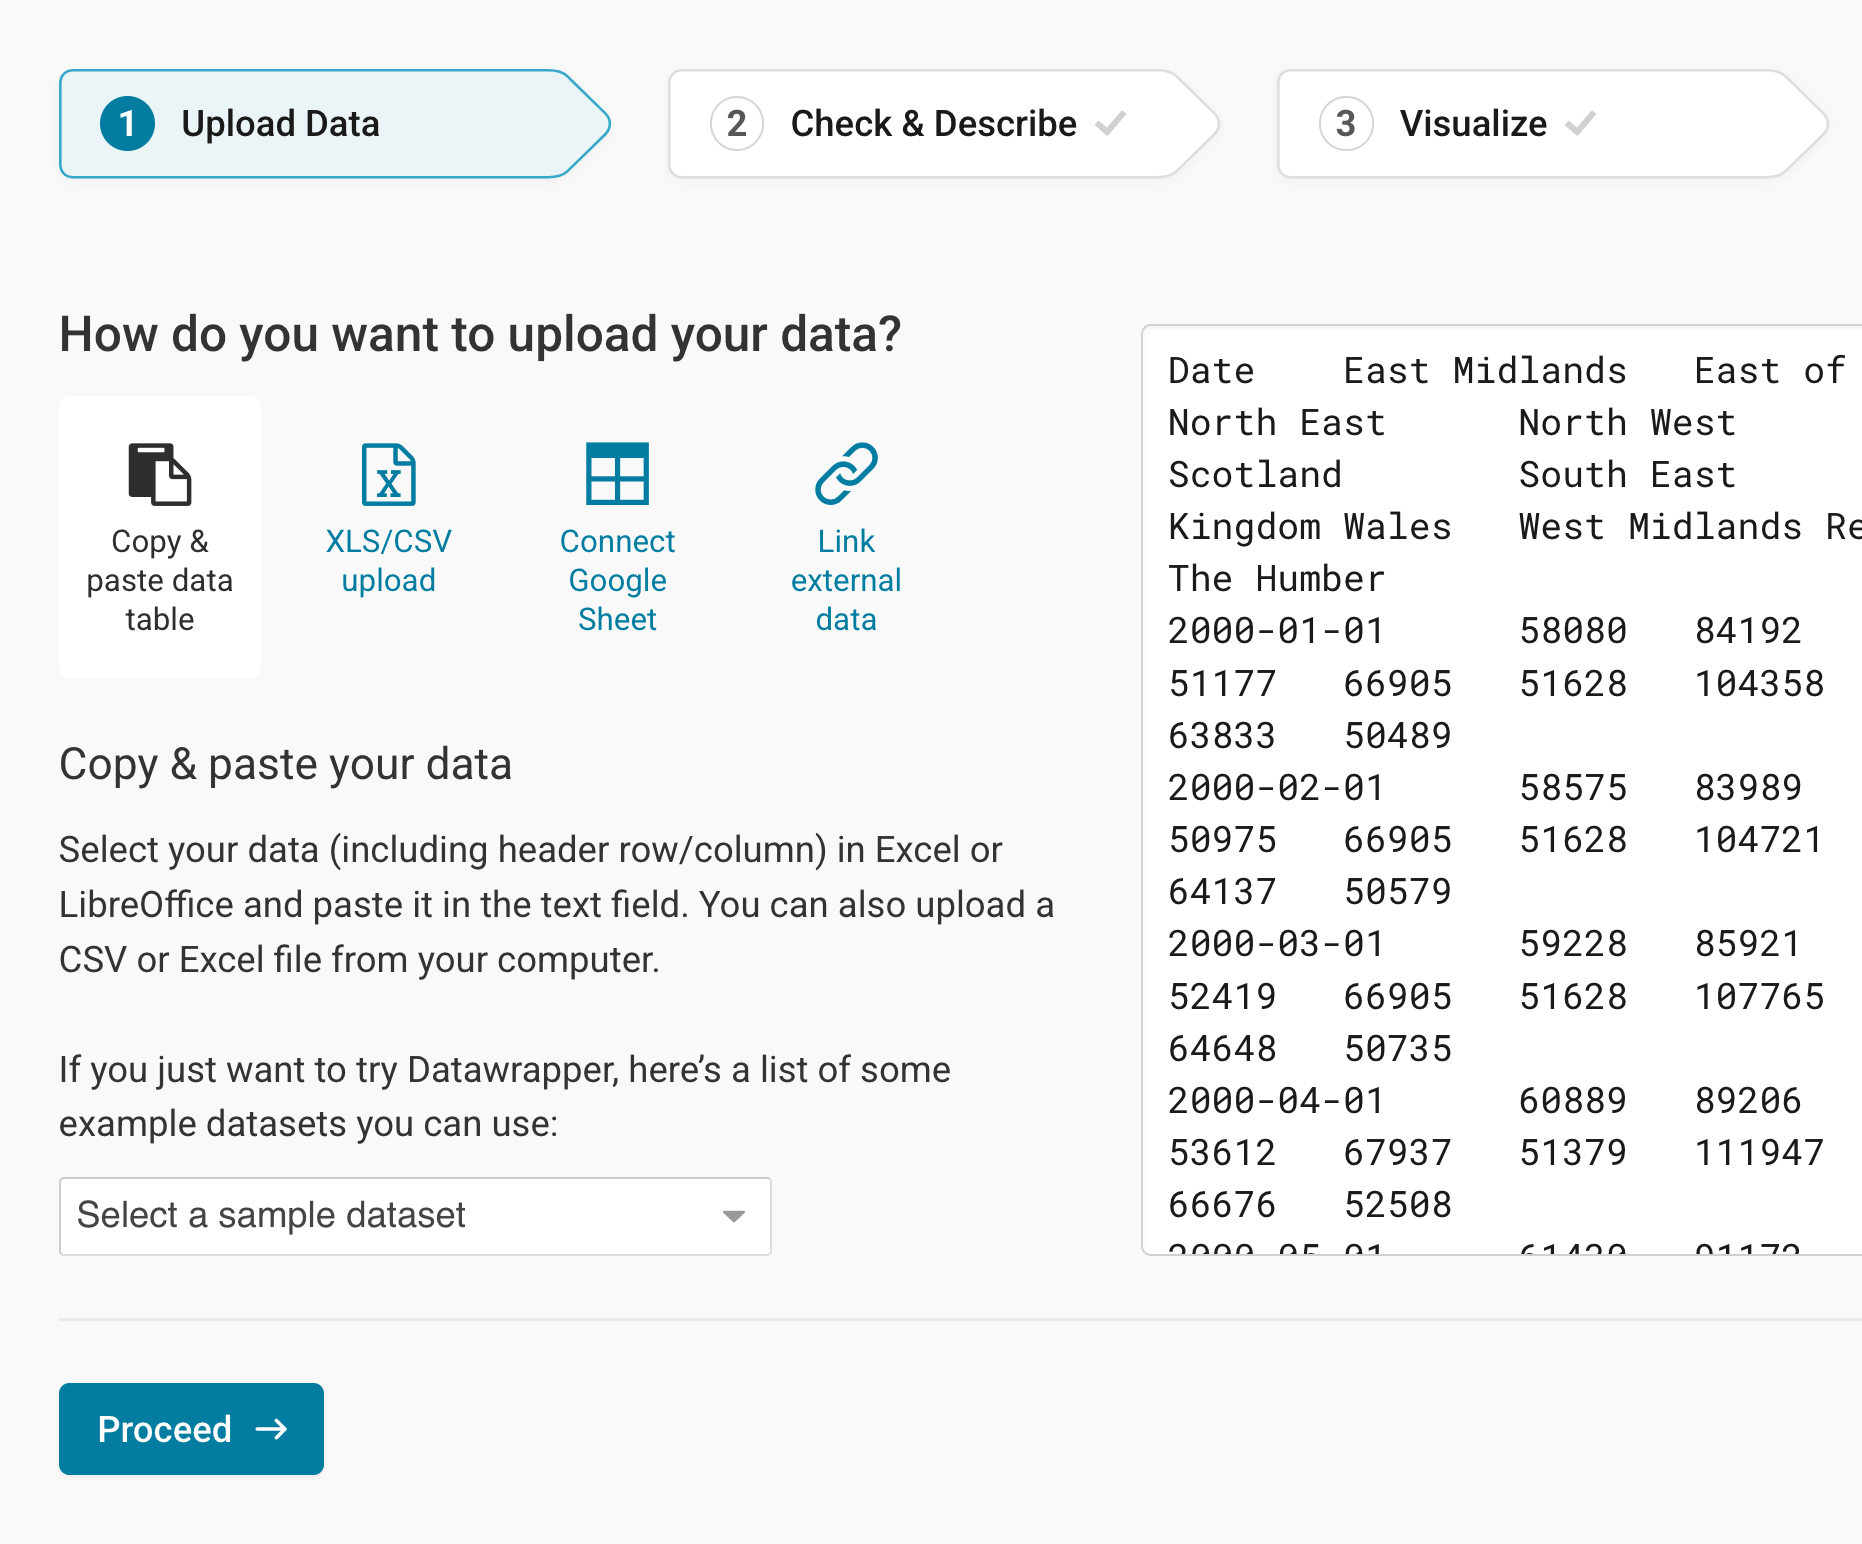
The data looks a bit chaotic in there, so let's quickly move on by clicking on Proceed in the lower right:
Checking data and units
In step 2: Check & Describe, you see that Datawrapper puts your data into a neat table:
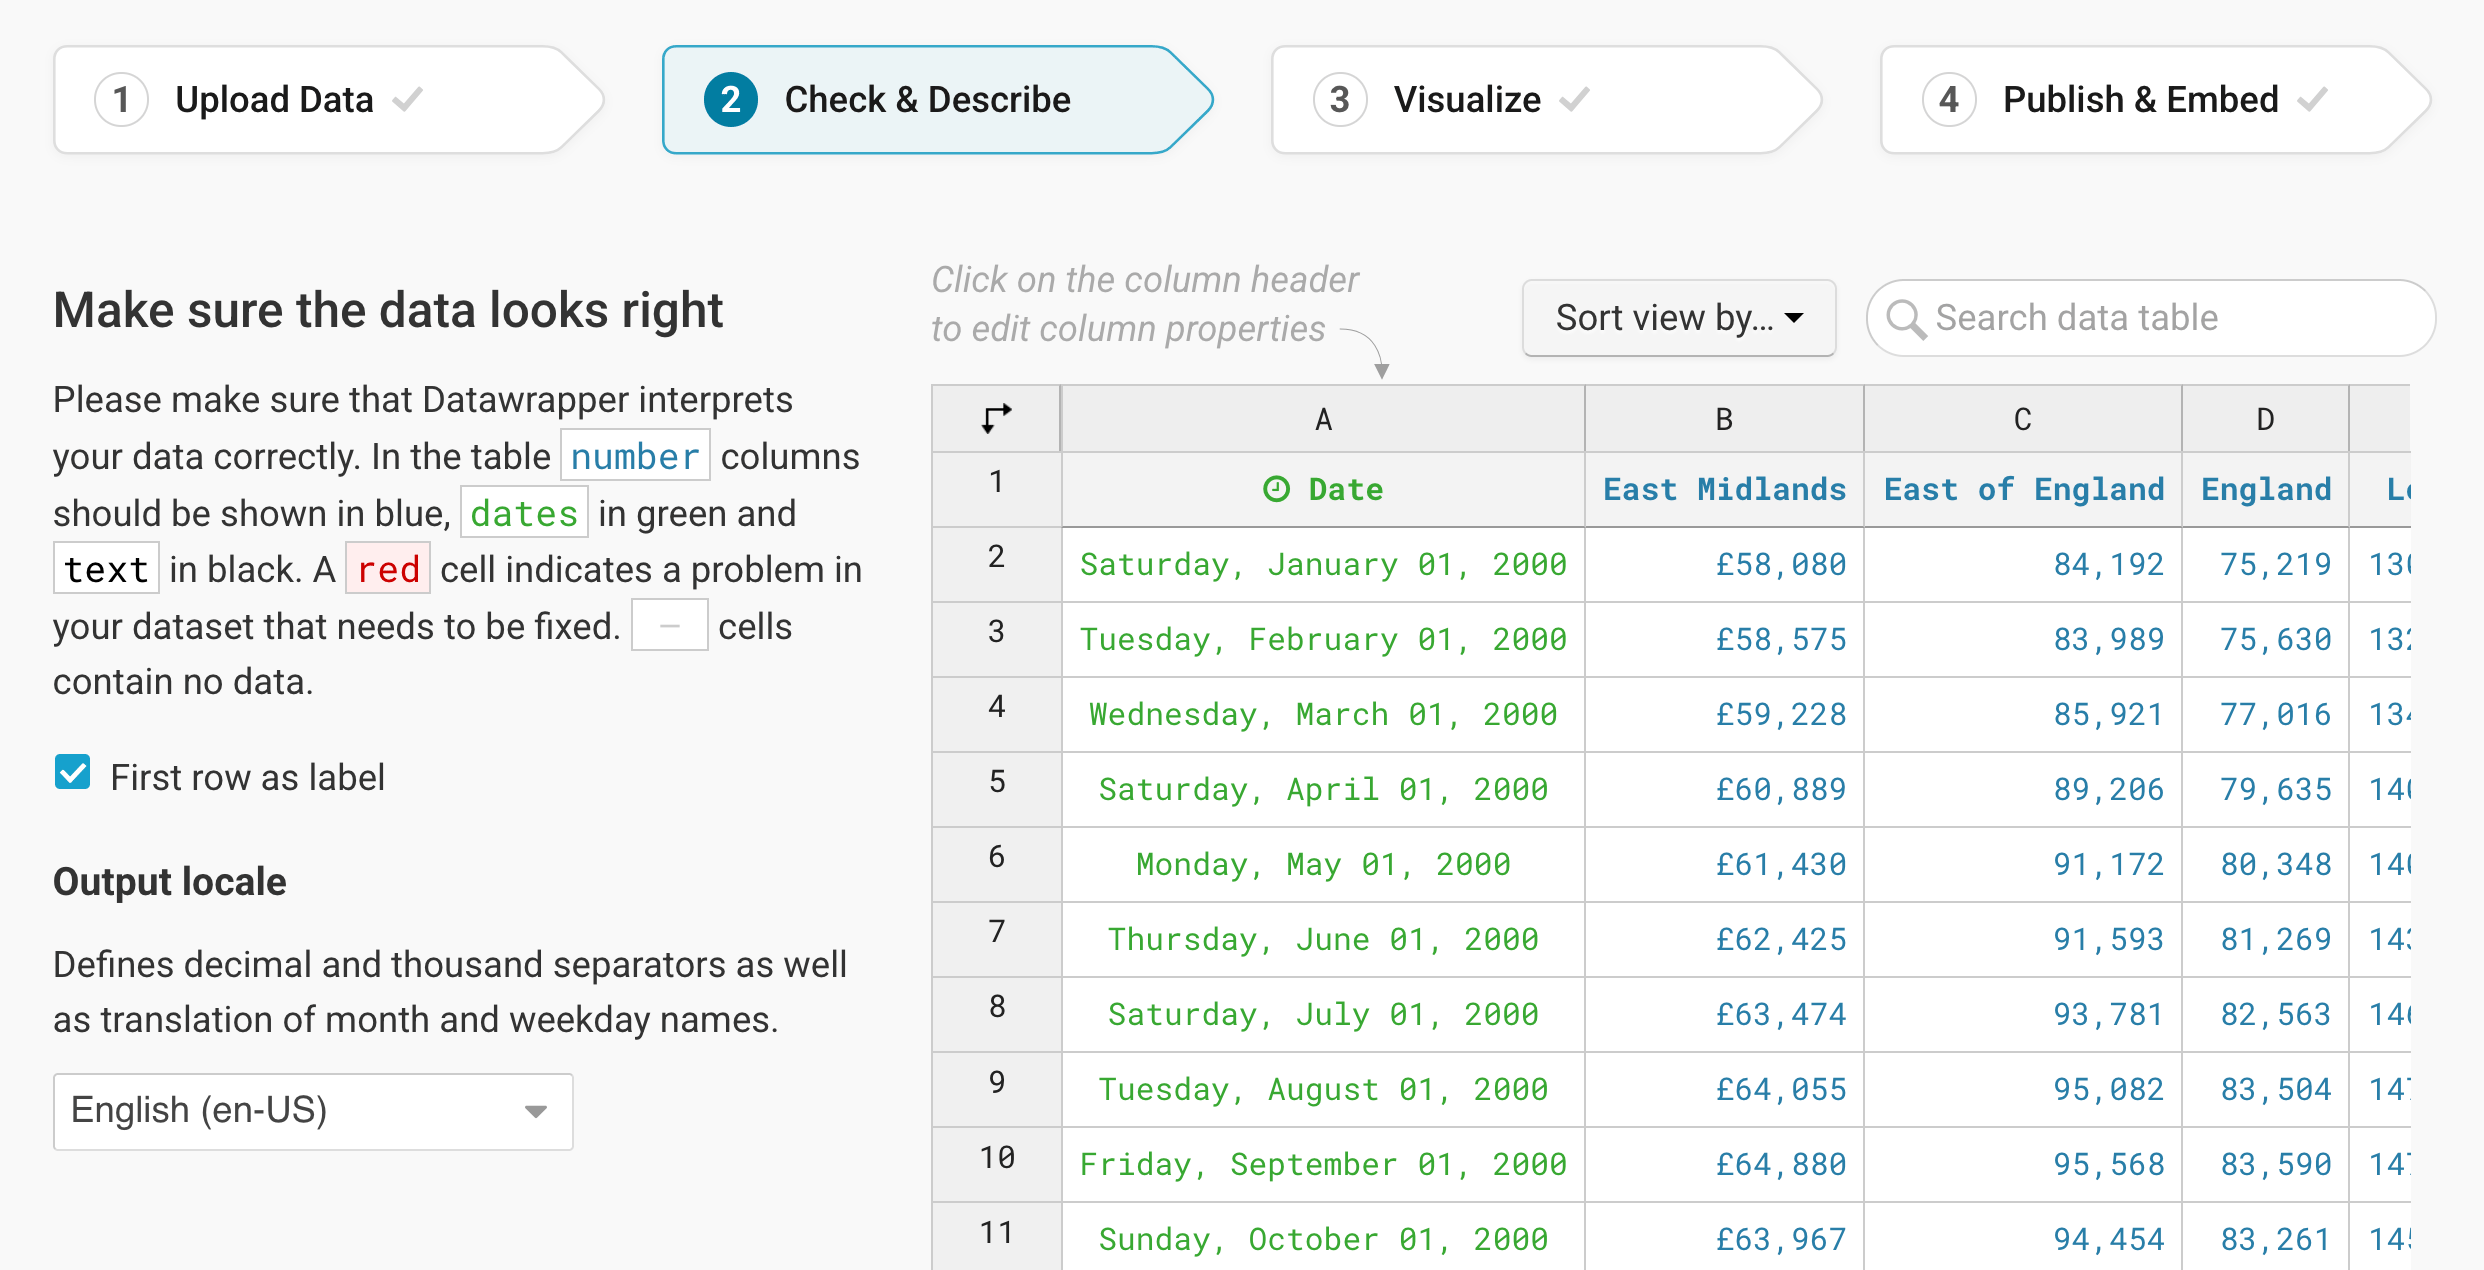
As explained in the upper left of step 2, Datawrapper automatically detects data formats (number, dates, or text) and empty cells. The first column is green, which tells you that Datawrapper correctly identified the dates as dates. The rest of the columns are blue and right-aligned, meaning Datawrapper recognized them as numbers.
You can always change the data format by clicking on the table header and selecting another one.
To add a unit (like km/h, kg, inch, $, etc.) to your numbers, click on a column header and then add the unit of your choice to the Prepend/append options on the left. You can learn more about adding units to numbers here.
For now, that looks good, so let's click on step 3: Visualize, to see your data visualized:
Choosing a multiple lines chart
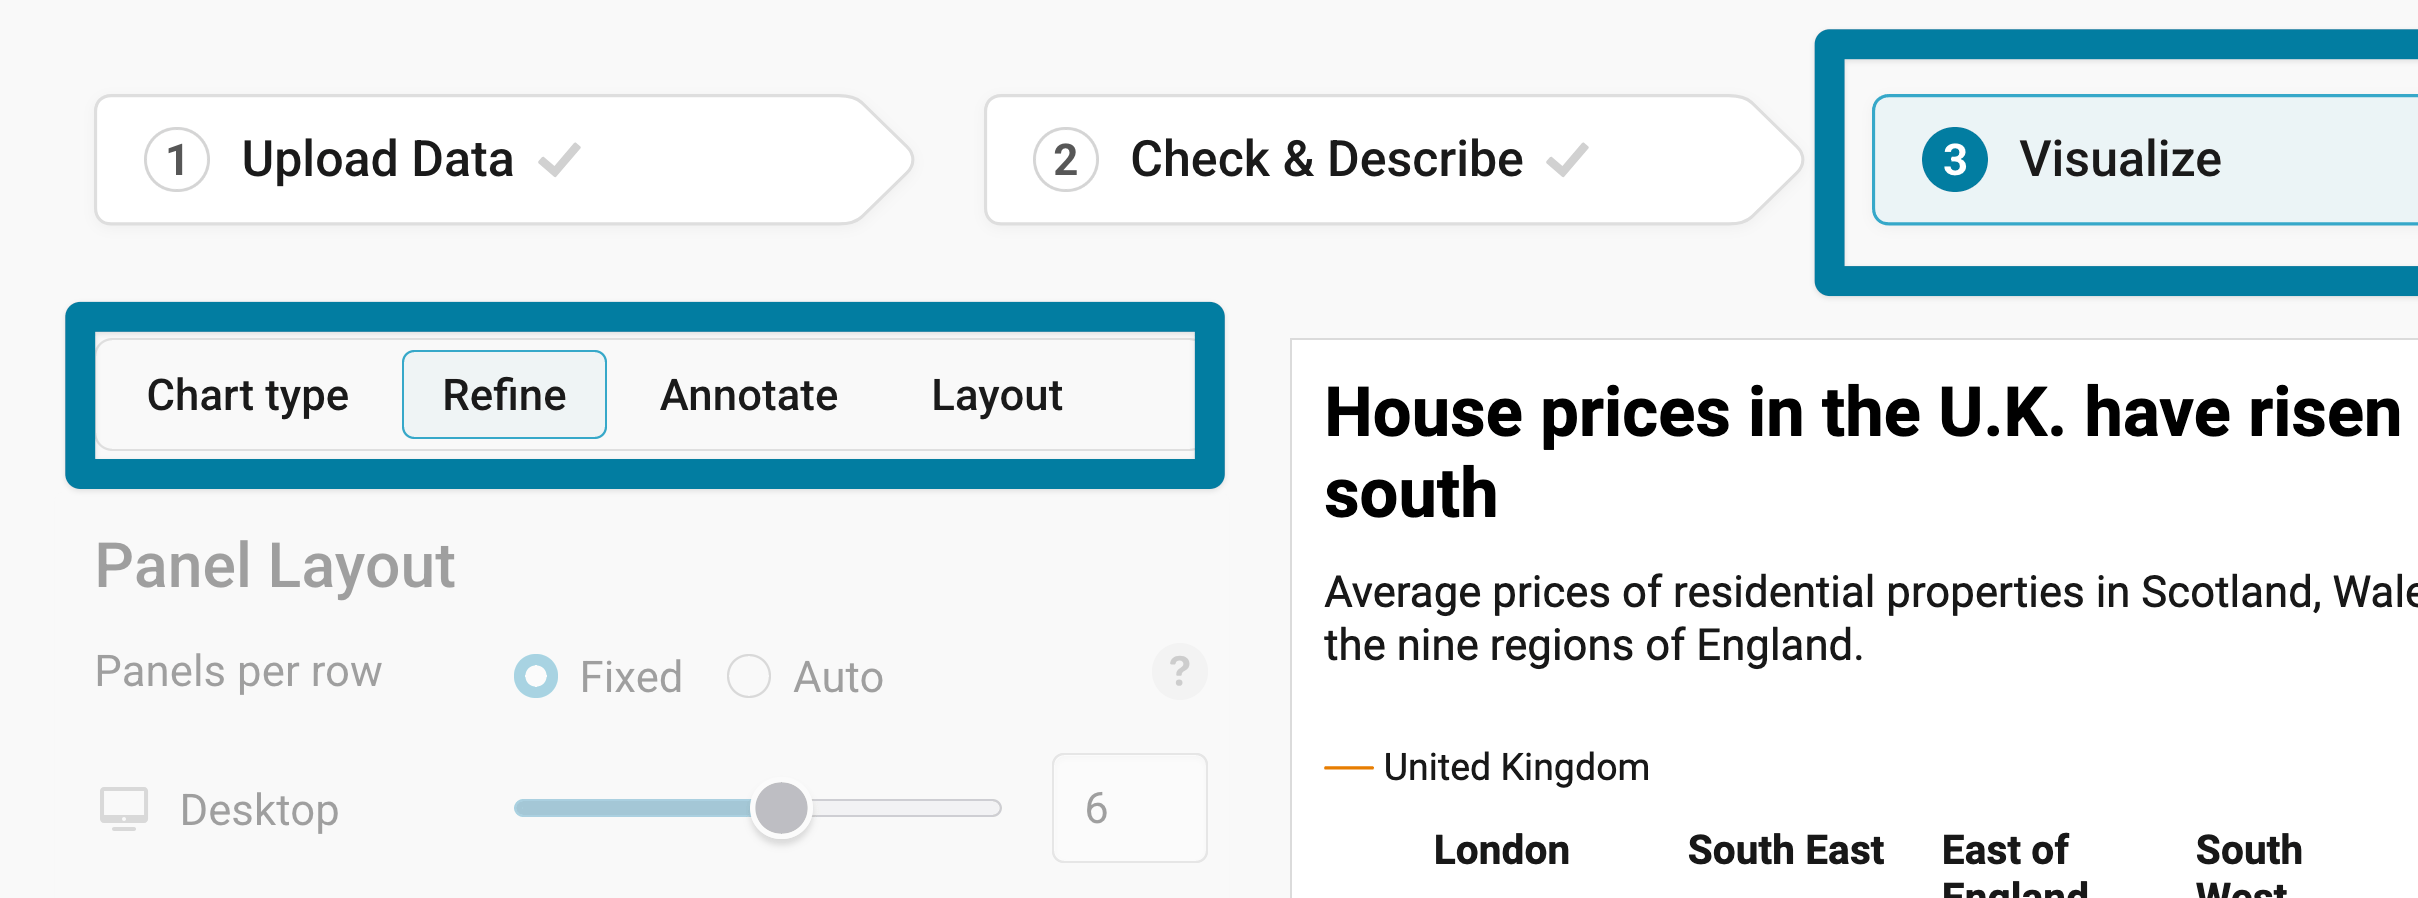
In step 3: Visualize, Datawrapper will always show you your data as a line chart. Click on any of the other chart types to see your data visualized differently. To create a small multiple line chart, make sure to click on Multiple Lines:
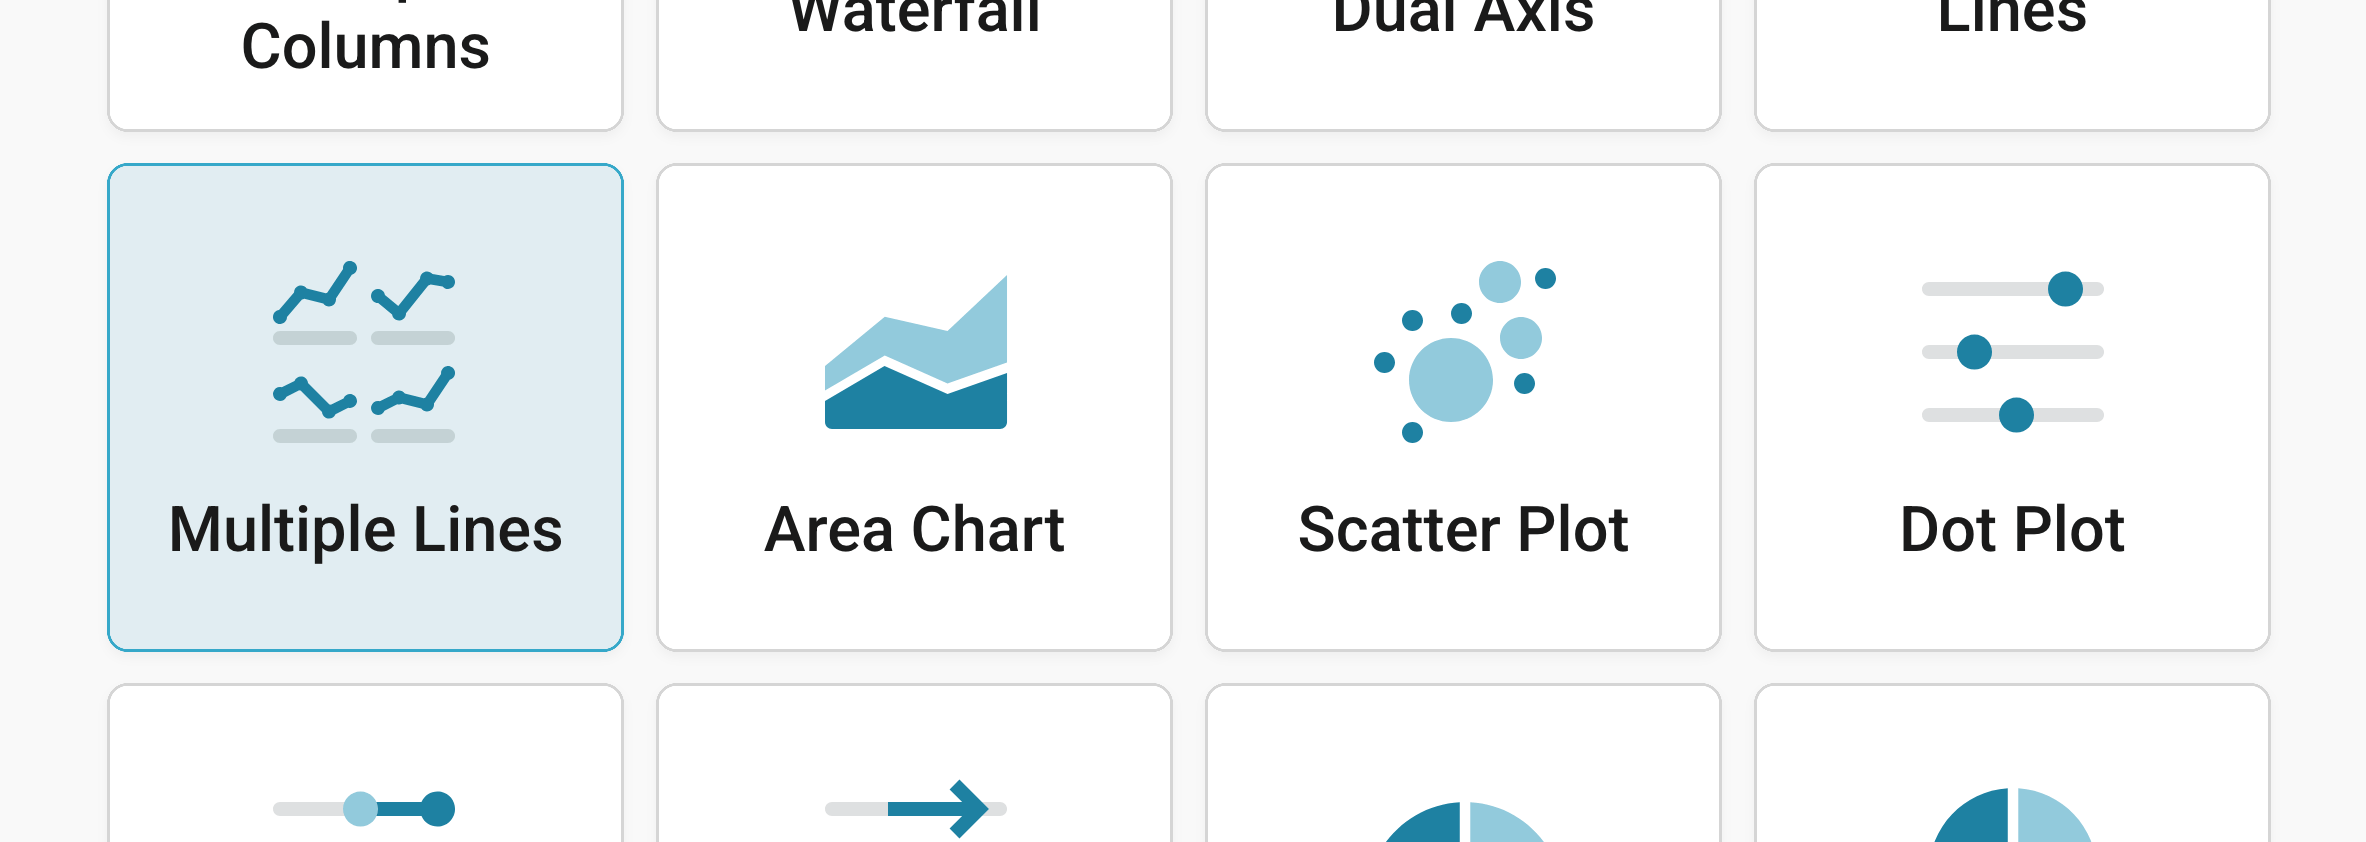
Congratulations! You've successfully created a small multiple line chart!
Besides Chart type, you'll notice three more tabs in this step: Refine, Annotate, and Layout.
Resizing
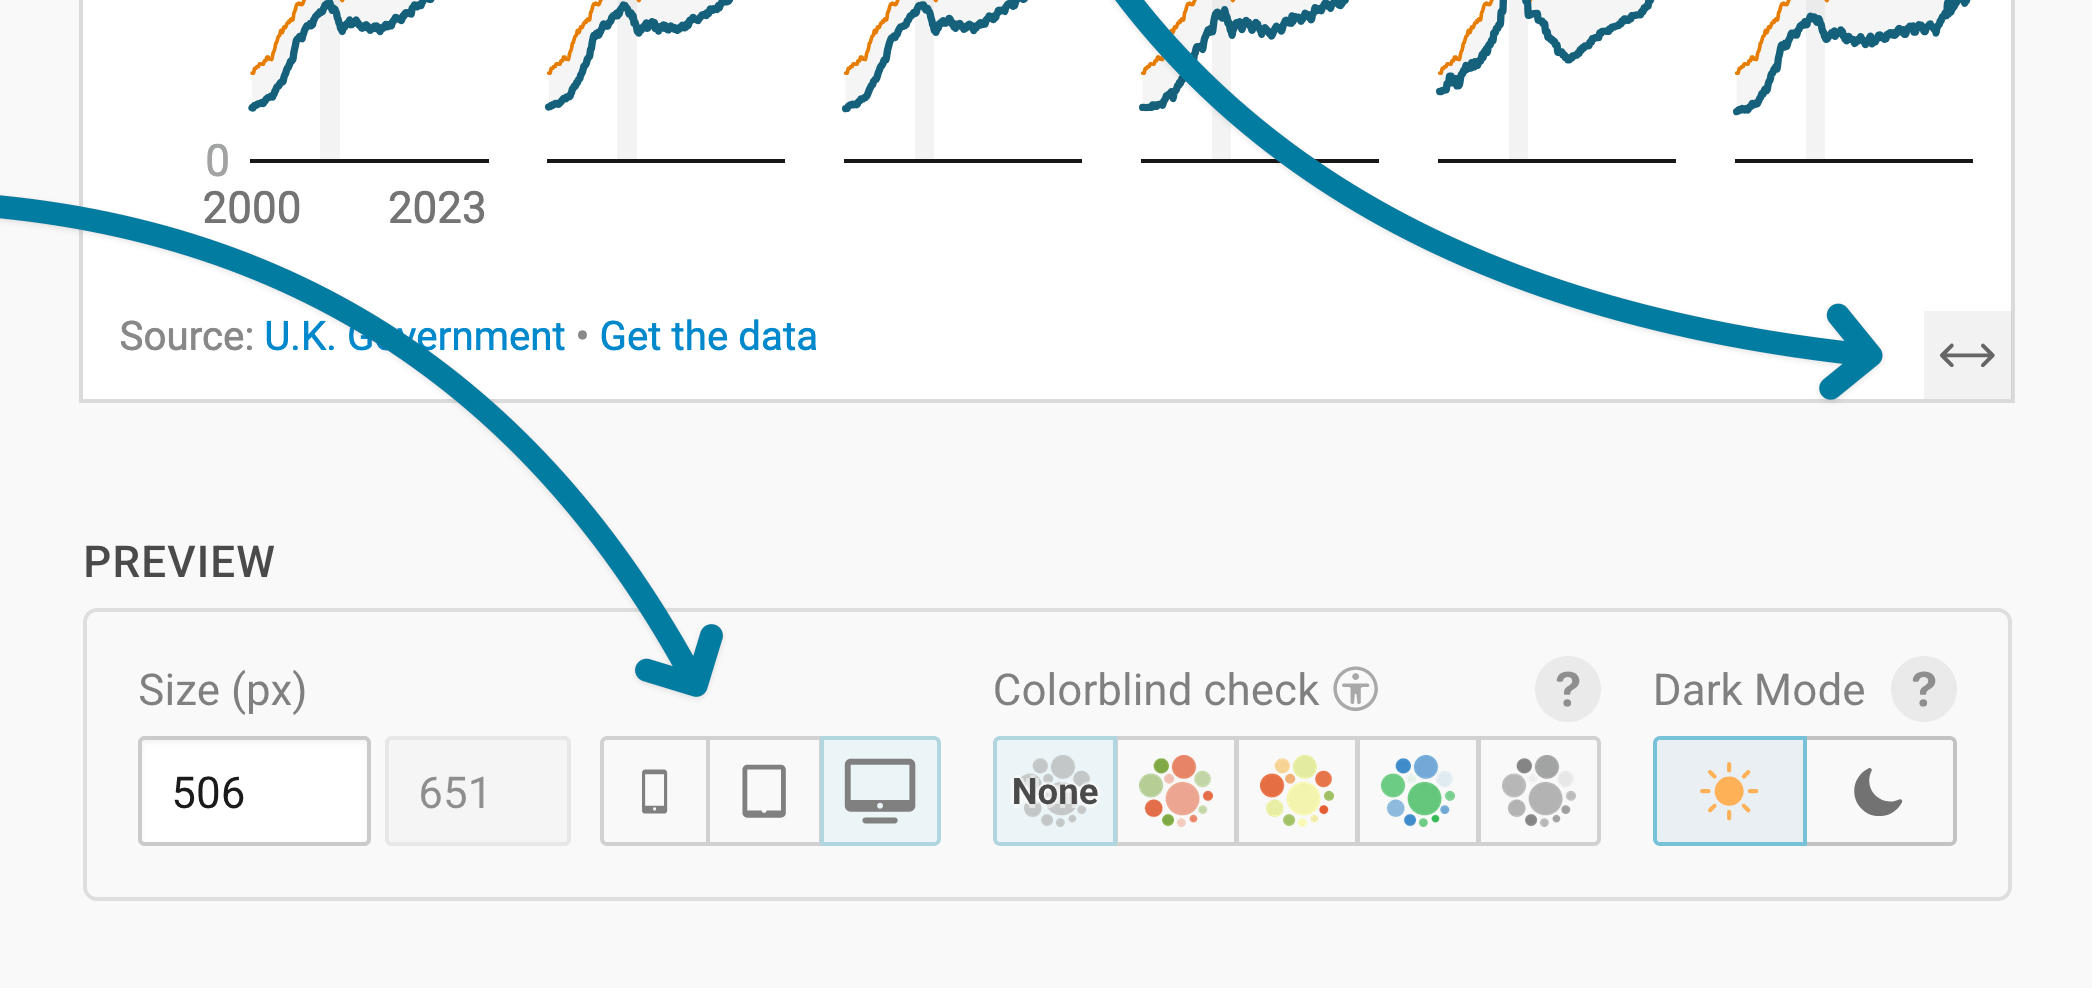
In any tab of step 3: Visualize, you can click, hold, and drag the arrow in the lower right corner to scale the chart window or manually determine the dimension of the chart by entering values in the boxes below the chart (Size).
We recommend checking what the chart looks like on different screen sizes multiple times while designing it, by clicking on the little icons (mobile, tablet, and computer) below the chart.
Learn more about changing the width and height of your chart in this article.
Refining your chart
Let's continue with the Refine tab. Here, we see six sections: Panel layout, Horizontal axis, Vertical axis, Lines, Area fill, and Tooltips.
Changing the panel layout
Panels are the "mini line charts" of your small multiple line chart. Each panel shows (at least) one line and a panel title. In the first section, Panel Layout, you can decide how big each panel should be and in which order they should appear:
Panels per row: Here you can control the number of columns of your chart for both desktop and mobile readers. You have two options:
Fixed is the default. It lets you choose the exact number of panels for mobile and for desktop readers.
For example: You can decide that your reader should see five panels when the chart is wider than 500px ("desktop"), and three panels if the chart is narrower. Then:
- When your chart is 300px wide, it shows 3 columns
- When your chart is 500px wide, it shows 5 columns
- When your chart is 900px wide, it also shows 5 columns, etc.
Auto lets you choose one minimum size for all panels.
For example: If you set the panel size to 200px, then
- When your chart is 300px wide, it shows 1 column
- When your chart is 500px wide, it shows 2 columns
- When your chart is 900px wide, it shows 4 columns, etc.
Panel height sets the height of each panel/row of panels. You have two options again:
Fixed: The height of the panel is always the same. For example, if you choose a fixed panel height of 140px, your panels will always be exactly 140px tall, no matter if they are 200px or 300px wide.
Based on width: The height of your panels is based on their width. The wider the panel, the taller your panel. For example, if you choose 100%, then the panel will always be square. If you choose 200%, the panel will always be twice as tall as it is wide.
Sort panels lets you decide in which order your panels should be. You have the following options:
- Start sorts by the first value in each panel.
- End sorts by last value.
- Difference sorts by absolute difference between first and last values.
- % change sorts by relative difference between first and last values.
- Range sorts by absolute difference between highest and lowest values (min and max value).
- Title sorts by panel title alphabetically.
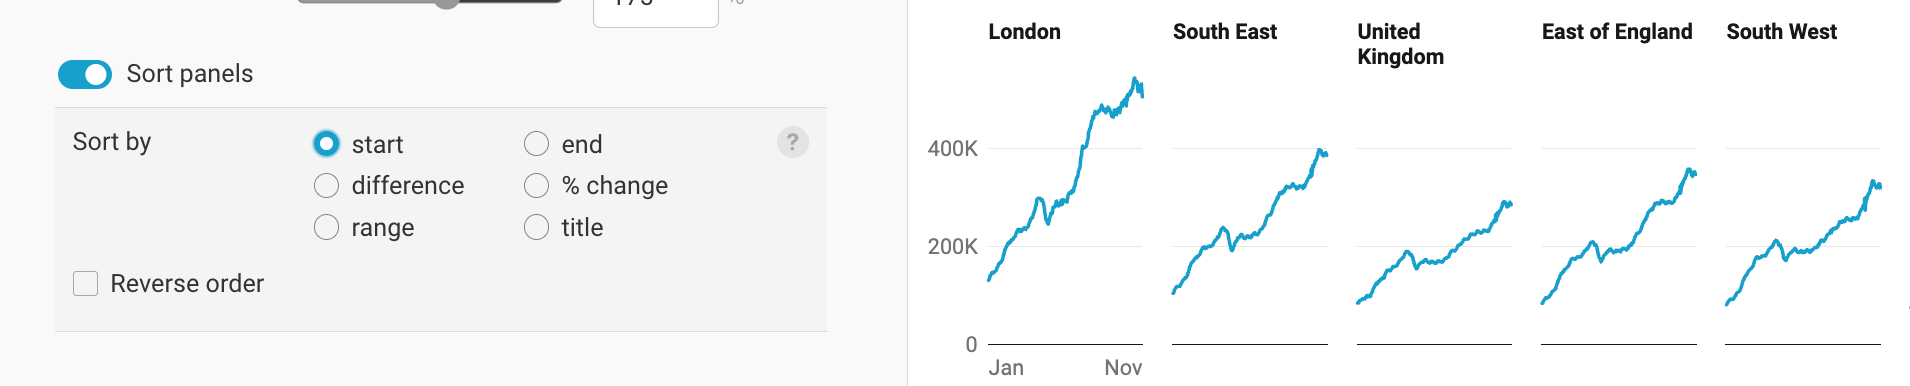
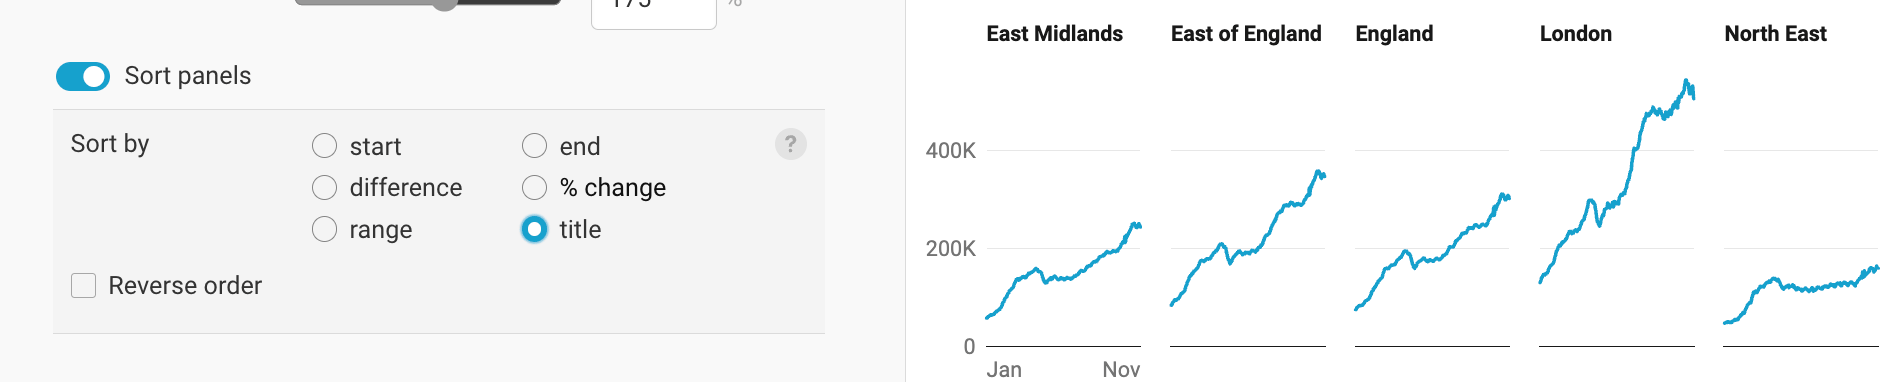
You can decide to reverse the order of the sort, to e.g. sort the panels by highest to lowest end value.
Changing the horizontal axis
This section lets you change your x-axis, including labels and grid lines:
Select column: By default, your first column is selected – which, in most cases, will be your date/time column. If that's not the case, you can choose another one.
Custom range: By default, the horizontal axis spans from the earliest to the latest date – but you can decide to cut off data points or extend your axis here. For example, you can decide to only show data points between 2005 and 2010, even if the data goes from 2000 to 2023.
Custom ticks: By default, the earliest and latest date/time are labeled. If you want to label more than these two dates, you can add dates here: e.g. "2000, 2010, 2020". Note that Datawrapper makes sure that labels don't overlap, so not all labels will show up if space doesn't permit.
Tick format: Here you can choose how your labels should appear: Should they include months? Only show days? Learn which date formats are available for your data in this Docs article.
Grid lines: By default, no grid lines are shown. You can decide to show them, or to only show ticks above the grid labels.
Display grid labels in all panels: By default, the grid labels (e.g. your years) are only shown in panels of the first column. You can decide to show them in all panels by turning this setting on.
Changing the vertical axis
This section lets you change your y-axis, including labels and grid lines.
Use independent scales for each panel: By default, this is turned off – so Datawrapper checks for the lowest and highest data point in all your data to determine the range for your vertical axis for all panels based on that. For data that's vastly different in magnitude (e.g. category A has data between 0 and 10 and category B has data between 0 and 1000), you can decide that Datawrapper should have a different range for each panel.
If you do so, the following happens:
- You can't show the data on a logarithmic scale anymore.
- You can't set custom ranges or custom ticks anymore. Grid labels will always be shown when you use independent scales, so that your readers can understand that the vertical axes are not the same for each panel.
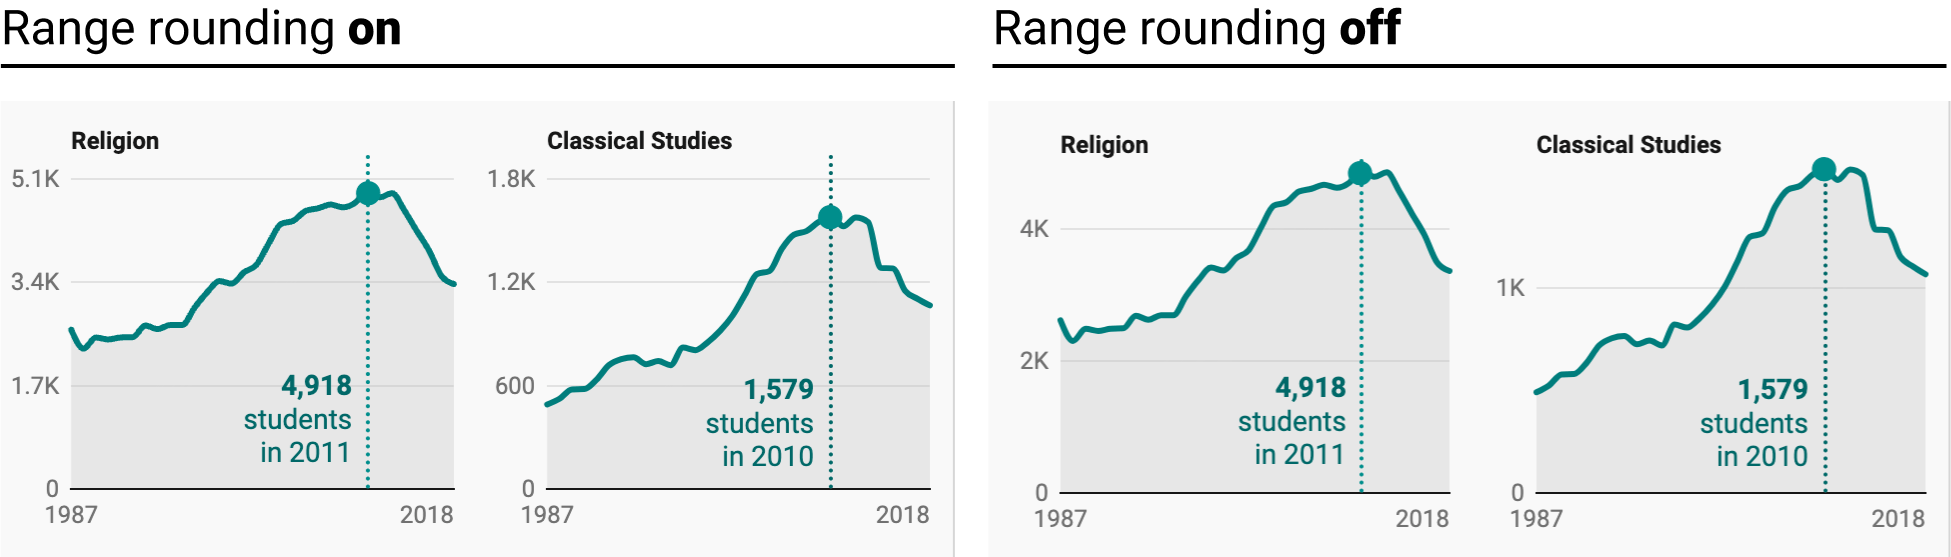
- You get a new option: Range rounding. If range rounding is turned on, all grid lines sit at the same height, but the label values are not rounded as much as possible (e.g. "5.1K" instead of "5K"). If range rounding is turned off, the label values are rounded, but the grid lines are at different heights:
Let's continue with the settings that are possible when Use independent scales for each panel is turned off:
Scale type: linear/logarithmic: By default, your vertical axis is scaled in a linear way – but if you have outliers in your values, a logarithmic scale can make sense. Note that this isn't possible when any of your values is zero. Learn more about log scales on our blog.
Custom range: By default, the vertical axis spans from the lowest to the highest value – although Datawrapper might extend the chart to the zero baseline if it's close. Using the custom range option, you can extend or cut off the y-axis at the top or bottom. For example, you can type in 50000 as the min value and 800000 (or 8e5) as the max value to cut off the values below 50,000, and to extend the vertical axis to 800,000.
Custom ticks: By default, Datawrapper tries to find a good-looking number of grid lines it then labels. You can change that by adding your own values, separated by a comma. Note that values will only be shown if they a) don't overlap and b) are within the custom range.
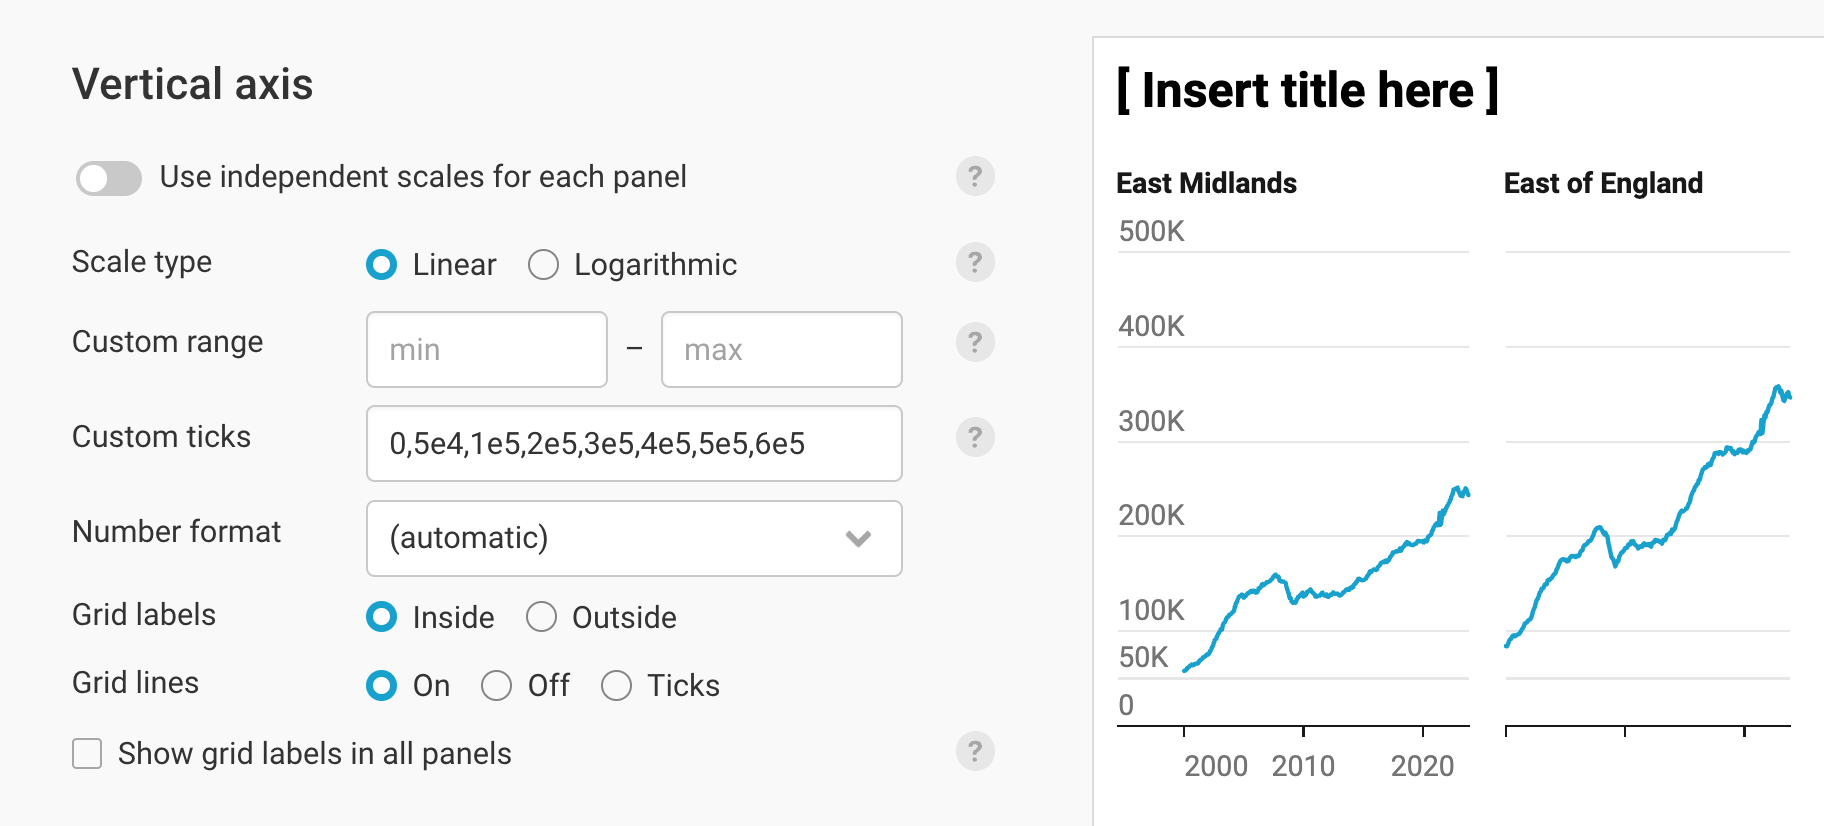
Number format: Choose how your numbers should appear (e.g. 200,000 or 200K or 200,000.0%). Learn about the available options in this Docs article.
Grid labels: You can decide to display your grid labels outside (= to the left, in left-to-right charts) of the panels – or inside. The latter option uses less space, but can overlap your lines.
Grid lines: You can choose between showing the grid lines for the whole width of each panel (On), to not show them at all (Off), or to only show short tick marks. Note that Datawrapper automatically shows the grid labels in all panels when you choose to not show grid lines or to show ticks.
Show grid labels in all panels: By default, the grid labels are only shown in panels of the first column. You can decide to show them in all panels by turning this setting on. Note that this makes your panels narrower:
Styling the lines
This section lets you change the style of your lines (color, dash, width), and if they show up on both mobile and desktop, or only on one of them:
Base color changes the color of all lines. That only works as long as you didn't customize lines in the list below.
Interpolation lets you control how the lines are connected between the data points. To read more about when to choose which interpolation, visit or blog post.

If your uploaded data is missing some data points, you'll see the option to Connect all points below the Interpolation options. Learn more about this feature here.
Show line symbols lets you add little circles/triangles/squares etc. to your lines to highlight each data point, or just the beginning and/or end of each line.
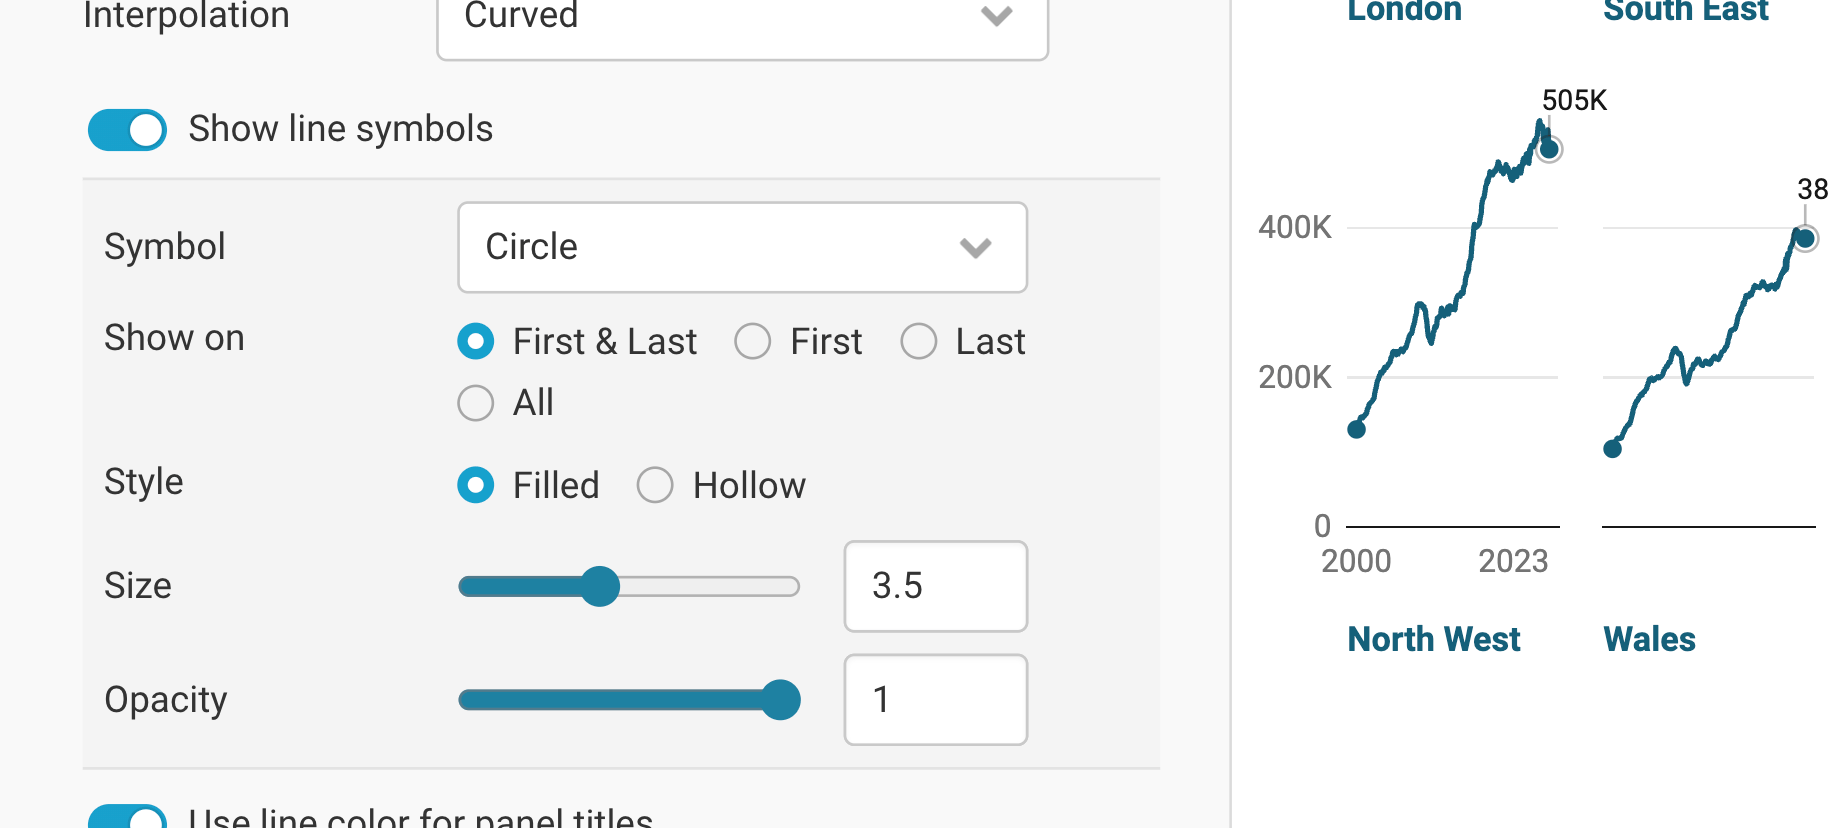
You can decide on
- the kind of symbol (circle, square, diamond, triangle, cross, hexagon, star, or wye)
- if the symbols should show up on the first and/or last, or on all data points. (Showing them on all data points only makes sense if you have few data points per line.)
- the style: filled ● or hollow ○
- the size (how big should the circles be?)
- and their opacity (how transparent should they be?)
Use line color for panel titles does exactly that: The line color (or a slightly darker option if the light color is too light) gets used for the title above the panel.
Below these settings, you see a list of all panels – meaning, every column that you can see in step 2: Check & Describe that isn't hidden will show up here. You can customize all, many, or individual lines by selecting them in the panel list. Let's see what's possible for each line:
- Panel title lets you change the name of your panel.
- Show on lets you choose if your panels should appear on both wider screens ("desktop", >500px), narrow screens ("mobile"), only one of them, or neither. Depending on what you choose, you'll see a symbol in the panel list itself. You can also click on the eye in the panel list to hide certain panels.
- Color, width, and dash let you choose the color, width, and dash of all selected lines.
Below these settings, you'll find something special: The option to repeat the line in all panels. If you turn this on, your selected line(s) will appear in all panels, and you can style that repeated line. You'll also see an indicator in the panel list:
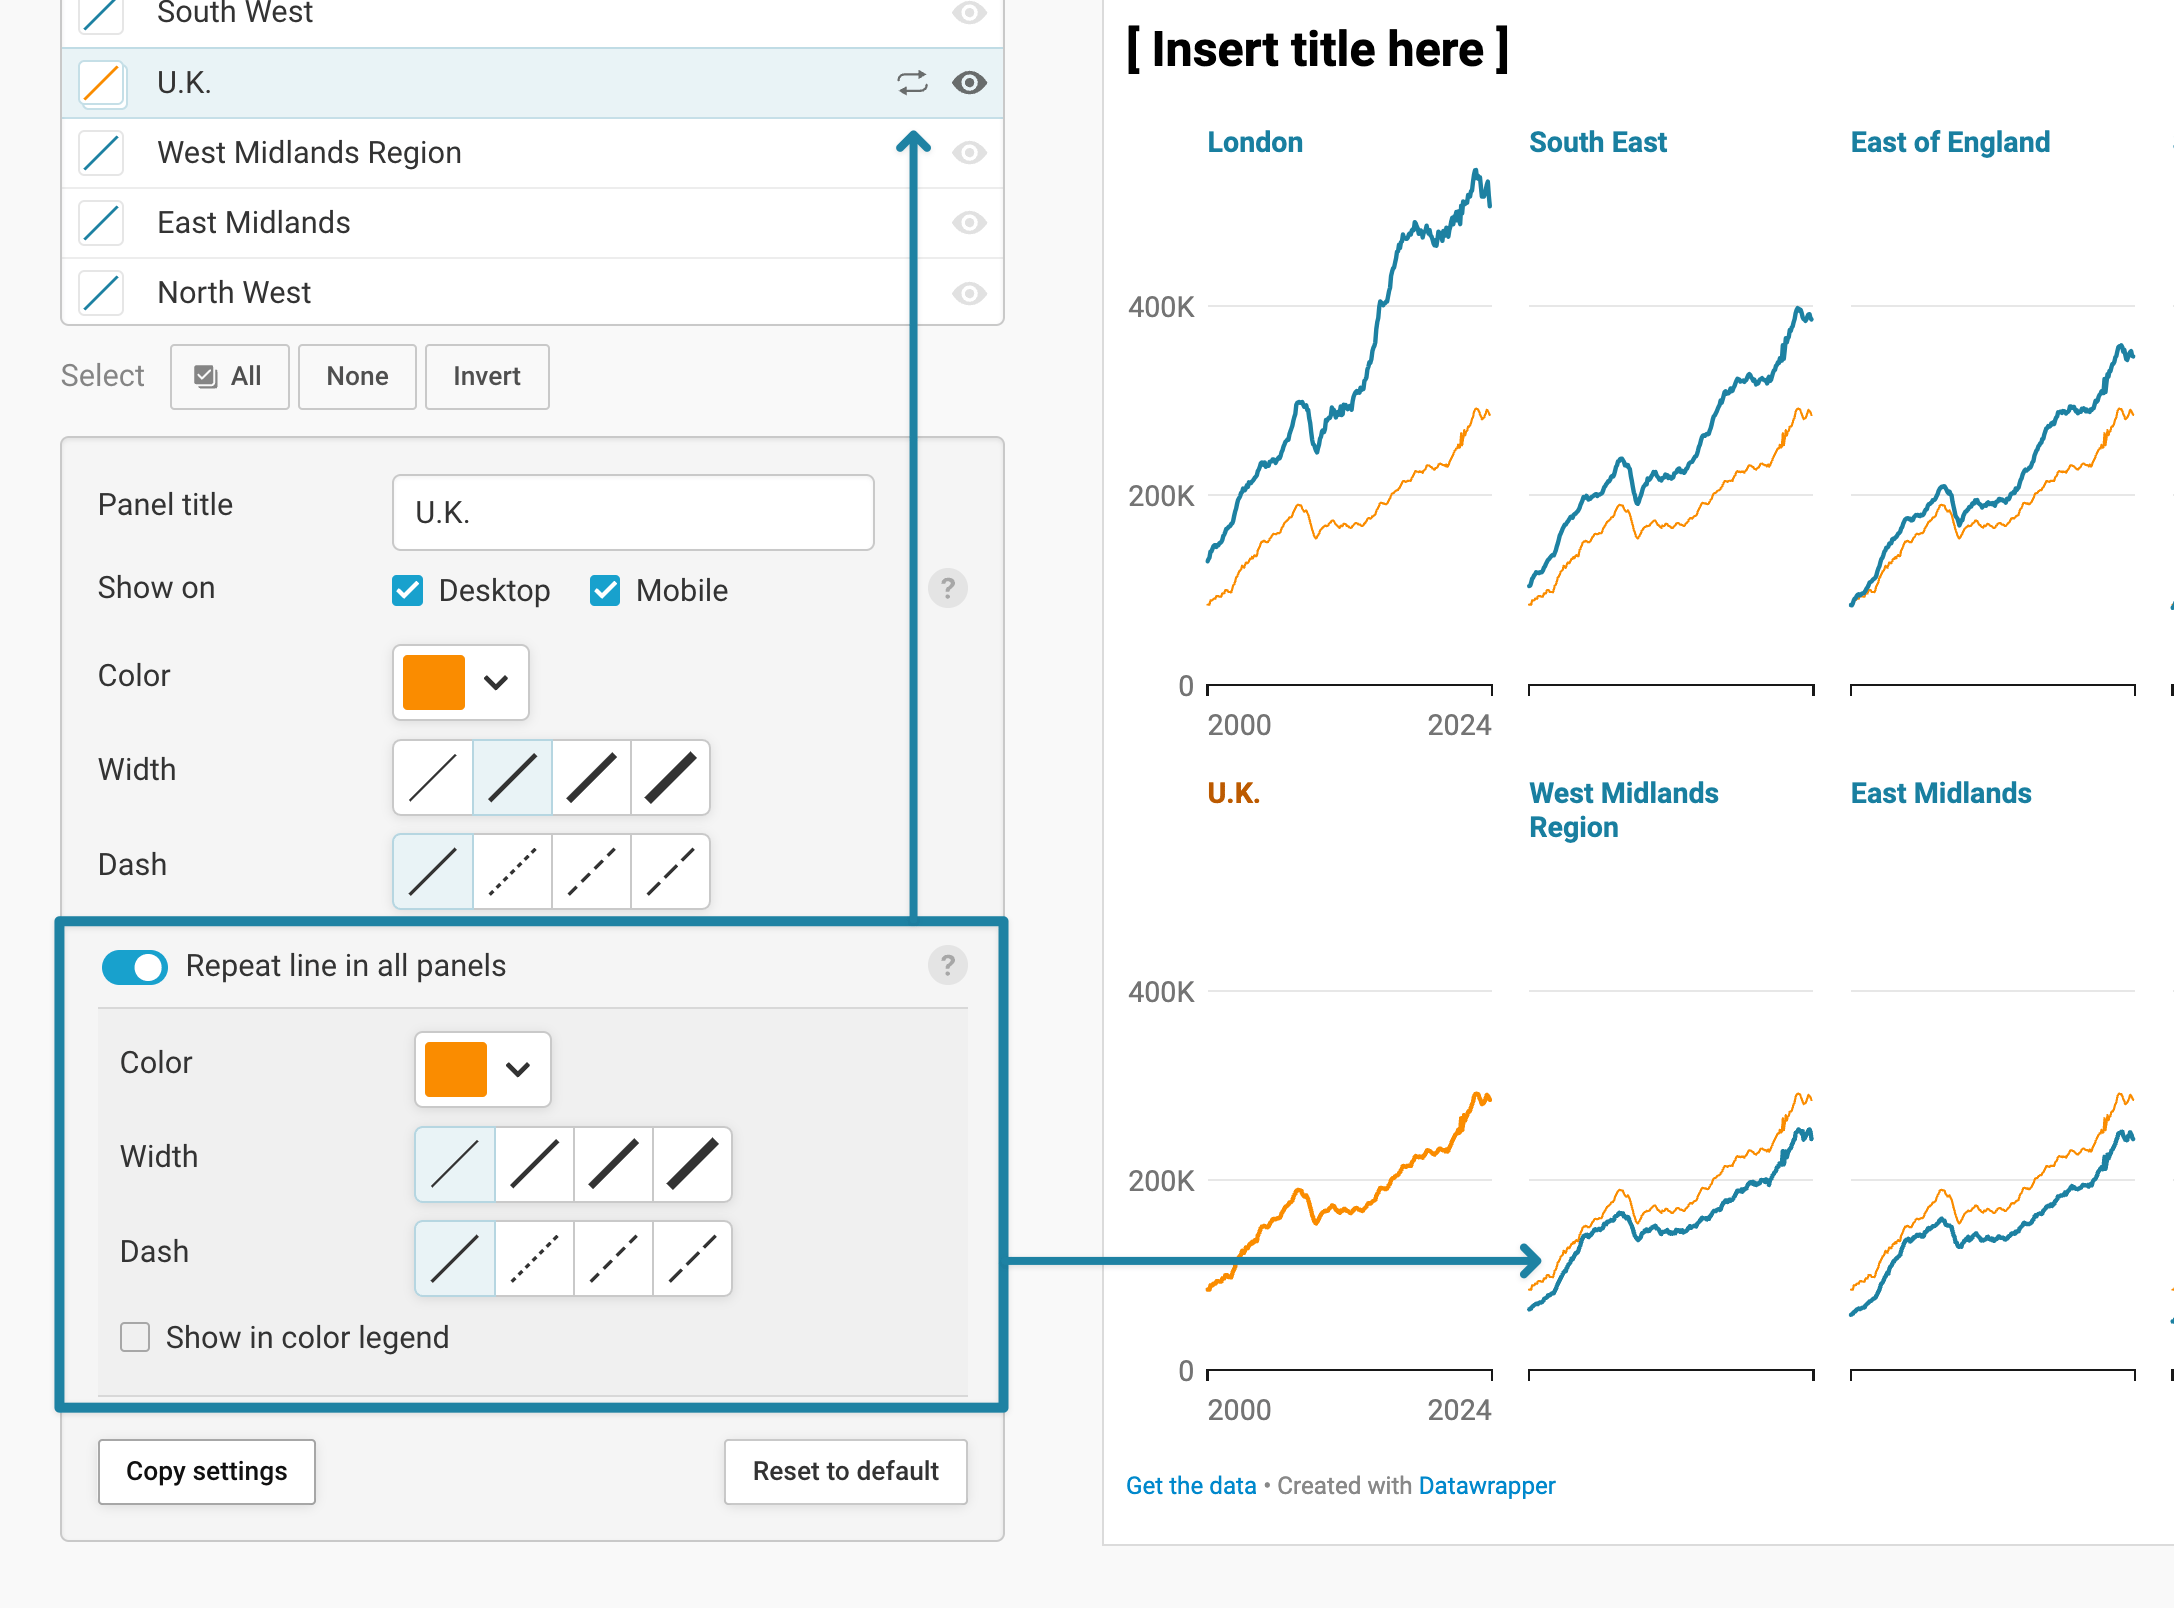
You can hide a panel in the panel list, but then decide to repeat the panel line in all panels. For example, in our house pricing chart, we want to let readers compare the prices of Wales, Scotland, Northern Ireland, and the English regions to the value for the whole of the United Kingdom. So we hide the U.K. line, but repeat it in all panels. We also decide to show the color in the color legend, so that our readers understand what that orange line is supposed to show:
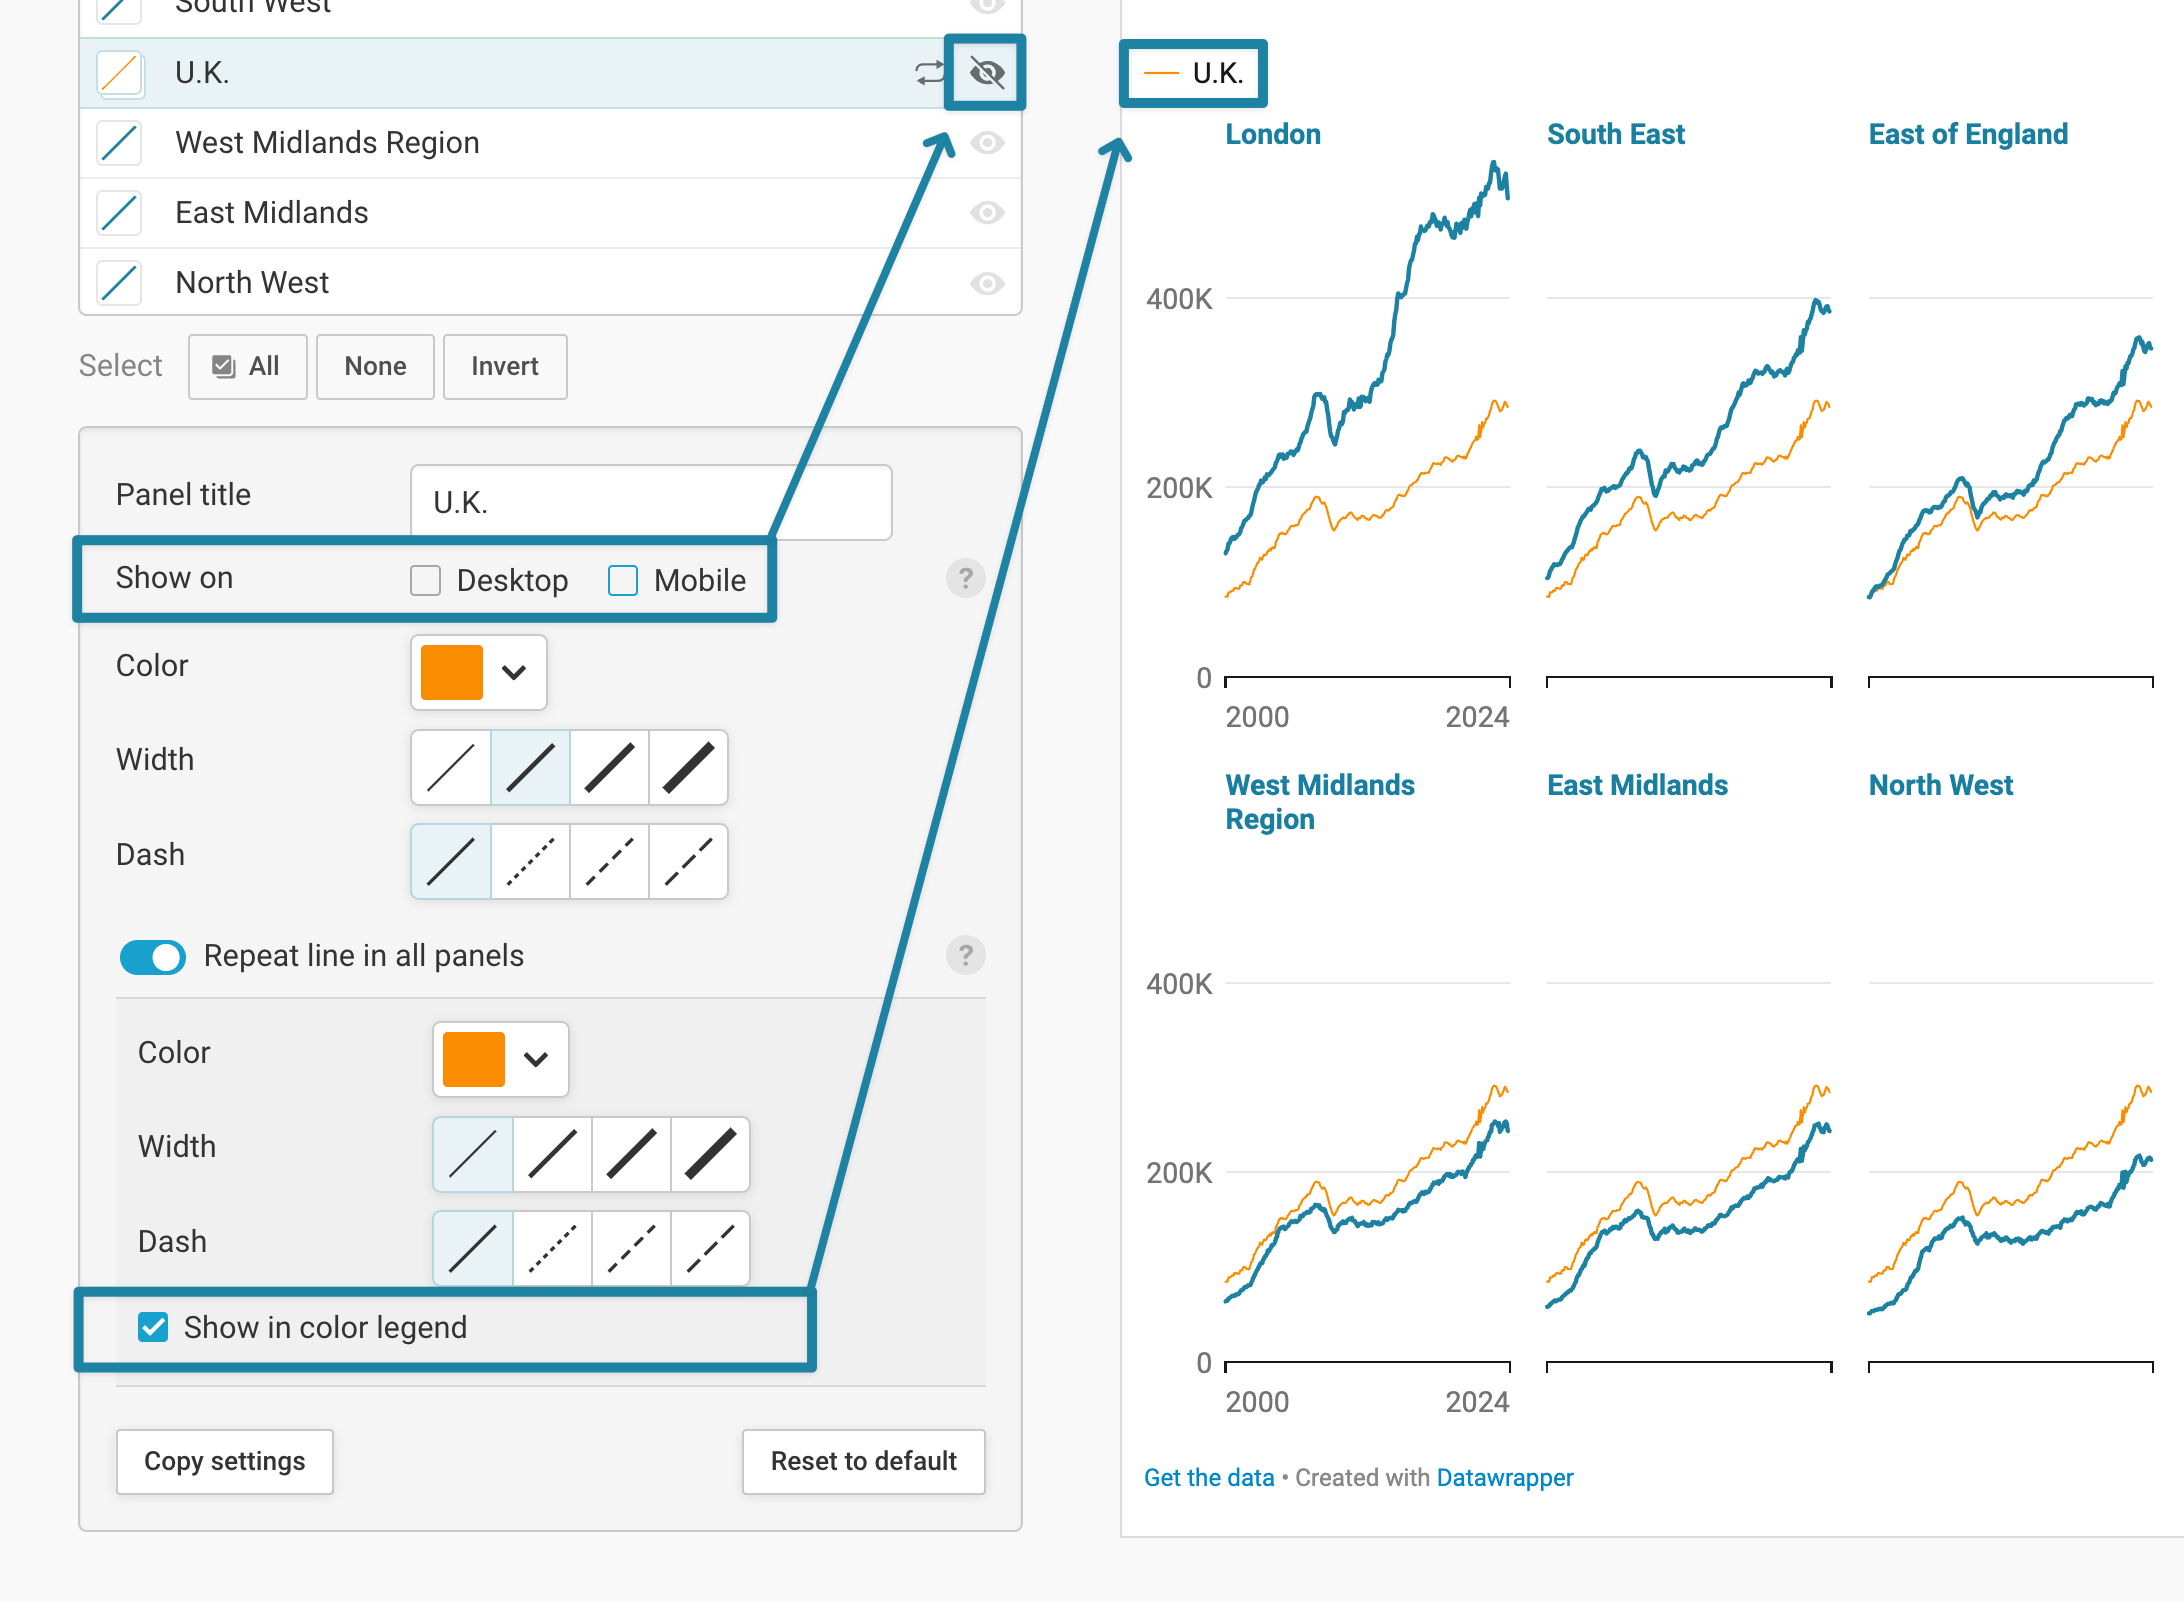
At the end of the settings for each line, you'll find the options to copy and paste settings. Click copy settings, then select at least one other line in the panel list and click on paste settings to give your newly selected lines the same style. As you can see in the following video, this also copies your settings for repeated lines:
You can customize lines further, even after pasting a setting.
If you're not happy with the result, you can always click on Reset to default.
Adding area fills
You can decide to fill the area between the panel line and the zero baseline. Once you've decided to repeat any lines (see above), you can also fill the area between that repeated line and the panel line. Once you've decided on a fill, you can also give that area fill a color and change its opacity with the slider:
Changing the tooltips
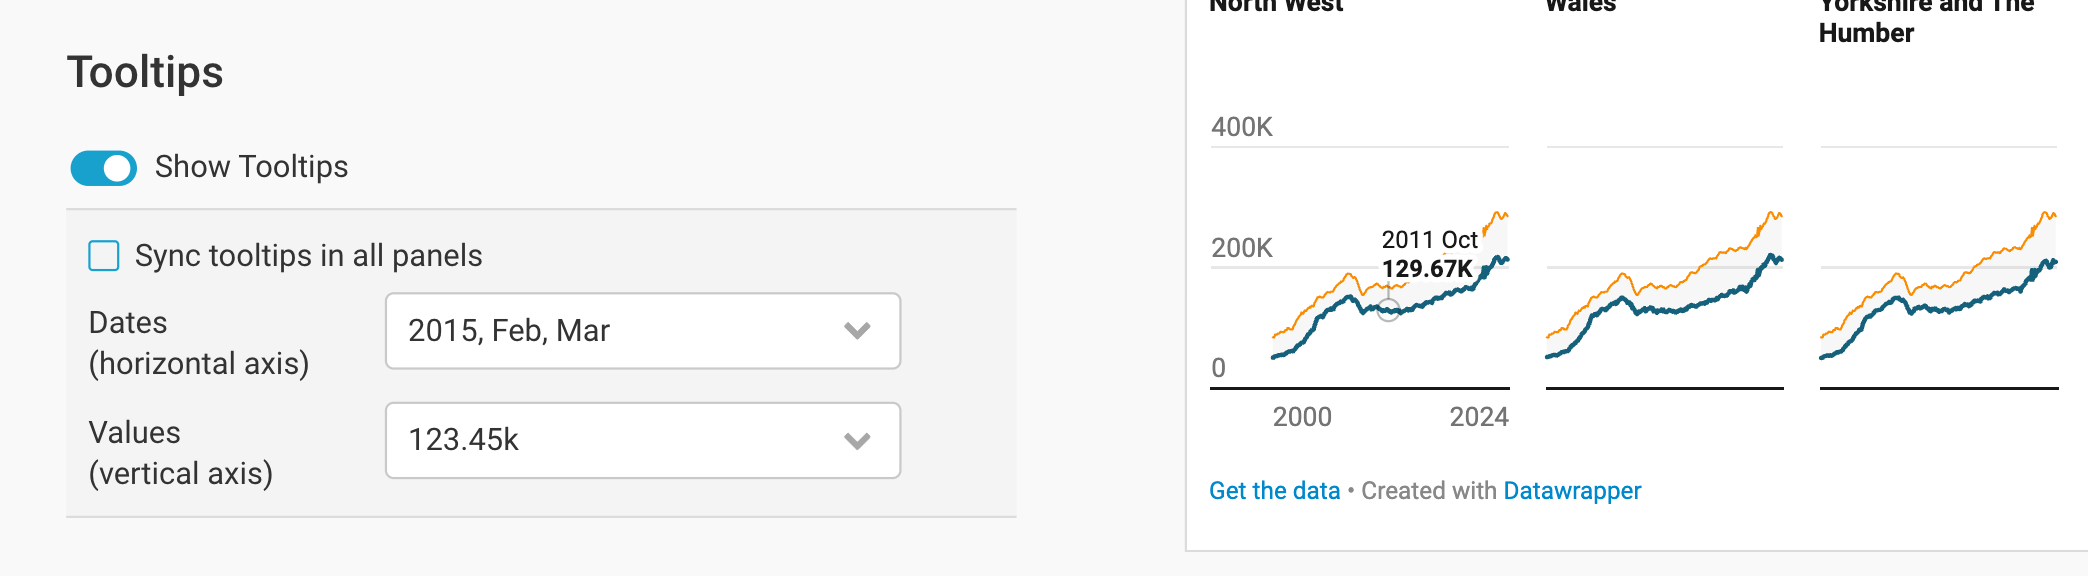
By default, tooltips are turned on and synced in all panels. That means that if you hover over the line in one panel, tooltips will also appear in every other panel for the same date/time. You can turn that off by deselecting Sync tooltips in all panels. You can also decide to give your tooltip a different date format and number format:
After working through all these options in the Refine tab, let's move on to the next tab: Annotate.
Annotating your chart
In the Annotate tab, you have the option to add text and highlight ranges/lines to your small multiple line chart.
Adding a title and source
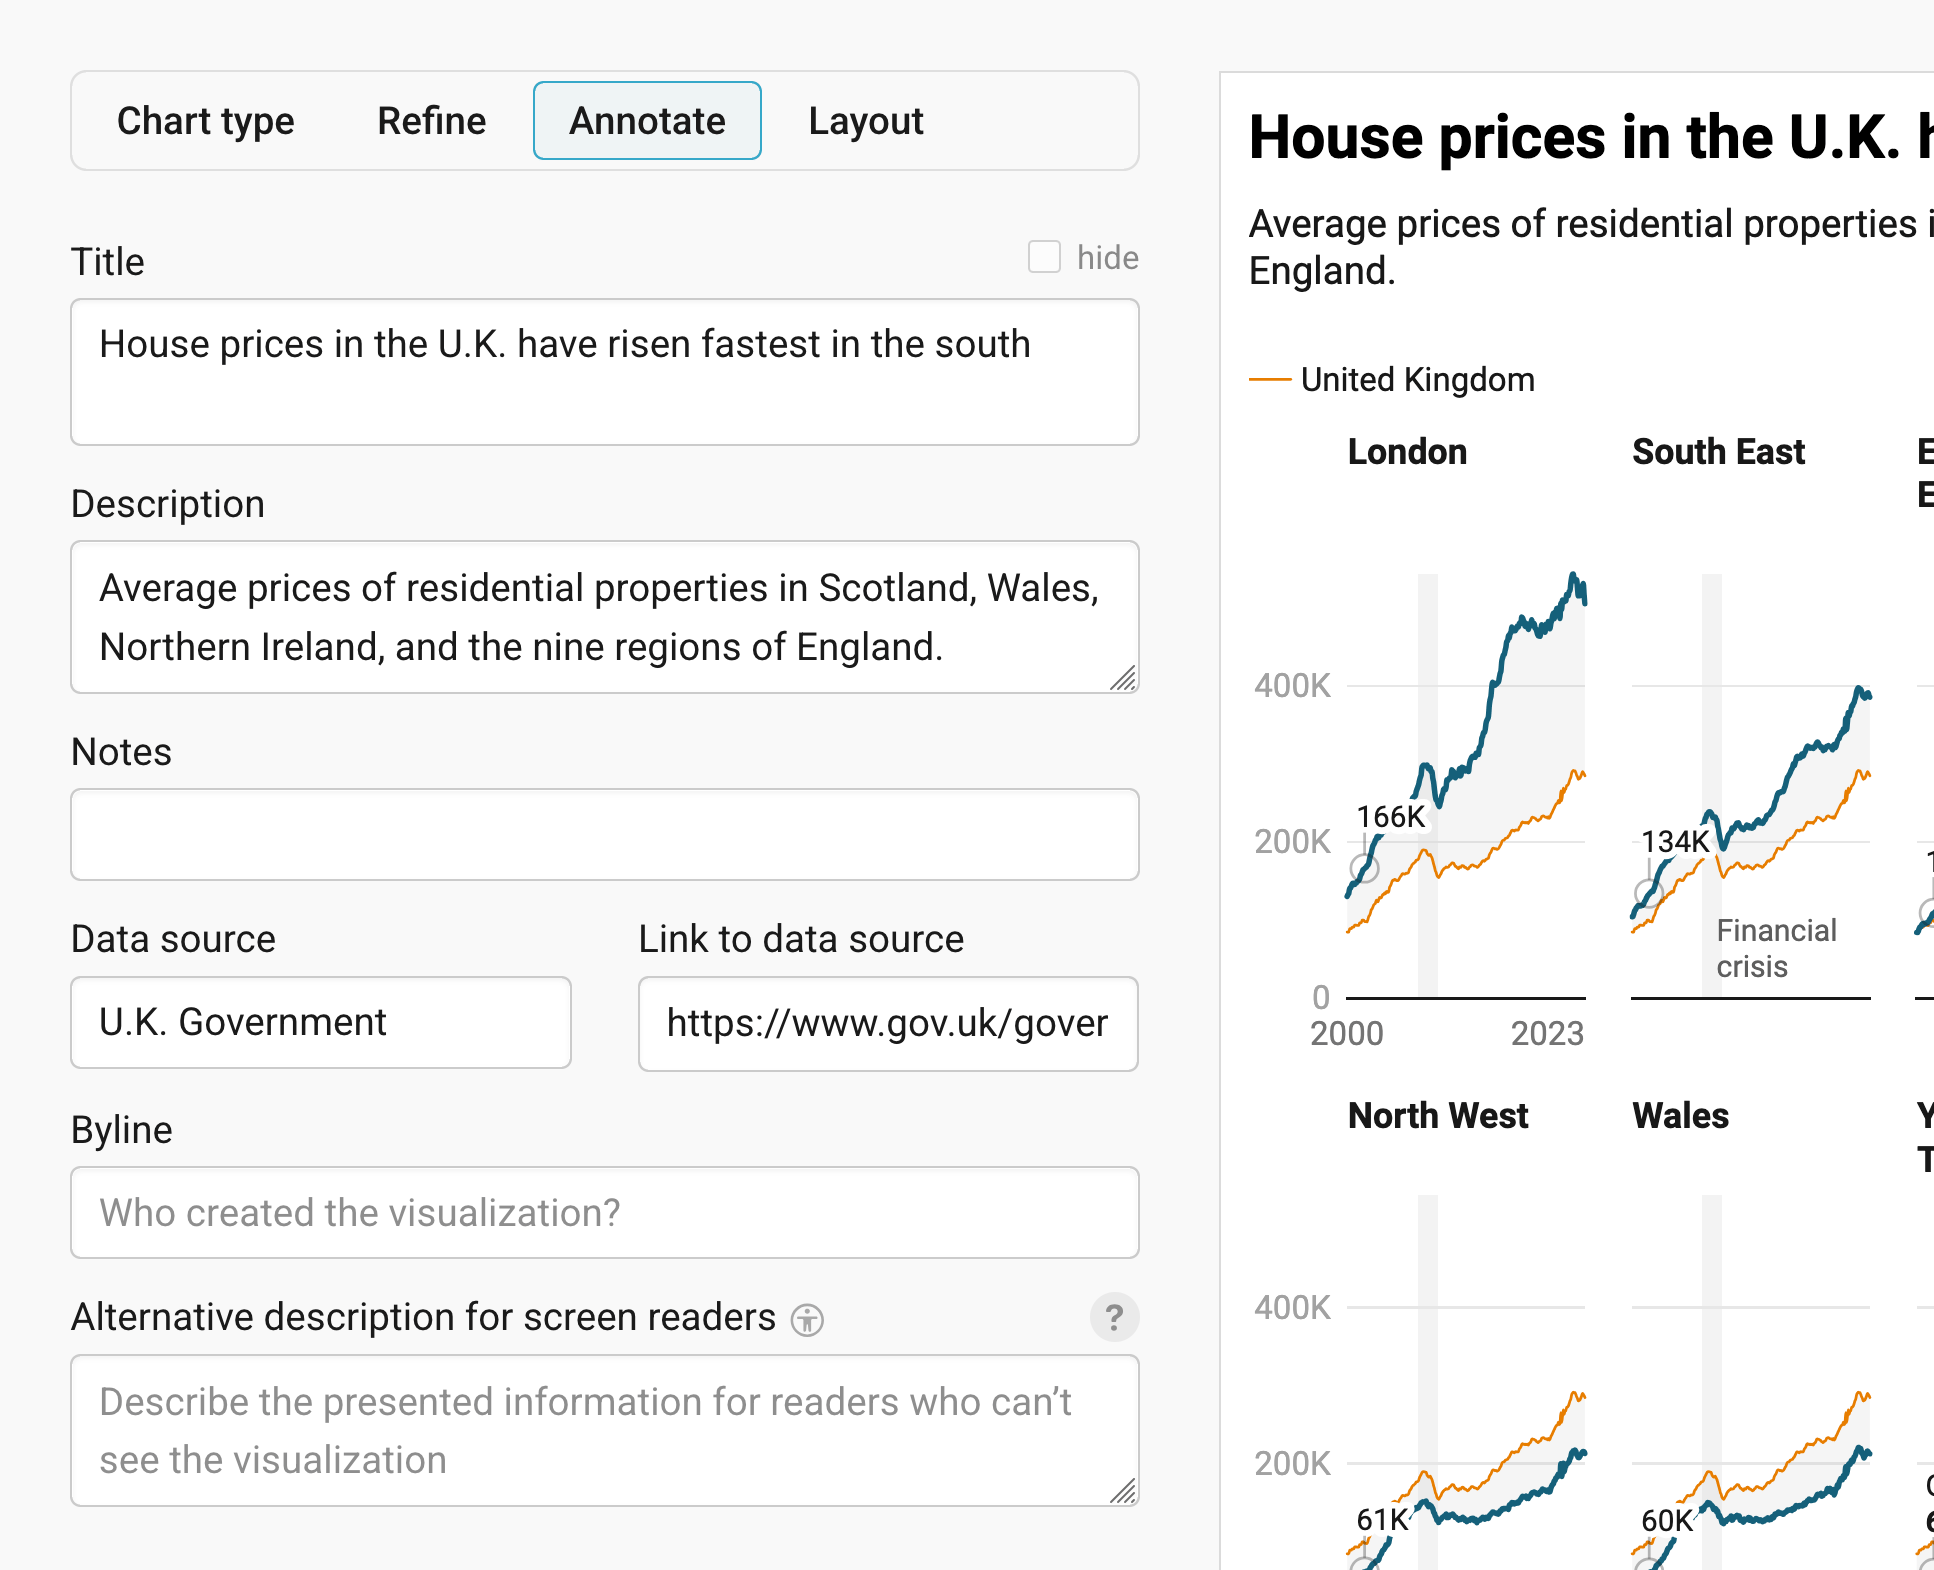
You can learn more about adding a title, description, notes, etc. to your chart in our Docs article Annotating your visualization in the "Annotate" tab.
Adding text annotations
Text annotations are great to give context to your chart or point out certain data points. You'll find that adding annotations works just like in any other Datawrapper chart – here's our Docs article on creating text annotations – with three exceptions:
- You can decide with a dropdown which panel your annotation should be in. (That's great for duplicating annotations!)
- You can drag an annotation from one panel to the next.
- You can decide to repeat an annotation in all panels.
Highlighting ranges
If you want to point out a date or value range/line, click on Add range highlight. You can then drag a range directly in one of your panels, repeat it in all panels, move it around, or change the position in the settings of the highlight. Here's an in-depth explanation of all the options.
Publishing your chart
After adding text to our chart, only one tab is left in step 3: Visualize: the Layout tab. You can find all Layout settings explained in this Docs article.
In step 4: Publish & Embed, you can first publish your chart and then decide how it gets to your readers. We recommend pasting the embed code into your website or CMS, but you can also share the chart's URL. Learn more about both options here. To use your chart somewhere else, download it as a PNG (on any plan) or as an SVG or PDF (on paid plans). See what each plan includes on our pricing page.
And that's it! You've successfully created and customized a small multiple line chart.